Homemade Choco Tacos Recipe

Klondike may have discontinued the Choco Taco, but this post will teach you how to make Choco Tacos at home! Grab a waffle cone maker to make waffle cone taco shells, vanilla ice cream, chocolate fudge, chocolate and peanuts. This DIY copycat Choco Taco recipe will make you the most popular stationary ice cream truck in the neighborhood serving homemade Choco Tacos.
If you're an ice cream fiend like me, here are some of my other favorite frozen treats: chocolate chip cookie dough ice cream, copycat Americone dream ice cream, and no churn salted caramel swirl ice cream.
I have always been the one that chases down the ice cream truck and immediately looks at the menu to make sure they have Choco Tacos. I did it as a child, a teenager, and even now as a growna** adult.
The Choco Taco came out the year before I was born, and I believe that is because it knew I was coming and that I would need them in my life. Obviously. I just love them. I love them so much.
So imagine how I felt when Klondike announced in 2022 that they were discontinuing production of the iconic Choco Taco.
The Choco Taco was, hands down, my favorite treat. If you scroll through my Instagram or TikTok accounts you'll find multiple videos of me eating them because they were my comfort food!
Why You'll Love This Recipe
- You'll have a homemade replacement for our dearly departed Choco Taco (RIP 1983-2022 – it was almost 40 years old!)
- Easy to customize for your personal preferences or allergies (like peanuts)
- You can make as much of the recipe from scratch as you want, or use premade products to speed up the process
Why did the Choco Taco get discontinued?
According to Klondike, the demand for other products forced them to “make a very tough decision” to stop production on the Choco Tacos ice cream treat. Klondike was quoted as saying, “We sometimes must discontinue products, even a beloved item like Choco Taco.”
Some people get upset about celebrity breakups and TV show cancelations. Me? I'm over here sobbing about a chocolate-covered ice cream taco.
Is the Choco Taco coming back?
After the announcement, there was an outpouring of love for the Choco Taco on social media, and Klondike released a statement saying, “We've heard from our fans, and we're hoping to bring this favorite treat back to ice cream trucks in the coming years!”
There's been speculation since that announcement that this is all a PR stunt and they'll be back – but only time will tell. In the meantime, we're going to make our own because my home is not a happy one unless I have a freezer full of Choco Tacos!
Okay, that's an exaggeration. Well… mostly.
Key Ingredients
To make the Choco Taco shells, we're going to make my fan favorite waffle cones – but we're going to shape them into a taco shape!
Waffle Cone Taco Shells
- 5 tablespoons unsalted butter, melted
- 2 egg whites
- ¼ cup heavy cream
- ½ cup granulated sugar
- ¼ teaspoon ground cinnamon
- ¼ teaspoon sea salt
- 1 teaspoon vanilla bean paste
- 1 teaspoon pure almond extract
- ⅔ cup all purpose flour
Filling
- 1 pint vanilla fudge swirl ice cream, softened (let set at room temperature for about 10 minutes)
- 8 ounces chocolate melting wafers (you could swap for milk chocolate, semisweet chocolate, or dark chocolate chips)
- ½ cup peanuts, chopped or crushed
- Chocolate fudge sauce, optional if you can't get your hands on vanilla fudge swirl ice cream and need to construct your own
How to Make Choco Tacos
This recipe as written will make about 12 large tacos, or up to 24 smaller tacos. The photos you see in this post reflect 12 large tacos because… well, I have no chill. When it comes to ice cream my motto is always go big or go home.
Make the waffle cone taco shells
- Melt butter and then set aside to cool.
- Preheat your waffle cone maker.
- Whisk together egg whites and heavy cream until combined. Add sugar, cinnamon, salt, vanilla bean paste and almond extract and whisk until well combined.
- Add melted butter and whisk to combine.
- Add flour and whisk only until just combined and smooth.
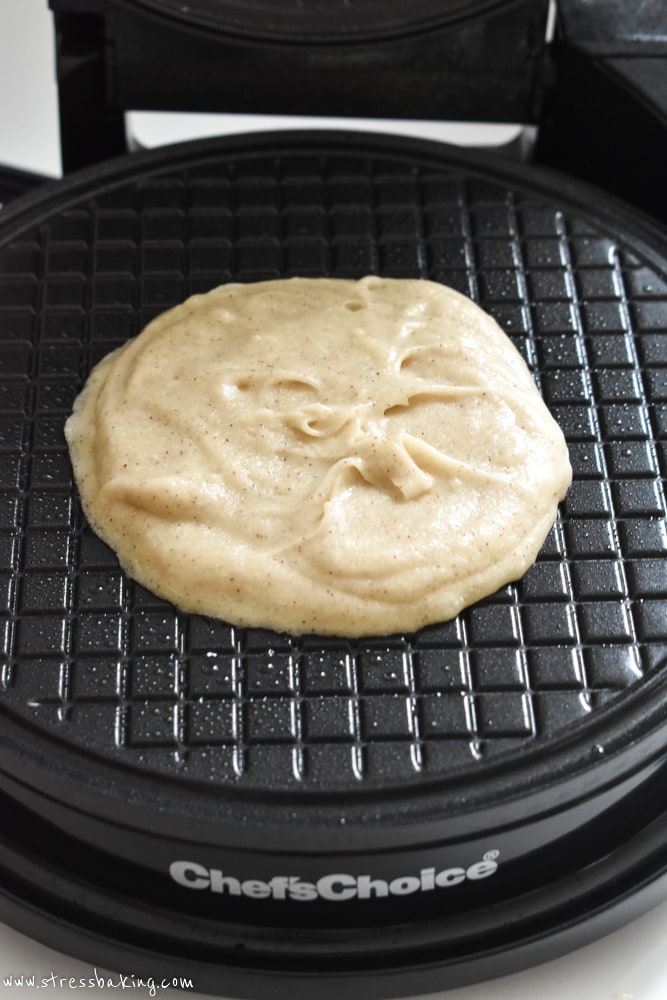
- Spray waffle maker with nonstick spray on both the bottom and top grids.
- Drop 1-2 tablespoons of batter into the center of prepared waffle cone maker (depending on how big you want them to be), and cook according to the manufacturer's instructions.
- Note: For my Chef's Choice Waffle Cone Express, I find best results cooking on the Color Control setting 3, for 2-3 minutes.
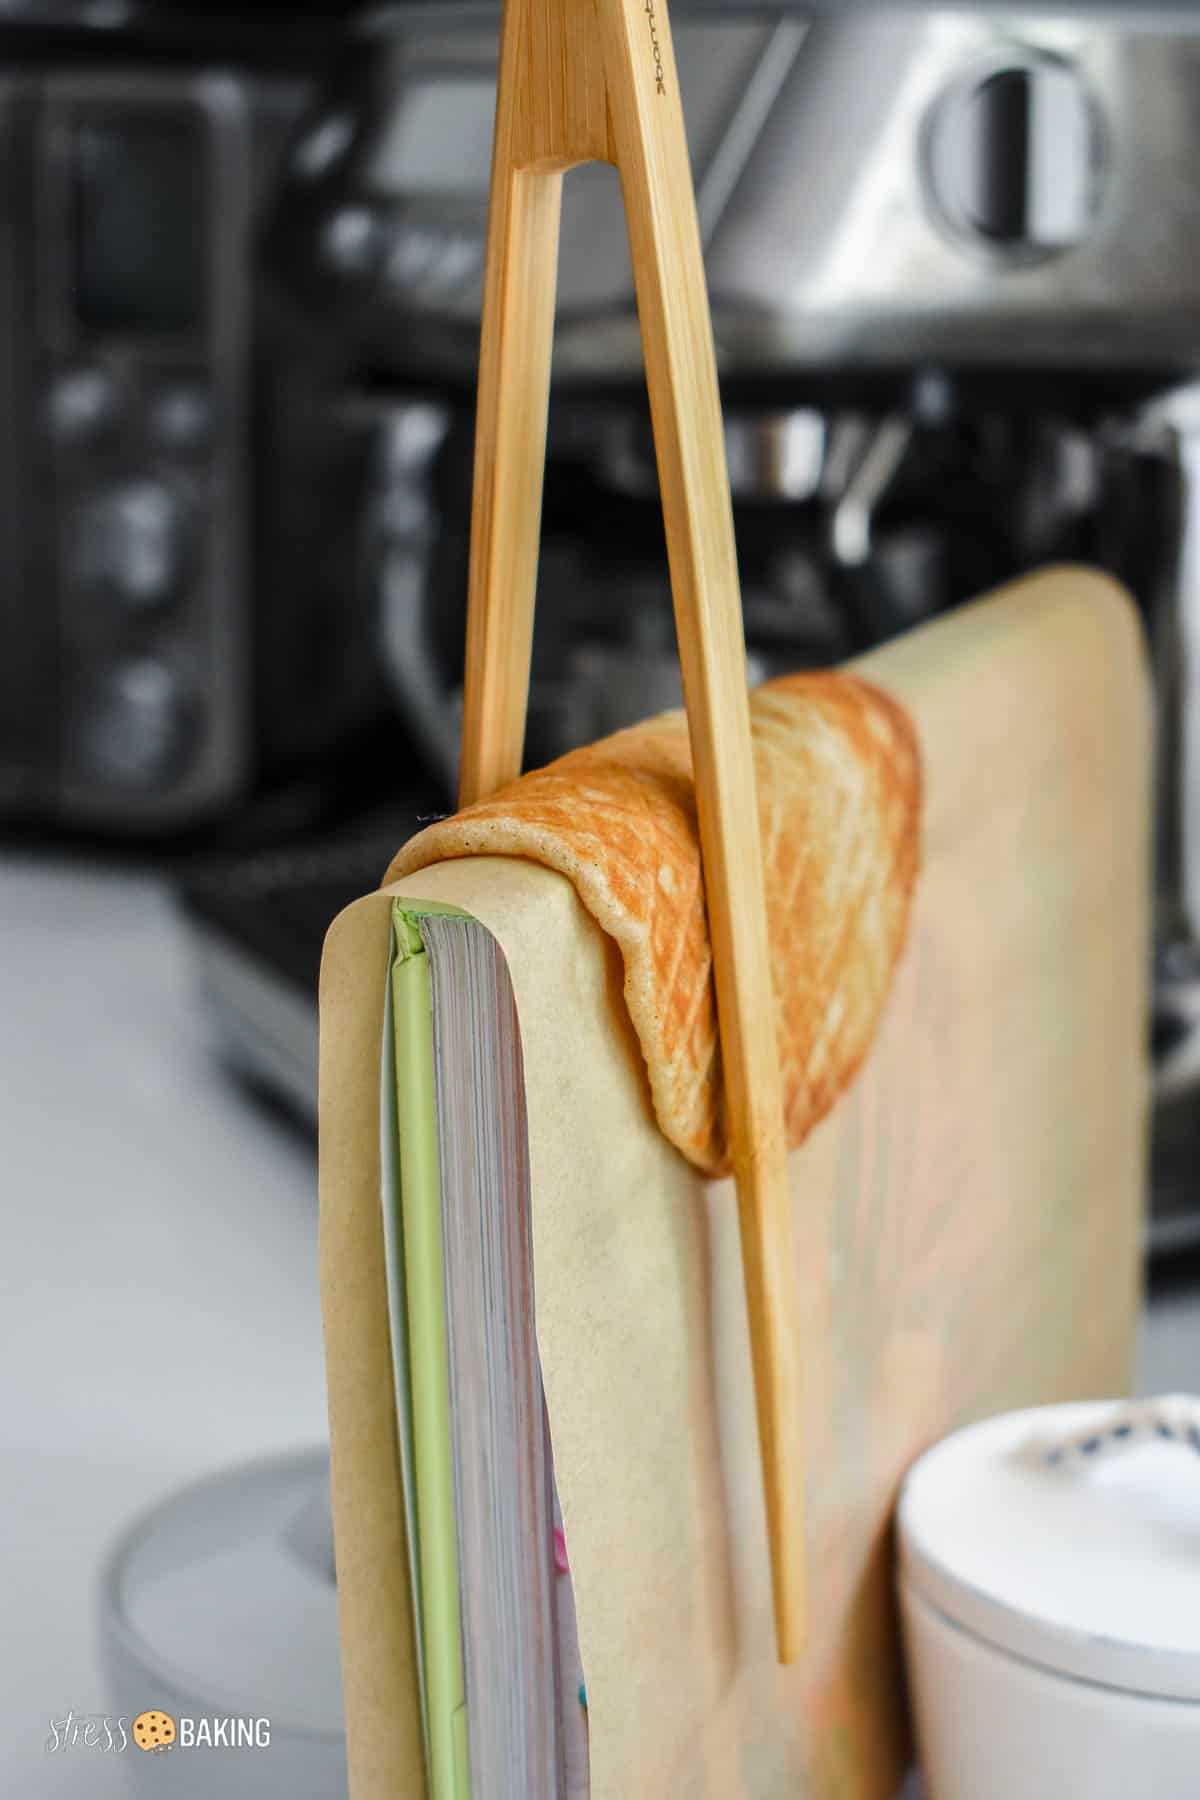
- Place a tea towel or paper towel over the binding of a book, and place the center of your freshly baked waffle cone across that binding to make the shape of a taco. Let it cool in that position.
- Note: I like to use a pair of small tongs to gentle hold the shell in place so the edges lay flat and straight.
Assemble the tacos
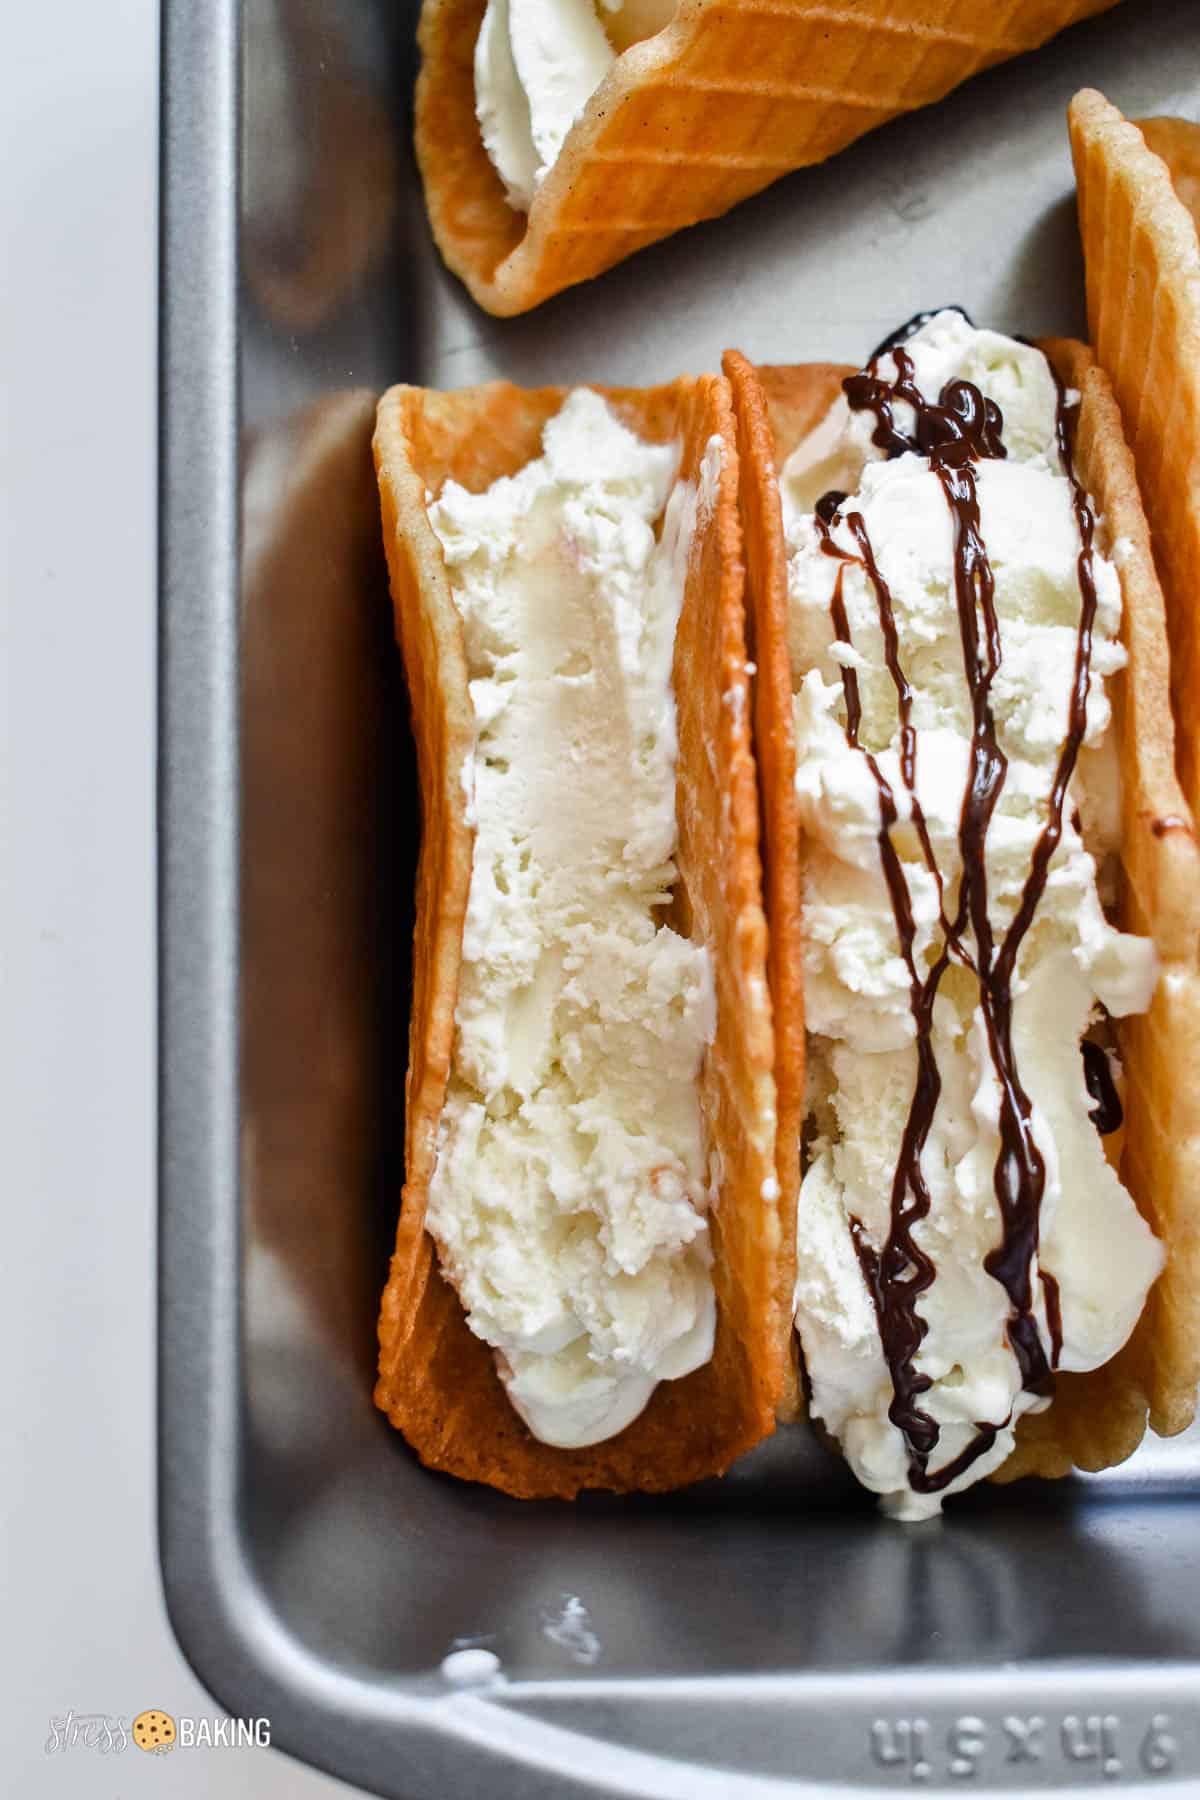
- Prep the workstation: Place your fully cooled taco shells side by side, opening-side facing up, in a loaf pan or similar container that can hold them in an upright position.
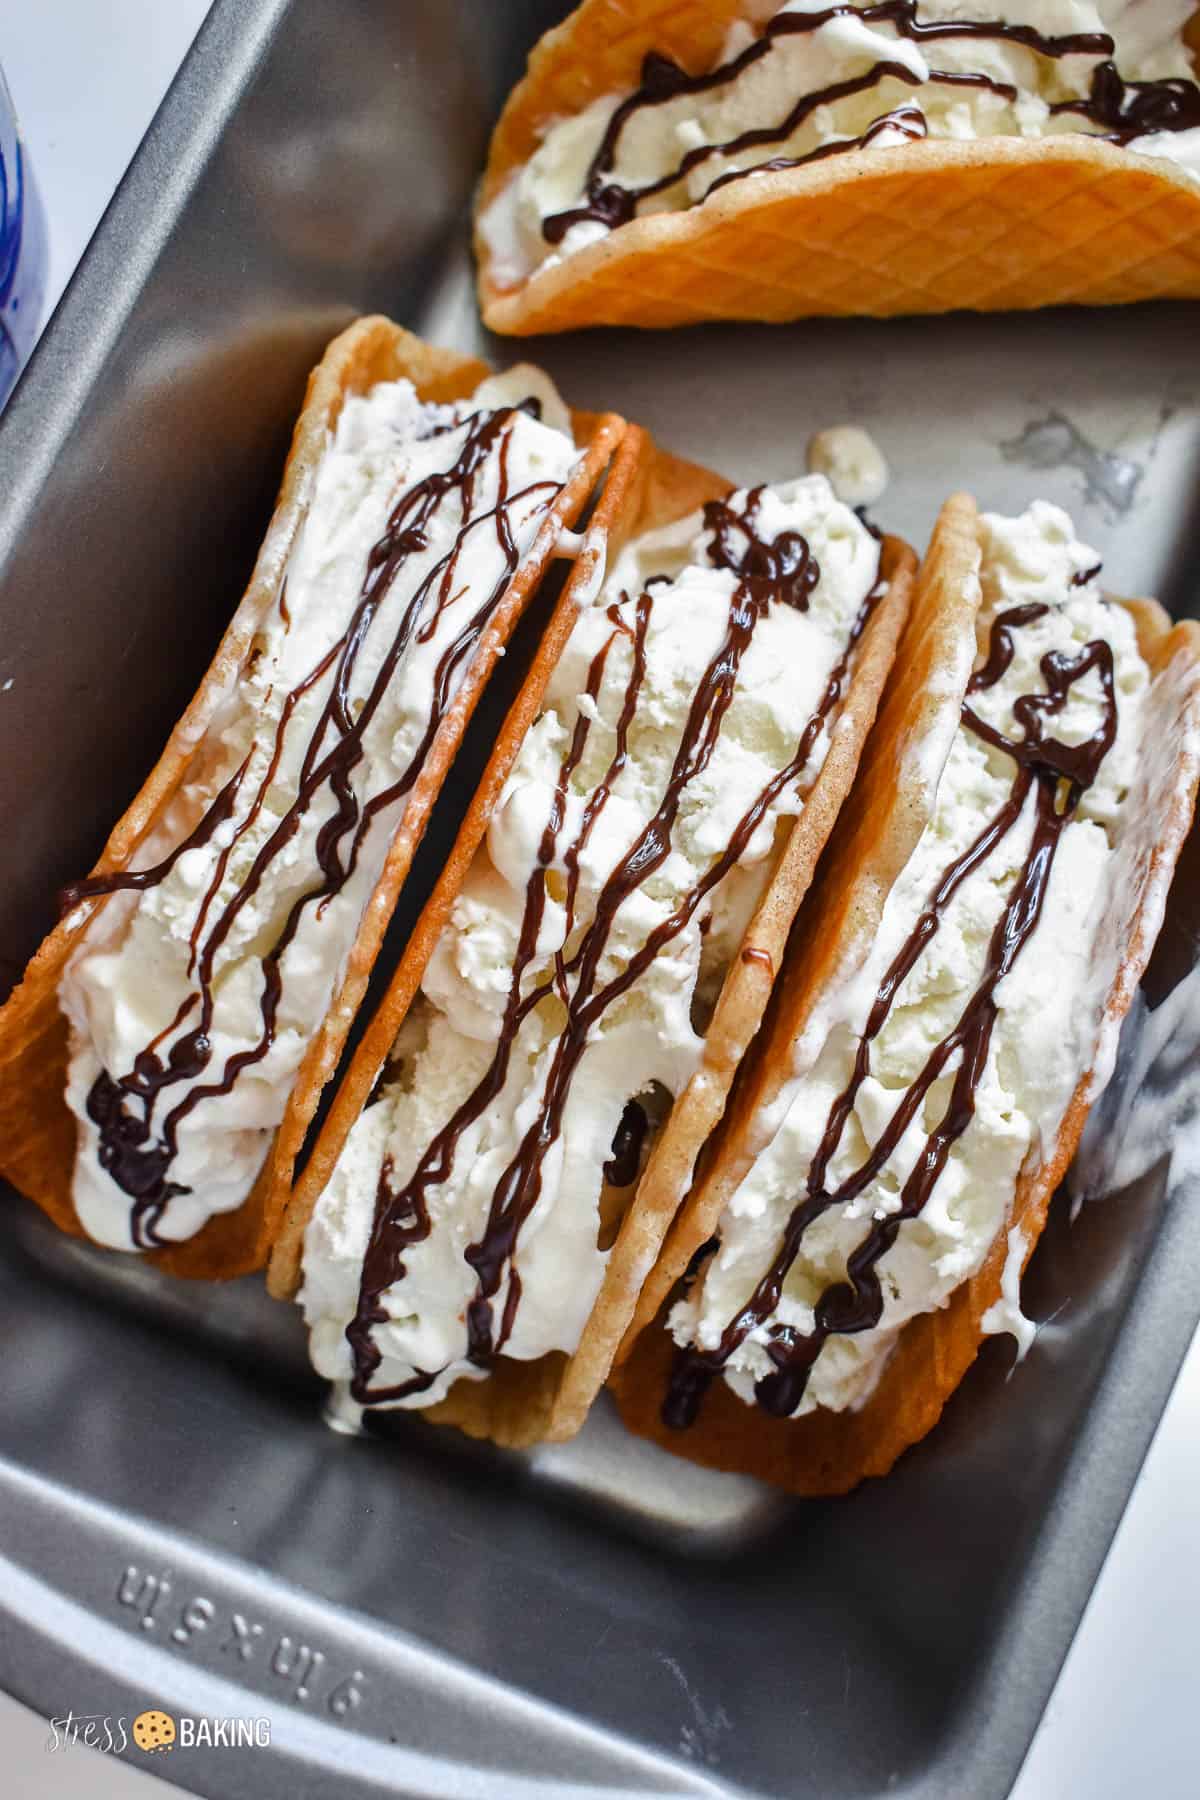
- Scoop and press a layer of ice cream into the bottom of each taco shell. The amount you want to use will depend on the size of the shell you made and your personal preference.
- Note: If you're using plain vanilla ice cream, you'll want to do 3 layers of ice cream with a layer of chocolate fudge sauce in between each ice cream layer.
- Freeze: Place the filled taco shells in the freezer to re-freeze (30-60 minutes).
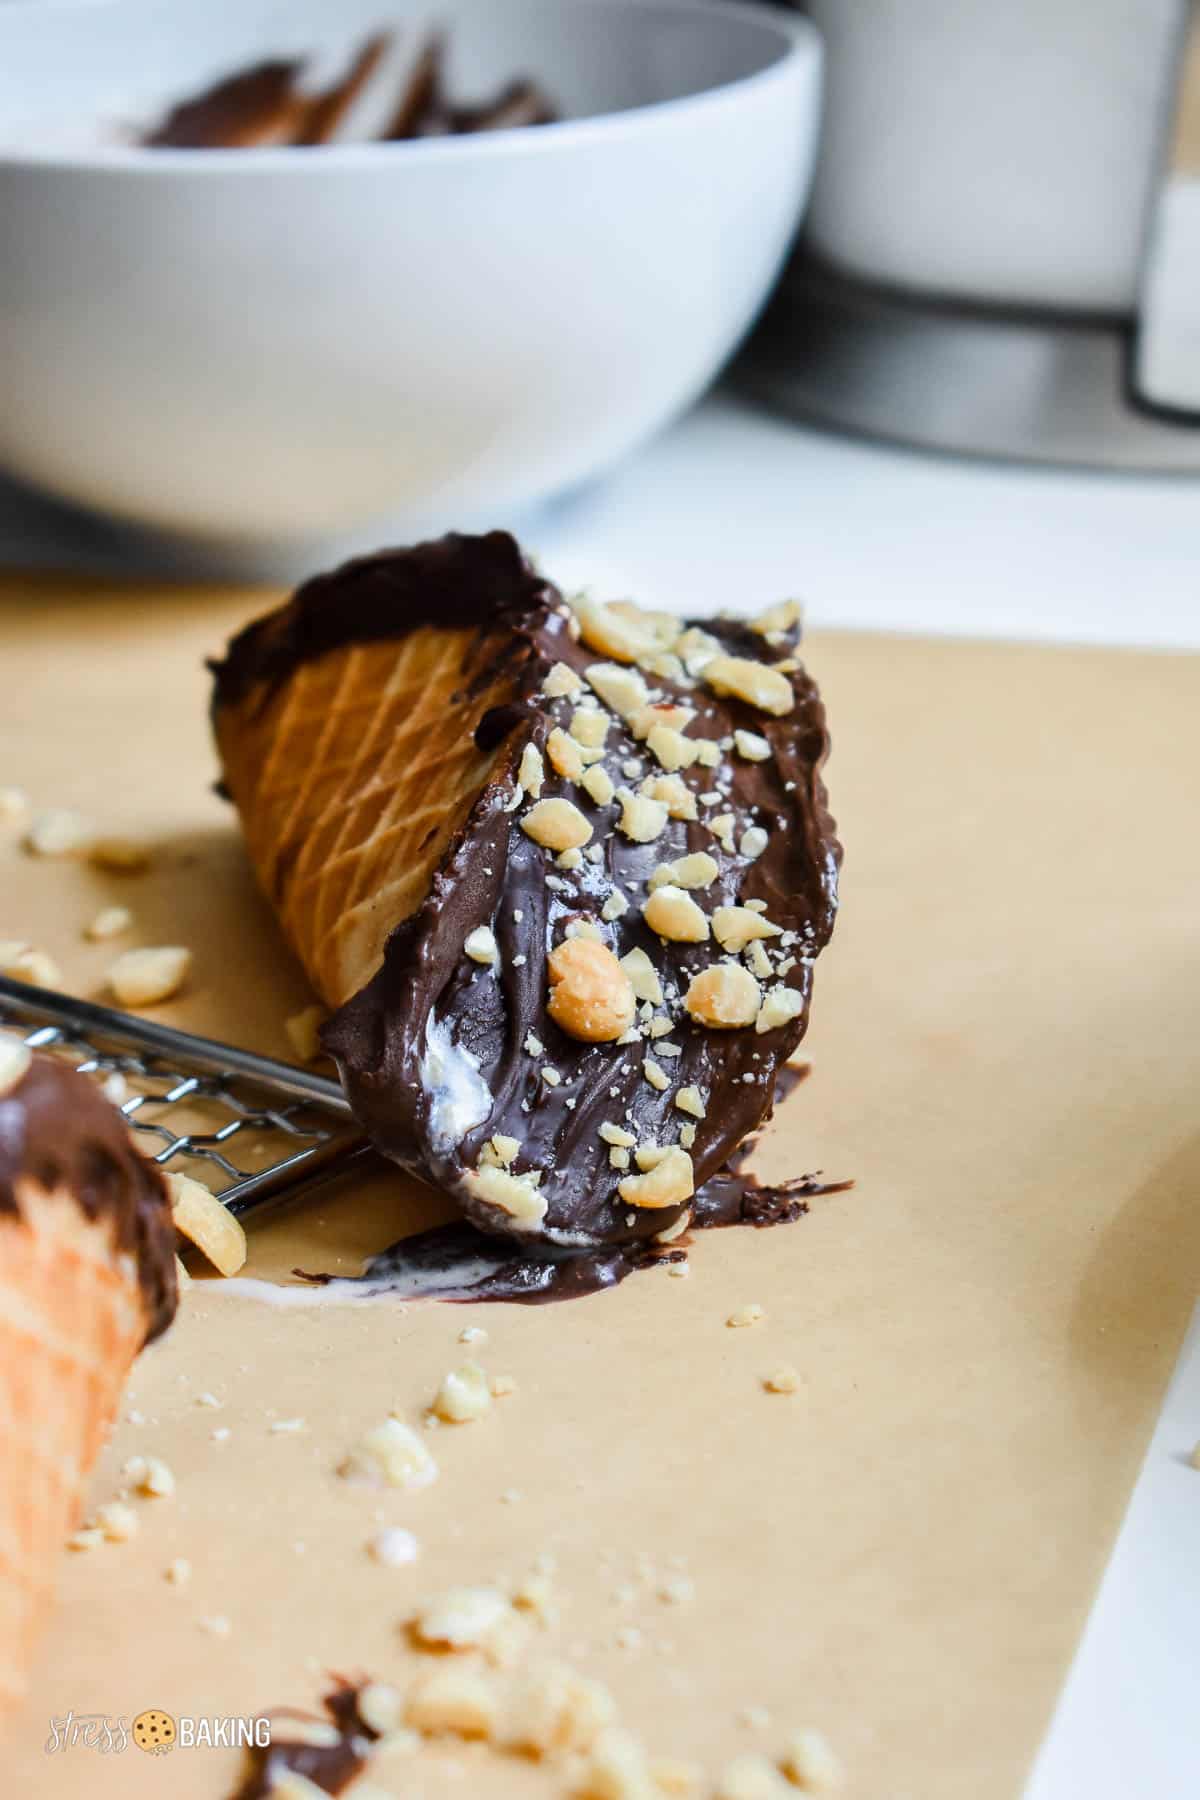
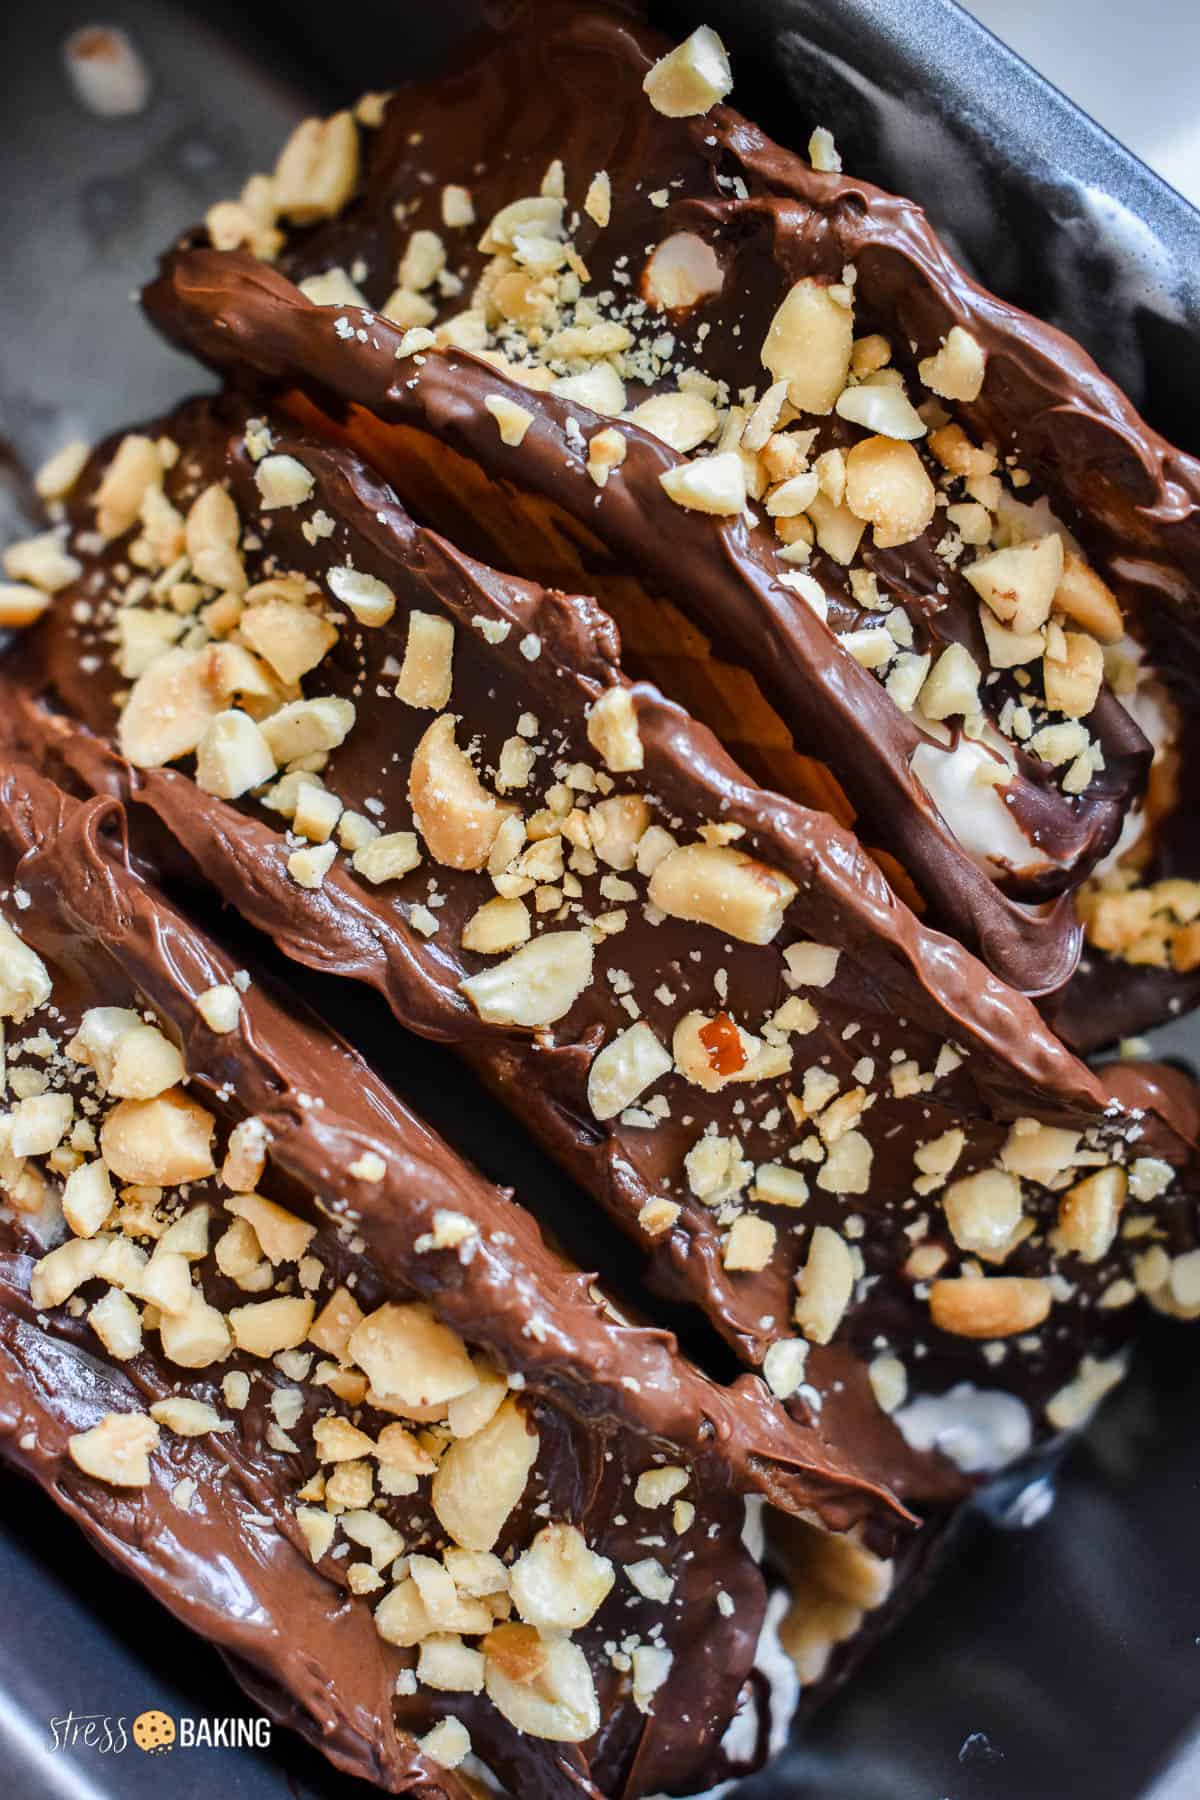
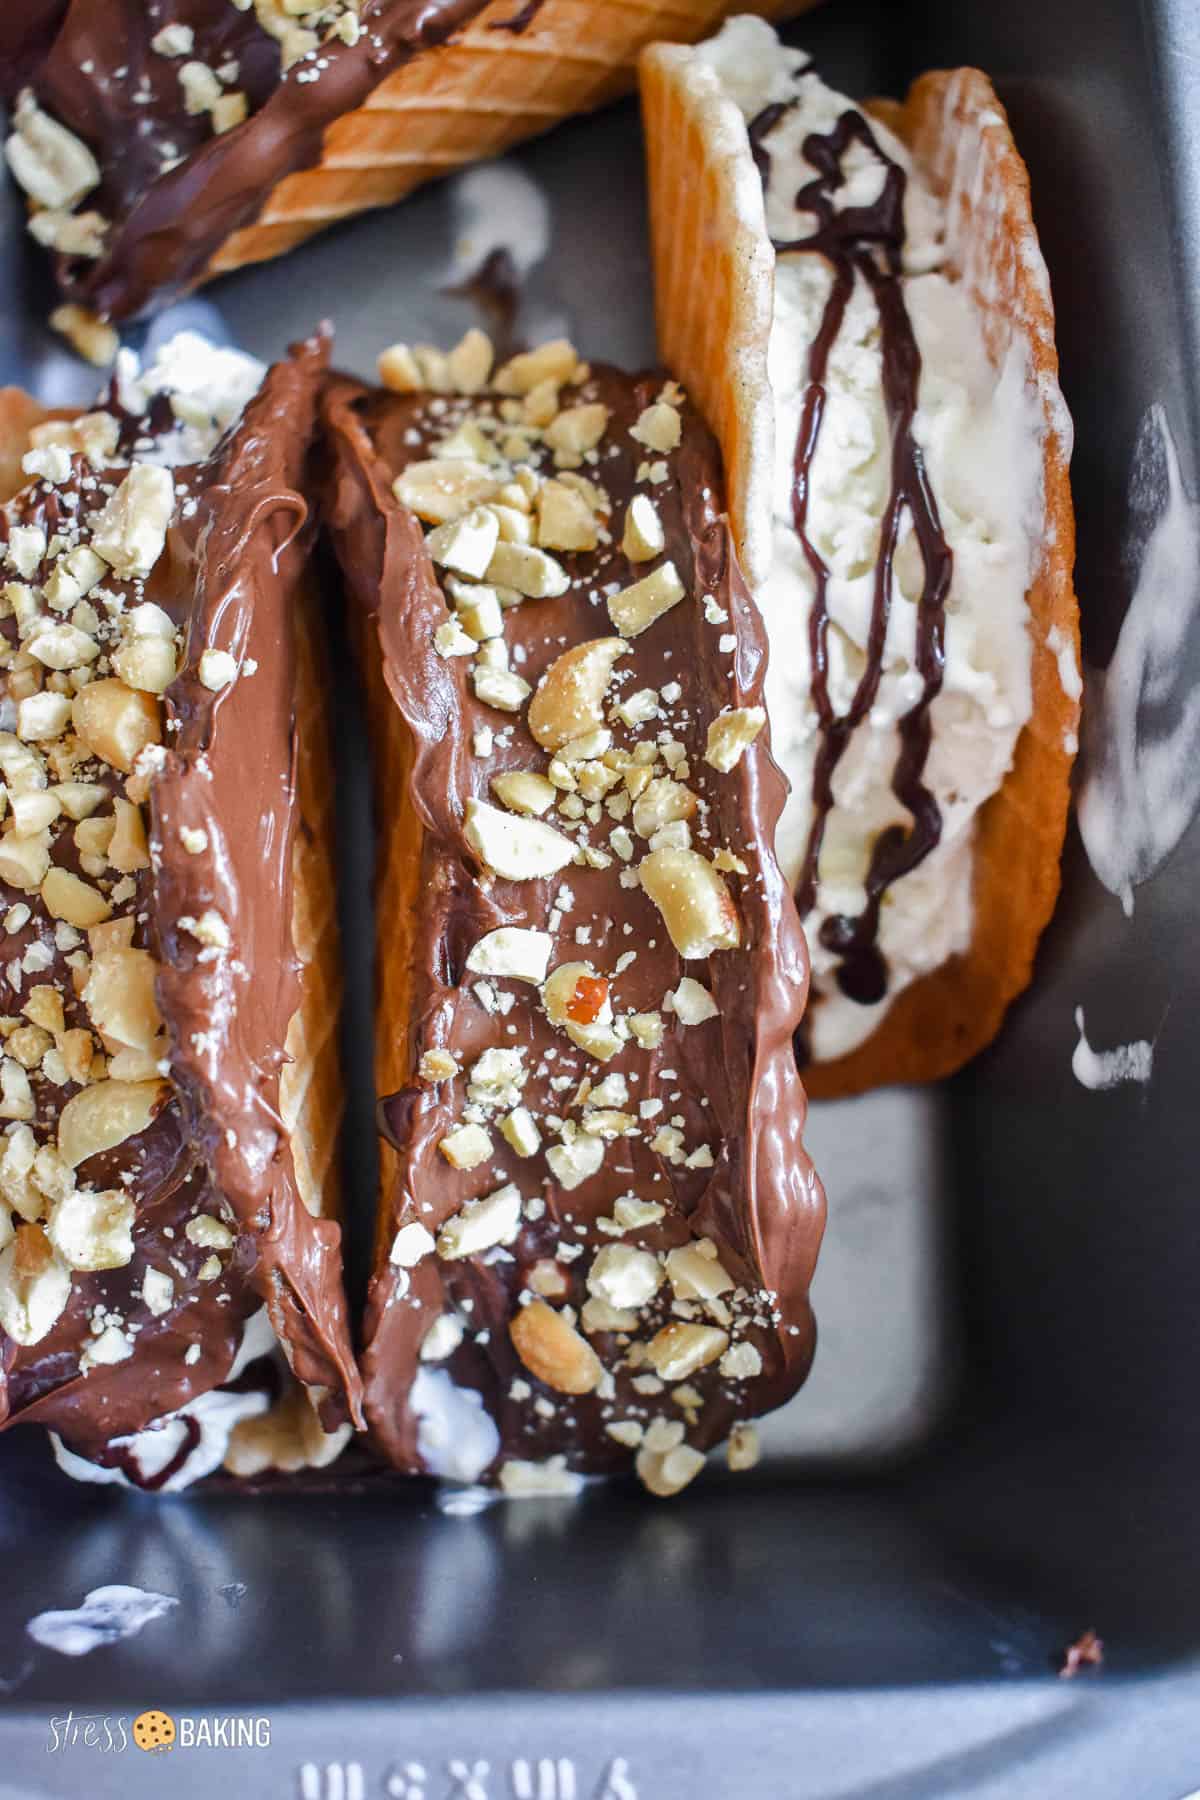
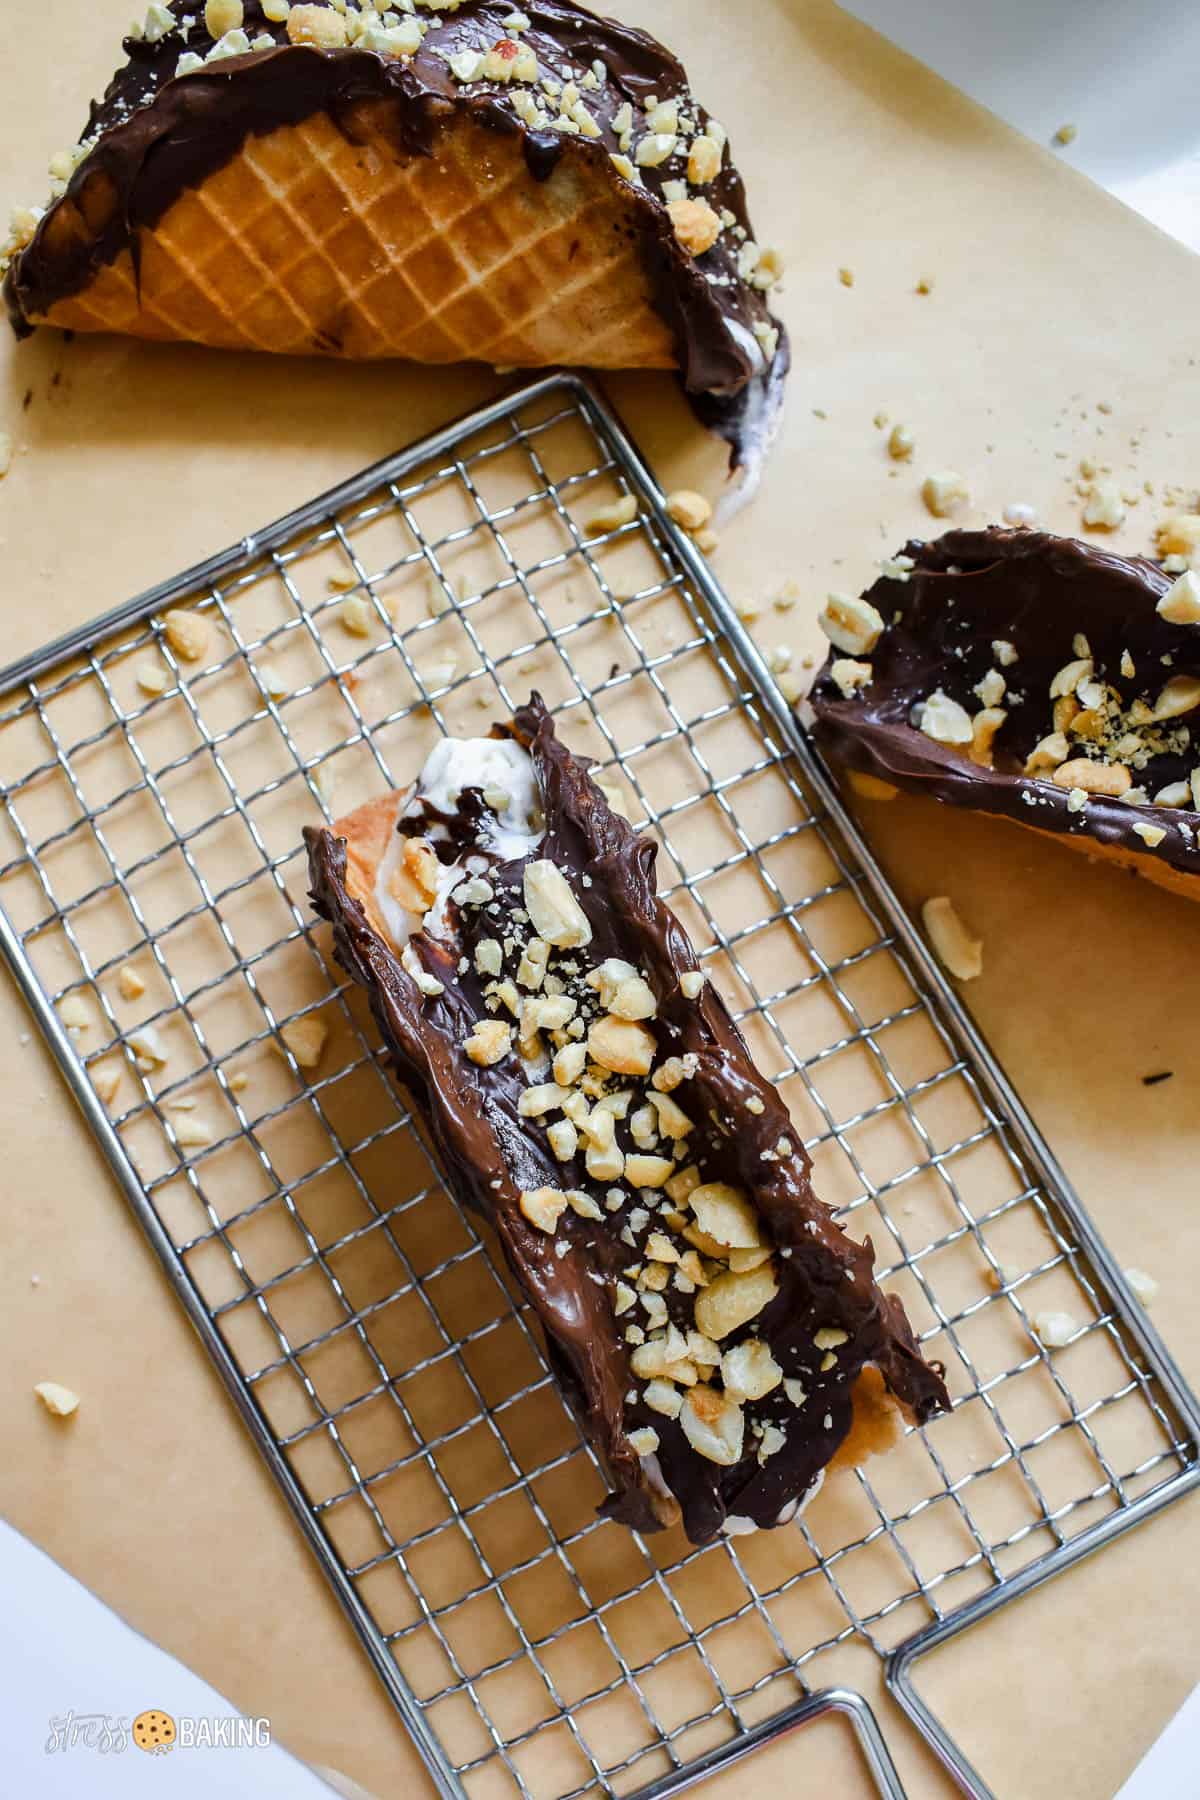
- Melt chocolate wafers according to package directions, and dip the open tops of each taco into the melted chocolate to cover any openings. Sprinkle the tops with crushed peanuts.
- Note: The chocolate will harden quickly, I recommend dipping each taco in chocolate and topping with peanuts before moving on to the next taco.
- Wrap each homemade choco taco in foil and/or plastic wrap and store in airtight containers in the fridge until ready to eat.
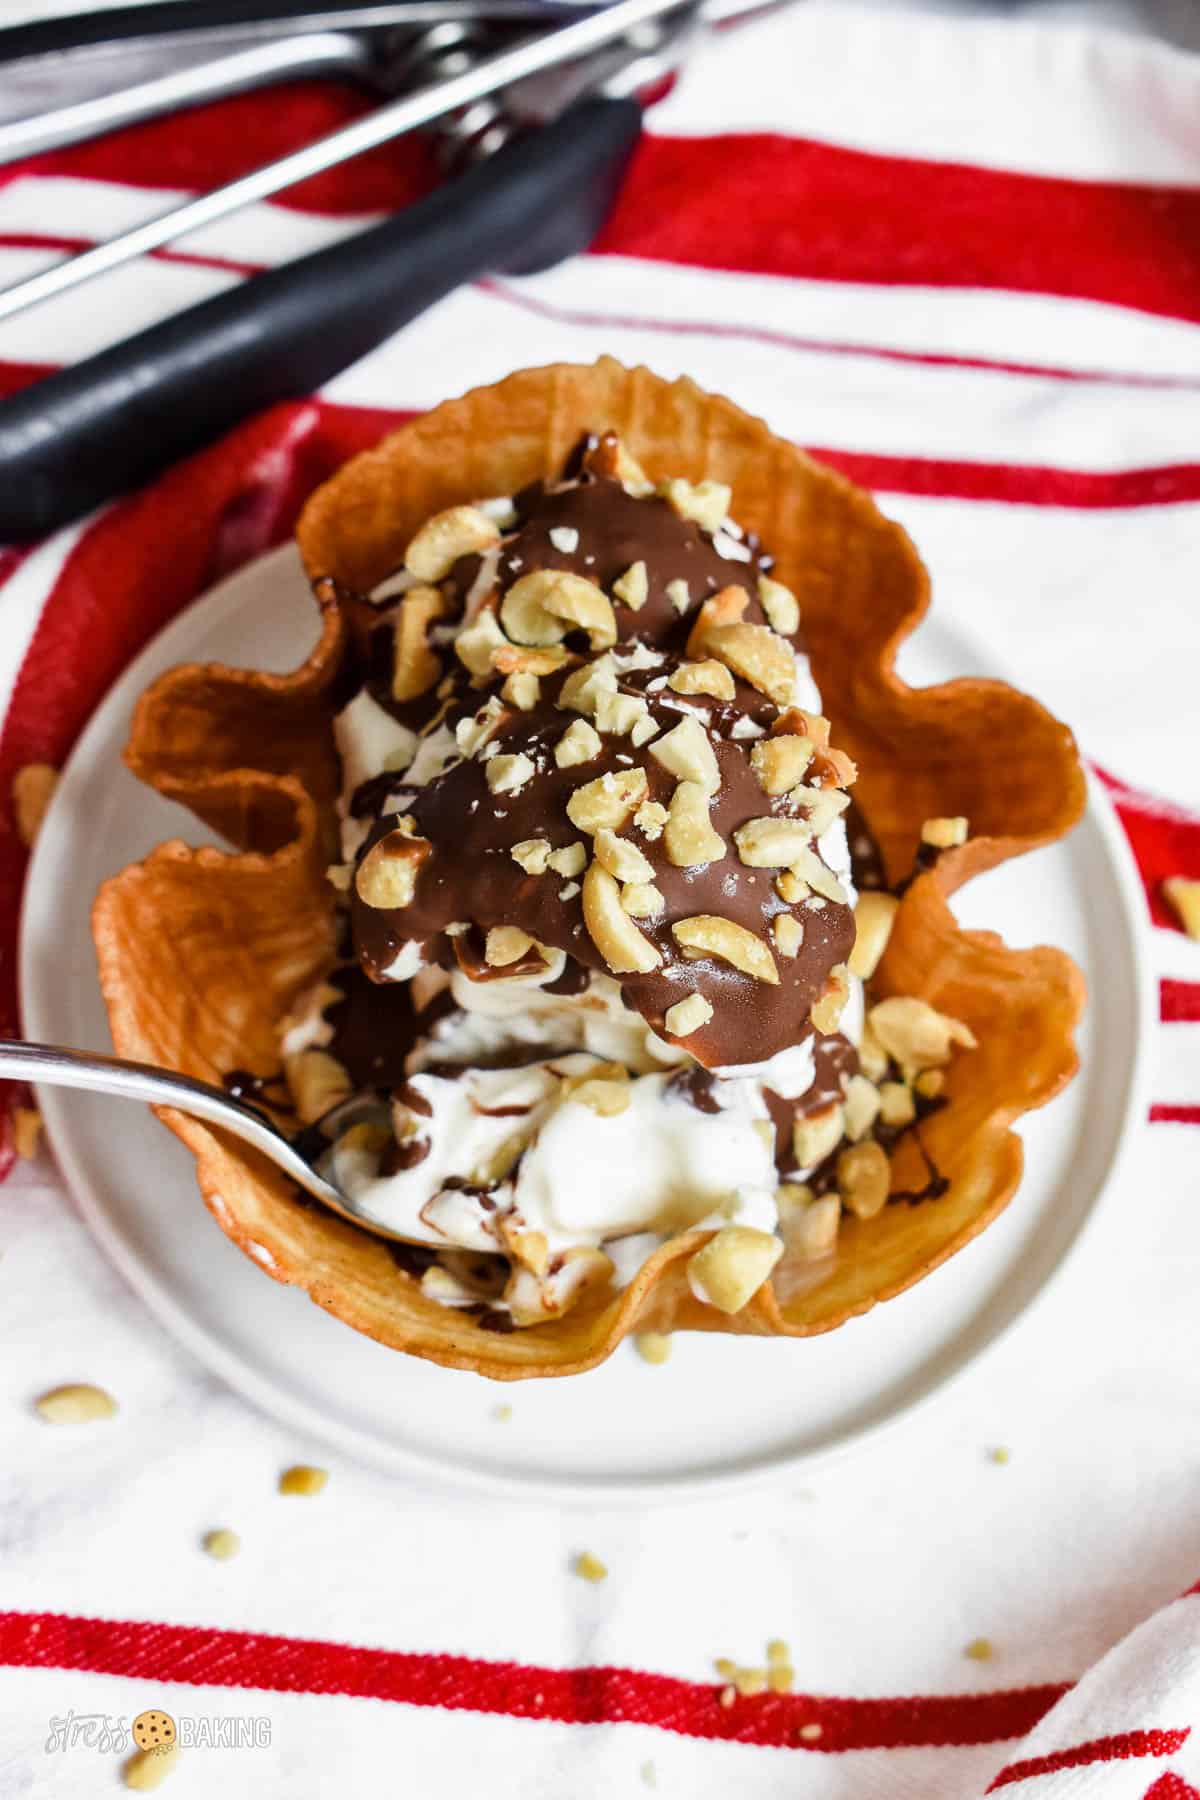
A “deconstructed Choco Taco” shortcut
If you don't have time for the full process of making your own Choco Tacos, consider making a deconstructed Choco Taco! What's that, you ask?
Basically just an ice cream sundae in a waffle bowl – haha!
Go ahead and make your homemade waffle cone bowl, then fill it with vanilla fudge swirl ice cream, and top it with chocolate shell topping and chopped peanuts.
All the Choco Taco flavor, much less work!
FAQs
This recipe as written will make about 12 large tacos, or up to 24 smaller tacos. The photos you see in this post reflect 12 large tacos.
I'm going to be completely honest here – I've never had them last long enough to find out! The longest I've had them before they got eaten up was 2 weeks, but I'm sure they'd last much longer than that if they're sealed up and stored correctly in the freezer.
According to Klondike, the demand for other products forced them to “make a very tough decision” to stop production on the Choco Taco. Klondike was quoted as saying, “We sometimes must discontinue products, even a beloved item like Choco Taco.”
After the announcement, there was an outpouring of love for the Choco Taco on social media, and Klondike released a statement saying, “We've heard from our fans, and we're hoping to bring this favorite treat back to ice cream trucks in the coming years!” There's been speculation since that announcement that this is all a PR stunt and they'll be back – but only time will tell.
Rating this recipe is a great (and free) way to support Stress Baking. After you've enjoyed this recipe, click on the stars below to share your experience – thank you!
Homemade Choco Tacos Recipe

Equipment
Ingredients
Waffle Cone Taco Shells
- 5 tablespoons unsalted butter, melted
- 2 egg whites
- ¼ cup heavy cream
- ½ cup granulated sugar
- ¼ teaspoon ground cinnamon
- ¼ teaspoon sea salt
- 1 teaspoon vanilla bean paste
- 1 teaspoon pure almond extract
- ⅔ cup all purpose flour
Filling
- 1 pint vanilla fudge swirl ice cream, softened (let set at room temperature for about 10 minutes)
- chocolate fudge sauce, optional (if using plain vanilla ice cream)
- 8 ounces chocolate melting wafers
- ½ cup peanuts, chopped or crushed
Instructions
Make the waffle cone taco shells
- In a small saucepan over low heat, melt butter and then set aside to cool.5 tablespoons unsalted butter
- Turn on your waffle cone maker to let it preheat.
- In a medium bowl, whisk together egg whites and heavy cream until combined.2 egg whites¼ cup heavy cream
- Add sugar, cinnamon, salt, vanilla bean paste and almond extract and whisk until well combined.½ cup granulated sugar¼ teaspoon ground cinnamon¼ teaspoon sea salt1 teaspoon vanilla bean paste1 teaspoon pure almond extract
- Add melted butter and whisk to combine.
- Add flour and whisk only until just combined and smooth.⅔ cup all purpose flour
- Spray waffle maker with nonstick spray on both the bottom and top grids.
- Drop 1-2 tablespoons of batter into the center of prepared waffle cone maker (depending on how big you want them to be), and cook according to the manufacturer's instructions.Note: For my Chef's Choice Waffle Cone Express, I find best results cooking on the Color Control setting 3, for 2-3 minutes.
- When it’s done baking, you can place a tea towel or paper towel over the binding of a book, and place the center of your freshly baked waffle cone across that binding to make the shape of a taco. Let it cool in that position.Note: I like to use a pair of small tongs to gentle hold the shell in place so the edges lay flat and straight.
Assemble the tacos
- Place your fully cooled taco shells side by side, opening-side facing up, in a loaf pan or similar container that can hold them in an upright position.
- Scoop and press a layer of ice cream into the bottom of each taco shell. The amount you want to use will depend on the size of the shell you made and your personal preference.1 pint vanilla fudge swirl ice cream
- Note: If you're using plain vanilla ice cream, you'll want to do 3 layers of ice cream with a layer of chocolate fudge sauce in between each ice cream layer.chocolate fudge sauce
- Place the filled taco shells in the freezer to re-freeze (30-60 minutes).
- Melt chocolate wafers according to package directions, and dip the open tops of each taco into the melted chocolate to cover any openings. Sprinkle the tops with crushed peanuts. Note: The chocolate will harden quickly, I recommend dipping each taco in chocolate and topping with peanuts before moving on to the next taco.8 ounces chocolate melting wafers1/2 cup peanuts
- Wrap each homemade choco taco in foil and/or plastic wrap and store in airtight containers in the fridge until ready to eat. Enjoy!
Video
Notes
Nutrition Facts
Nutrition Disclaimer
The provided nutrition information is generated by an automatic API and does not take variations across specific brands into account. This information is provided as a general guideline and should not be treated as official calculations. Learn more here.