Easy Cheesy Garlic Bread
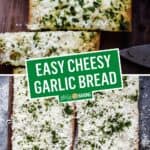
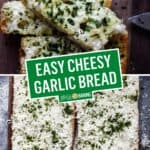
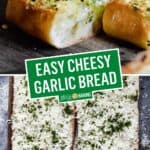

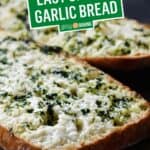
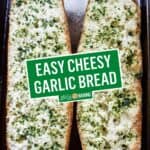
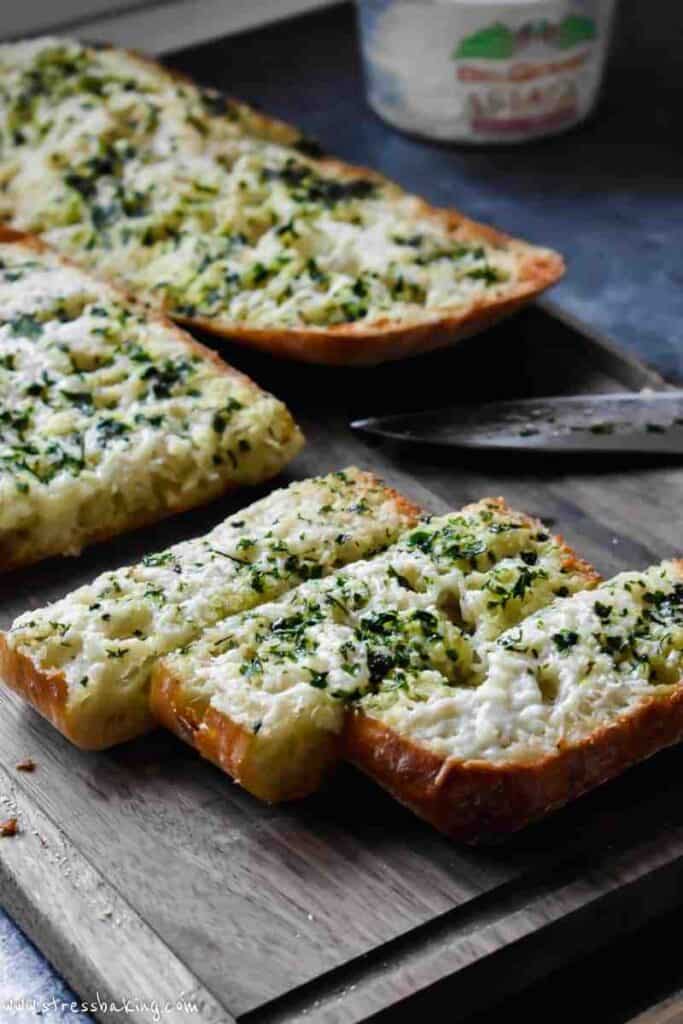
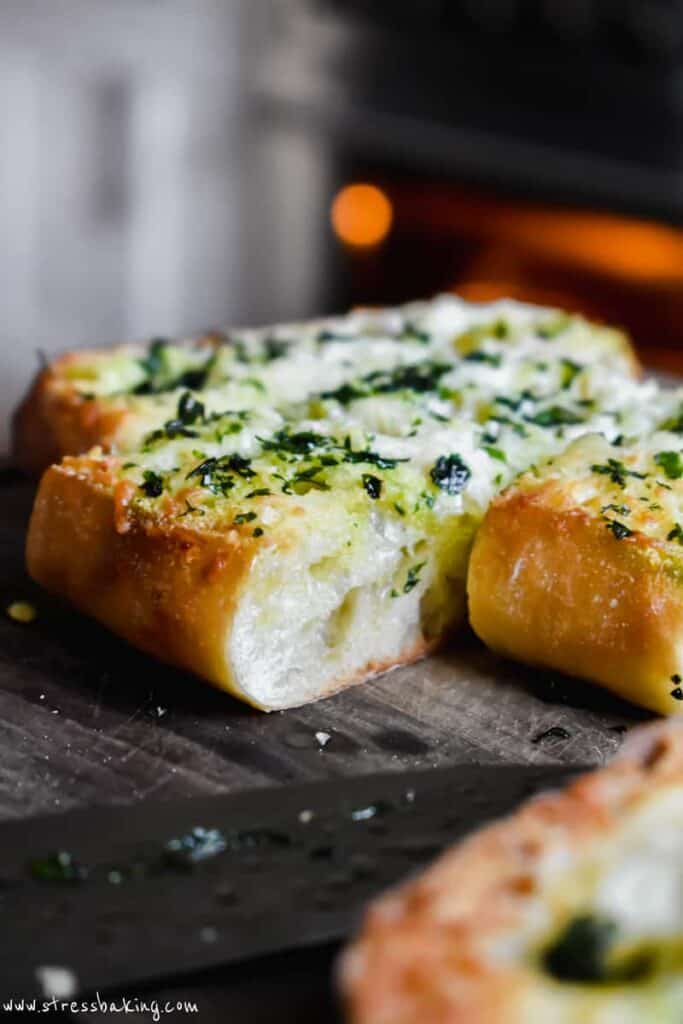
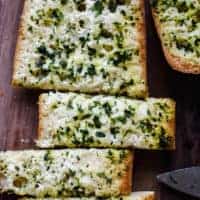
This cheesy garlic bread is crisp on the outside, soft on the inside, full of garlic and butter flavors, and ready in 20 minutes! This recipe uses ciabatta bread and an Asiago and Parmesan cheese mixture for an addictive side dish to your favorite dinners.
Elly said: “Made this the other night! It was so delicious. I did not have asiago cheese so I used a little bit of mozzarella and cheddar. It turned out wonderful. The garlic flavor was amazing! And it was so cheesy. Thanks for the recipe!⭐⭐⭐⭐⭐“
I have quite a few comfort foods, which is why I've made an entire category on this blog dedicated to it. At the top of my list at any given time is basically anything that involves cheese. Carbs and cheese.
You know – mozzarella sticks, soft pretzels and beer cheese, pizza, baked mac and cheese, ham and cheese strata, cheddar bay biscuits… you get the idea. And now I'm adding homemade cheesy garlic bread to that list.
What kind of cheese should I use for this garlic bread recipe?
I love the combination of Asiago and Parmesan, but really what it comes down to is that you want good melting cheese.
Some other good cheese choices are the typical choice of mozzarella, a finely shredded cheddar, provolone or muenster.
But as is always the case, freshly shredded or grated always melt better and more smoothly than the pre-packaged kinds. They'll work in a pinch, but fresh is better!
What kind of bread should I use for garlic bread?
You can use whatever you'd like, but you'll want to make sure it's a sturdy loaf of bread.
My personal favorite is ciabatta, which isn't the typical choice. Most people lean toward a French bread or Italian loaf, or you can pick up a baguette from a local shop which will work for this recipe as well.
How to make garlic butter
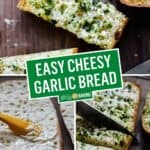
It's super simple – in a small bowl, you're going to stir together very soft unsalted butter, minced garlic and some black pepper. No, really, that's it! A couple things to ensure the best results:
- Use very soft butter, but not melted. If it's melted, it's going to seep into all the little crevices and not sit on the surface which won't give the same texture we're looking for on this bread.
- Don't substitute the minced garlic. You need to use fresh garlic that you've peeled and minced, as garlic powder just isn't going to provide the same consistency you want for the butter spread.
Tips for making the best homemade garlic bread
I wouldn't say that I'm picky about cheesy garlic bread, but I do have some opinions on the type of bread and cheeses I like the best.
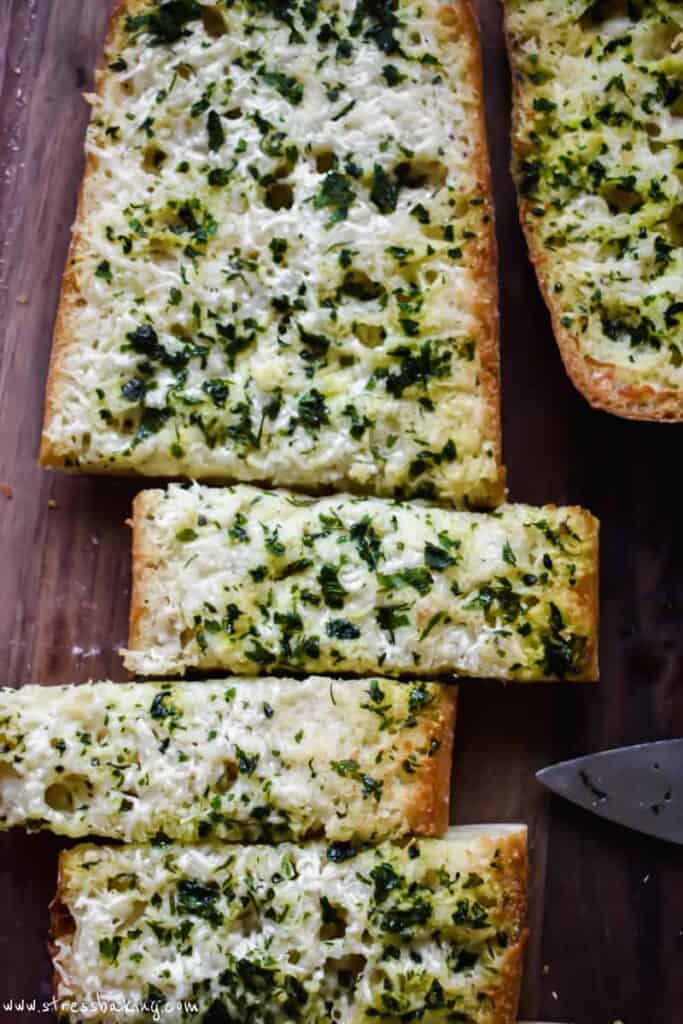
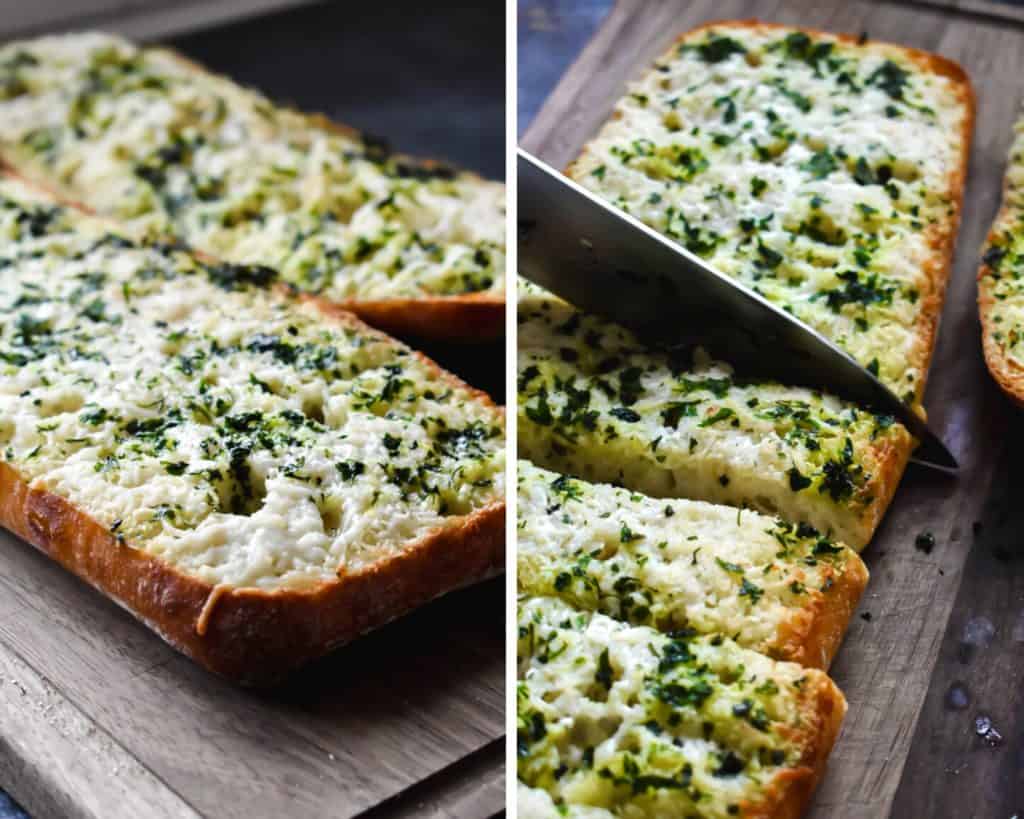
- Spread your garlic butter mixture on thick, and from edge to edge. Cover every square inch of the cut side of your bread with it!
- Want more cheese? Add more cheese! I've outlined a moderate amount in the recipe below, but I've been known to add 50% more when the cheese craving hits hard.
- You'll need flat leaf parsley. When you're checking out your choices at the store, make sure you grab flat-leaf parsley and not curly-leaf parsley. In my opinion, flat-leaf parsley has a more pleasant flavor – I find curly to be a tad bitter.
How to store garlic bread
Don't refrigerate garlic bread, as it will dry it out and it will actually go stale more quickly that way.
It's best stored at room temperature in an airtight bag or container after it's cooled to room temperature. It will only last a couple days at room temperature.
If you want store it for a longer period of time, I'd recommend freezing it. Let it cool to room temperature, then wrap in a layer of plastic wrap followed by a layer of foil. Then place the bread in a freezer-safe bag and squeeze out all the excess air. Can be stored in the freezer for up to 3 months.
How to reheat garlic bread
To reheat garlic bread in the oven, wrap the bread in foil and place on a baking sheet on the middle rack (it can be sliced or still whole). Bake at 350°F for 10-15 minutes, or until warmed through.
If you want to broil the cheese a bit, uncover the top out of the foil and place on the top rack and set to broil for a couple minutes. Keep a close eye on it so it doesn't burn!
I don't recommend reheating it in the microwave as it will end up with an odd soft texture, and becomes hard at room temperature really quickly.
Garlic bread variations
You can't go wrong with the tried and true original, but if you wanted to mix it up…
- Add some thinly sliced tomatoes and sprinkle some chopped basil on top
- You could even turn them into garlic bread pizzas! Add a thin layer of marinara sauce before you top it with the cheese, and add your favorite pizza toppings.
- Swap the minced garlic for a roasted garlic spread for a more robust garlic flavor.
What to serve with garlic bread
Here's the thing about garlic bread: I believe it goes with basically anything.
I'd just eat a loaf on its own as my dinner if it were socially acceptable. Okay, fine, I've done that before and I'm not even sorry.
But here are some dinners that pair well with your hot, cheesy, crispy homemade garlic bread:
- Sheet Pan Sausage and Peppers Dinner
- Pastas: Quick and Easy Pantry Pasta, Summer Vegetable Spaghetti, Ground Turkey Stuffed Shells, Veggie Lasagna Rollups, Ramen “Spaghetti” Bake
- Soups: Instant Pot Carrot Ginger Soup, Instant Pot Butternut Squash Soup, Easy Instant Pot Corn Chowder
Leaving a star rating is a great (and free) way to support Stress Baking! ❤️ After you've made this recipe, please consider clicking on the stars below to share your experience!
Easy Cheesy Garlic Bread
Equipment
Ingredients
- 1 loaf ciabatta bread
- ½ cup unsalted butter, very soft
- 3 cloves garlic, minced
- ⅛ tsp ground black pepper
- 4 ounces asiago cheese, shredded
- ½ cup parmesan cheese, grated
- 2 tbsp flat leaf parsley, roughly chopped
Instructions
- Preheat oven to 375°F.
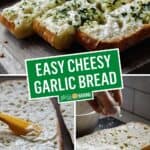
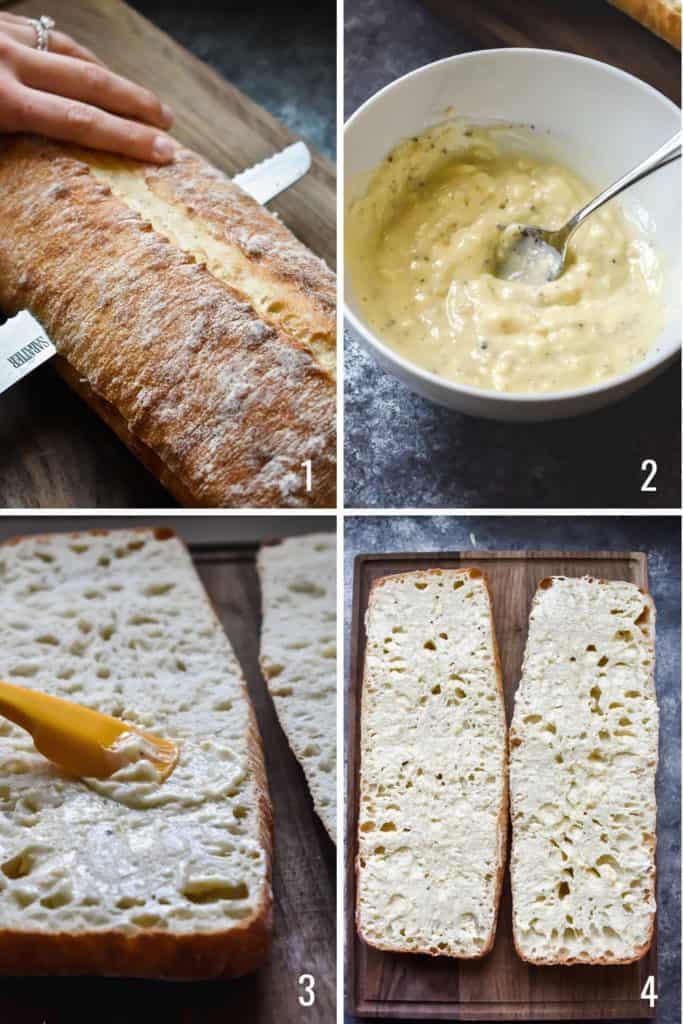
- Slice the ciabatta loaf in half lengthwise, trying to keep the top and bottom slices as even as possible.1 loaf ciabatta bread
- In a small bowl, stir to combine butter, garlic and ground pepper.1/2 cup (113 ½ g) unsalted butter3 cloves garlic1/8 tsp (⅛ tsp) ground black pepper
- Brush the butter mixture to the cut side of each half of the loaf, coating evenly to the edges.
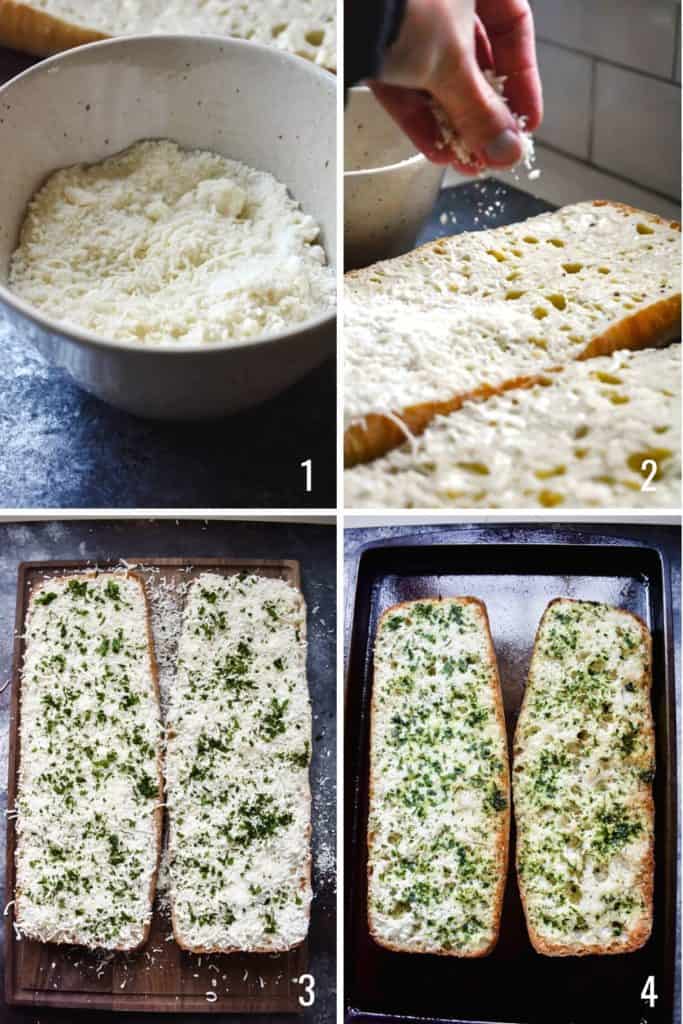
- In a separate small bowl, combine asiago and parmesan cheeses.4 ounces (113 ⅖ g) asiago cheese1/2 cup (50 g) parmesan cheese
- Top each buttered loaf evenly with the cheese mixture, and top evenly with parsley.2 tbsp flat leaf parsley
- Place each half on a large baking sheet (cheese side up!) and bake for 10 minutes.
- Leave the oven door closed and turn the oven to broil. Let broil for 3-4 minutes or until the cheese is bubbly and the top edges of the loaf are golden brown, keeping a close eye to ensure it doesn’t burn.
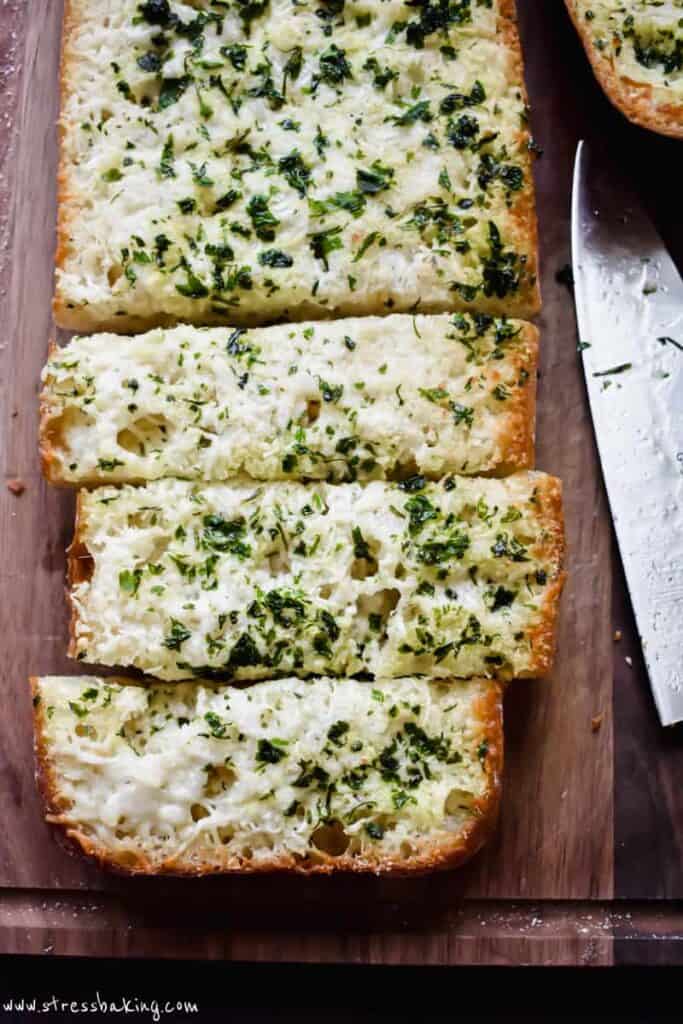
- Remove from the oven and carefully transfer to a cutting board to slice into nice thick slices (depending on the size of your loaf, could be 8-10 slices on each half). Serve immediately and enjoy!
Notes
- Choice of bread: My personal favorite is ciabatta, but a French or Italian loaf will work just fine for this recipe as well.
- Use very soft butter, but not melted. If it’s melted, it’s going to seep into all the little crevices and not sit on the surface which won’t give the same texture we’re looking for on this bread.
- Don’t substitute the minced garlic. You need to use minced garlic, as garlic powder just isn’t going to provide the same consistency you want for the butter spread.
- The choice of cheese is up to you. If you’re not a fan of Asiago cheese, feel free to swap it out for mozzarella. And if you want more cheese, add more cheese! You can add 50% more when the cheese craving hits hard.
- You’ll need flat leaf parsley. Curly leaf parsley is more bitter.
Nutrition Facts
Nutrition Disclaimer
The provided nutrition information is generated by an automatic API and does not take variations across specific brands into account. This information is provided as a general guideline and should not be treated as official calculations. Learn more here.
Made this the other night! It was so delicious. I did not have asiago cheese so I used a little bit of mozzarella and cheddar. It turned out wonderful. The garlic flavor was amazing! And it was so cheesy. Thanks for the recipe!
I’m so glad you liked it!
Will this bread be good to take to a party to serve with a crockpot of chipotle meatballs. I’m looking for some kind of bread to serve with them that won’t get hard as a rock??? If I make them a few hours before the party will it be ok or not?? Thanks.
Hi Suzi! These would be absolutely delicious with those meatballs, and you can make these ahead of time. As outlined in the body of the post, you could make them ahead of time and then reheat them – or make them, freeze them, and then bake them when it’s party time!
They’re best stored at room temperature in an airtight bag or container after it’s cooled to room temperature. It will only last a couple days at room temperature. To reheat garlic bread in the oven, wrap the bread in foil and place on a baking sheet on the middle rack (it can be sliced or still whole). Bake at 350°F for 10-15 minutes, or until warmed through.
If you want store it for a longer period of time, I’d recommend freezing it. Let it cool to room temperature, then wrap in a layer of plastic wrap followed by a layer of foil. Then place the bread in a freezer-safe bag and squeeze out all the excess air. Can be stored in the freezer for up to 3 months.