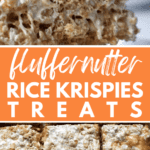
Fluffernutter Rice Krispie Treats
Ooey, gooey soft rice krispie treats are loaded with creamy peanut butter and sweet marshmallow fluff for the perfect fluffernutter flavor! All you need are 5 ingredients and 30 minutes. Next time try my fluffernutter cookies or thick and chewy fluffernutter bars.
Nancy said: “I will sum up my review with my husband’s words: ‘These are the best rice krispie treats I’ve ever had!' Loved them. I thought they might be too over the top, but they weren’t… YUM! I will definitely make these again! ⭐⭐⭐⭐⭐“
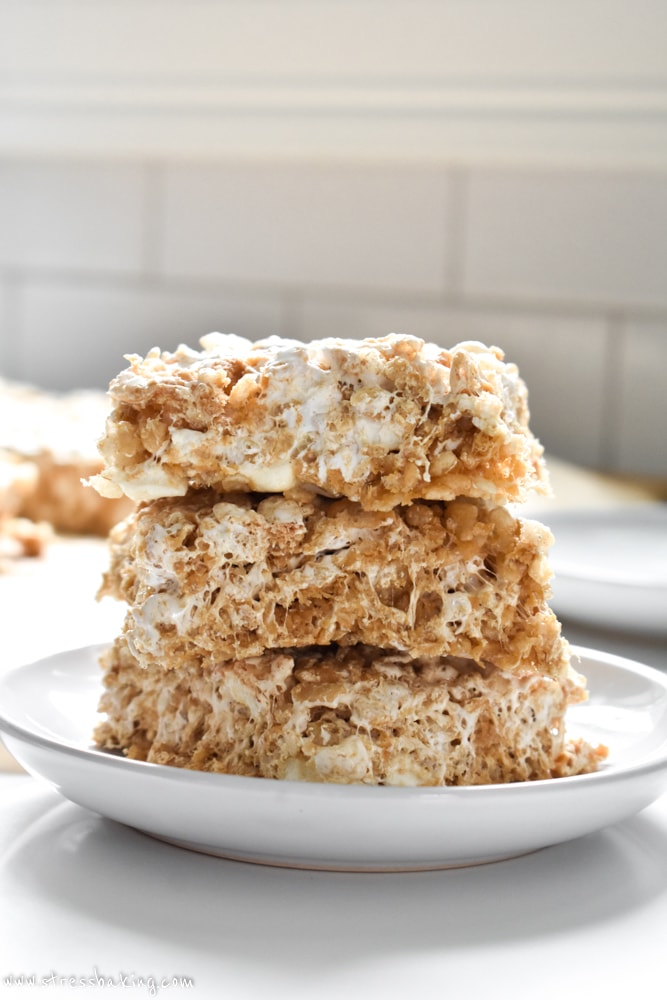
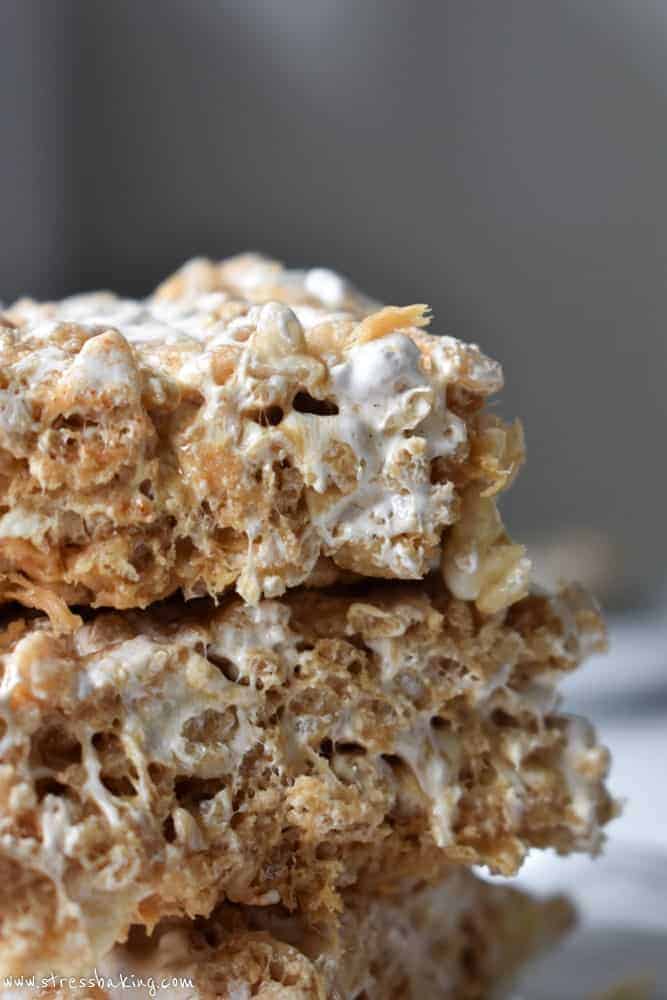
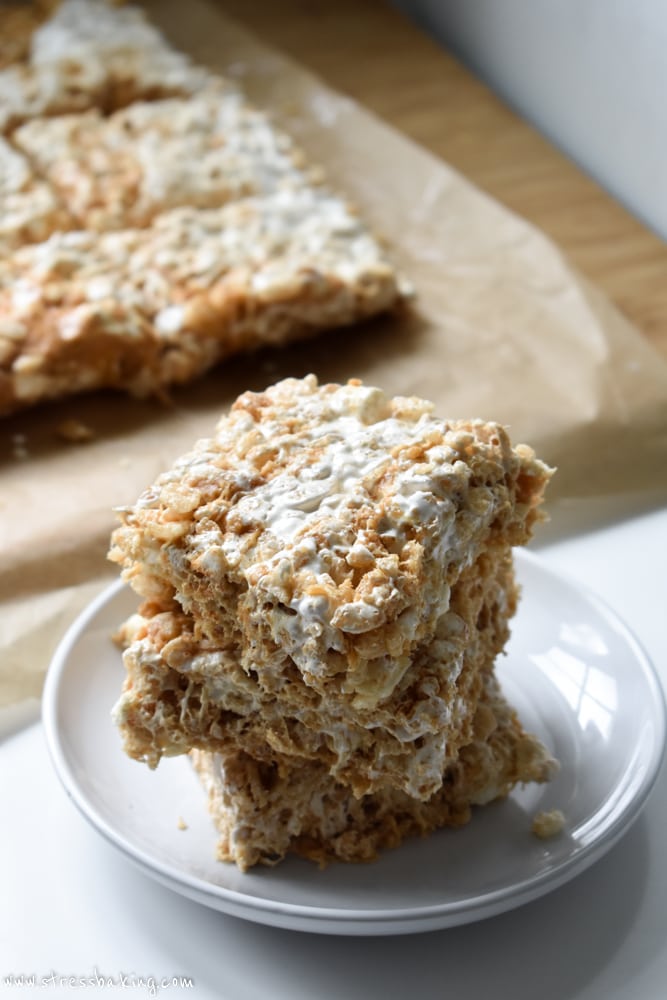
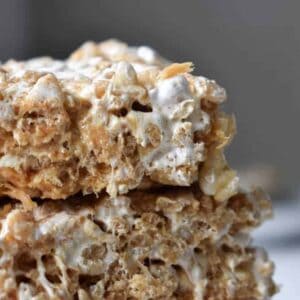
Here's the thing about these fluffernutter rice krispie treats: there is nothing healthy about them and they're everything I wanted them to be. They're soft, and ooey, and gooey, and taste like I covered a fluffernutter sandwich with cereal.
Okay, that doesn't sound appealing or particularly delicious, but you'll just have to trust me. These are delicious.
In today's edition of “Why Can't Leslie Just Leave Things Alone”, I needed to level up the classic rice krispie treats. The base recipe that you find on the side of the Rice Krispies box makes a perfect decent treat, but it's just not enough for me. They need to be softer and butterier.
So, I solved those problems by adding more marshmallows and more butter. But I still wanted more flavor. I was just… bored.
You all love fluffernutter recipes!
Recently I've been digging into my site analytics to see what my audience (that's you!) has been loving lately, and the fluffernutter cookies and fluffernutter bars are consistently near – or at – the top of the list.
So, I figured… if you love those fluffernutter recipes, maybe you'd love another one. And rice krispie treats are already chock full of marshmallows, so all I'd need to do is add peanut butter!
Not so fast, Leslie.
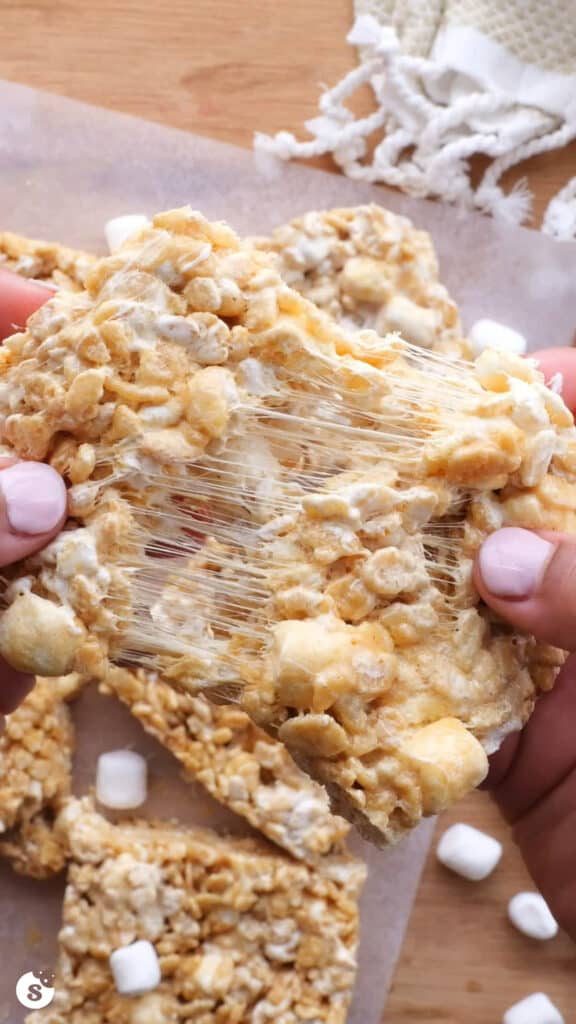
Marshmallow fluff makes these bars super soft
Marshmallows and marshmallow fluff don't have the same flavor, so just adding peanut butter was underwhelming. What it really needed was the addition of both peanut butter and fluff. On top of the marshmallows.
And you know what? Let's add some more mini marshmallows for fun.
That resulted in the softest and most flavorful rice krispie treats I've ever made. And it's strong with the fluffernutter flavor I wanted.
How to make fluffernutter rice krispie treats
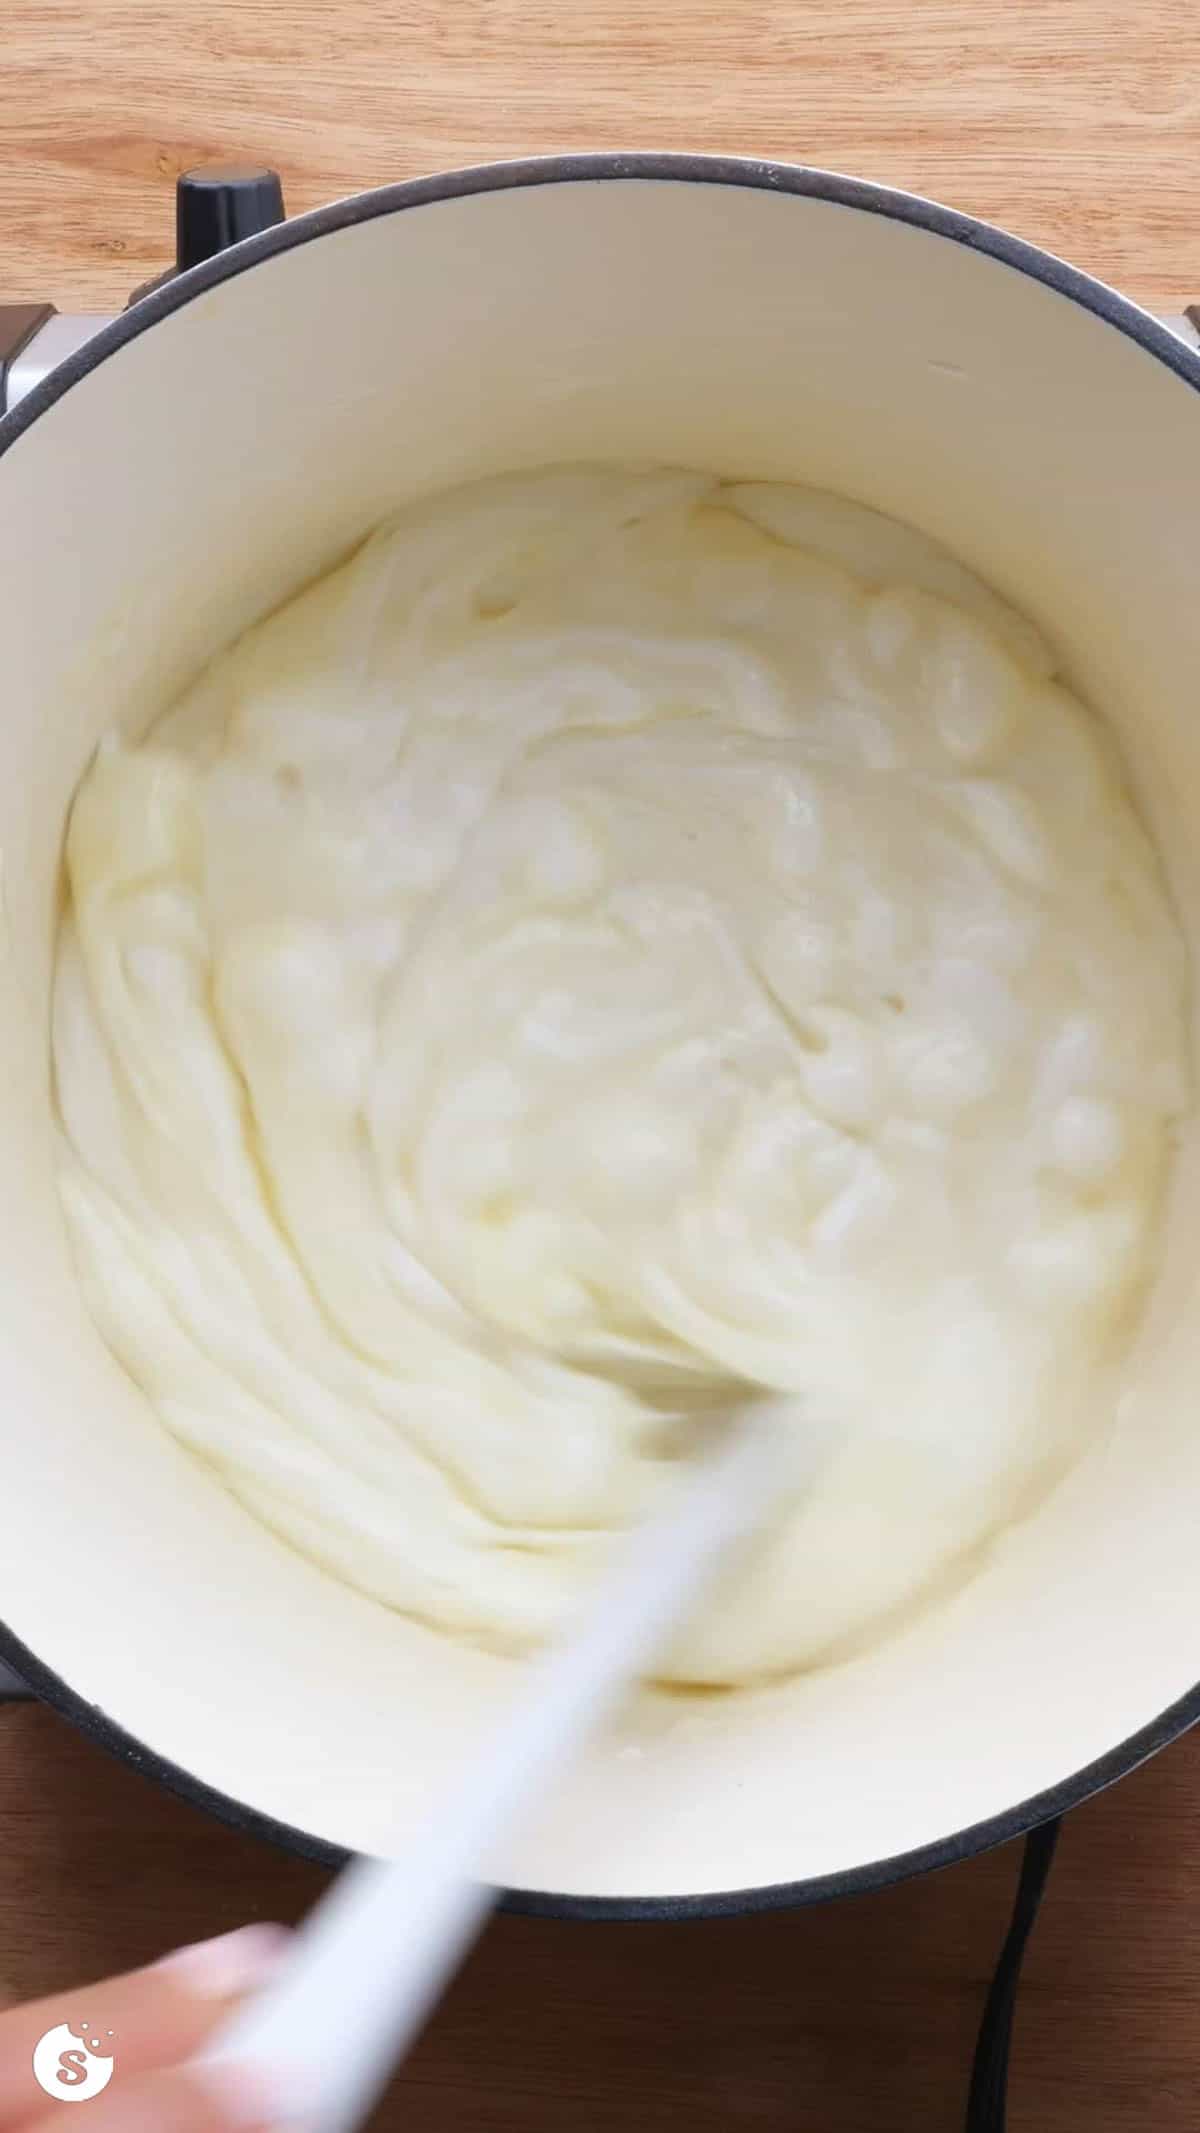
Step 1: In a medium saucepan, melt butter over low heat. Add 4 cups mini marshmallows and heat, stirring frequently, until melted and mostly combined – it’s okay that it’s not fully incorporated, it’s better that way!
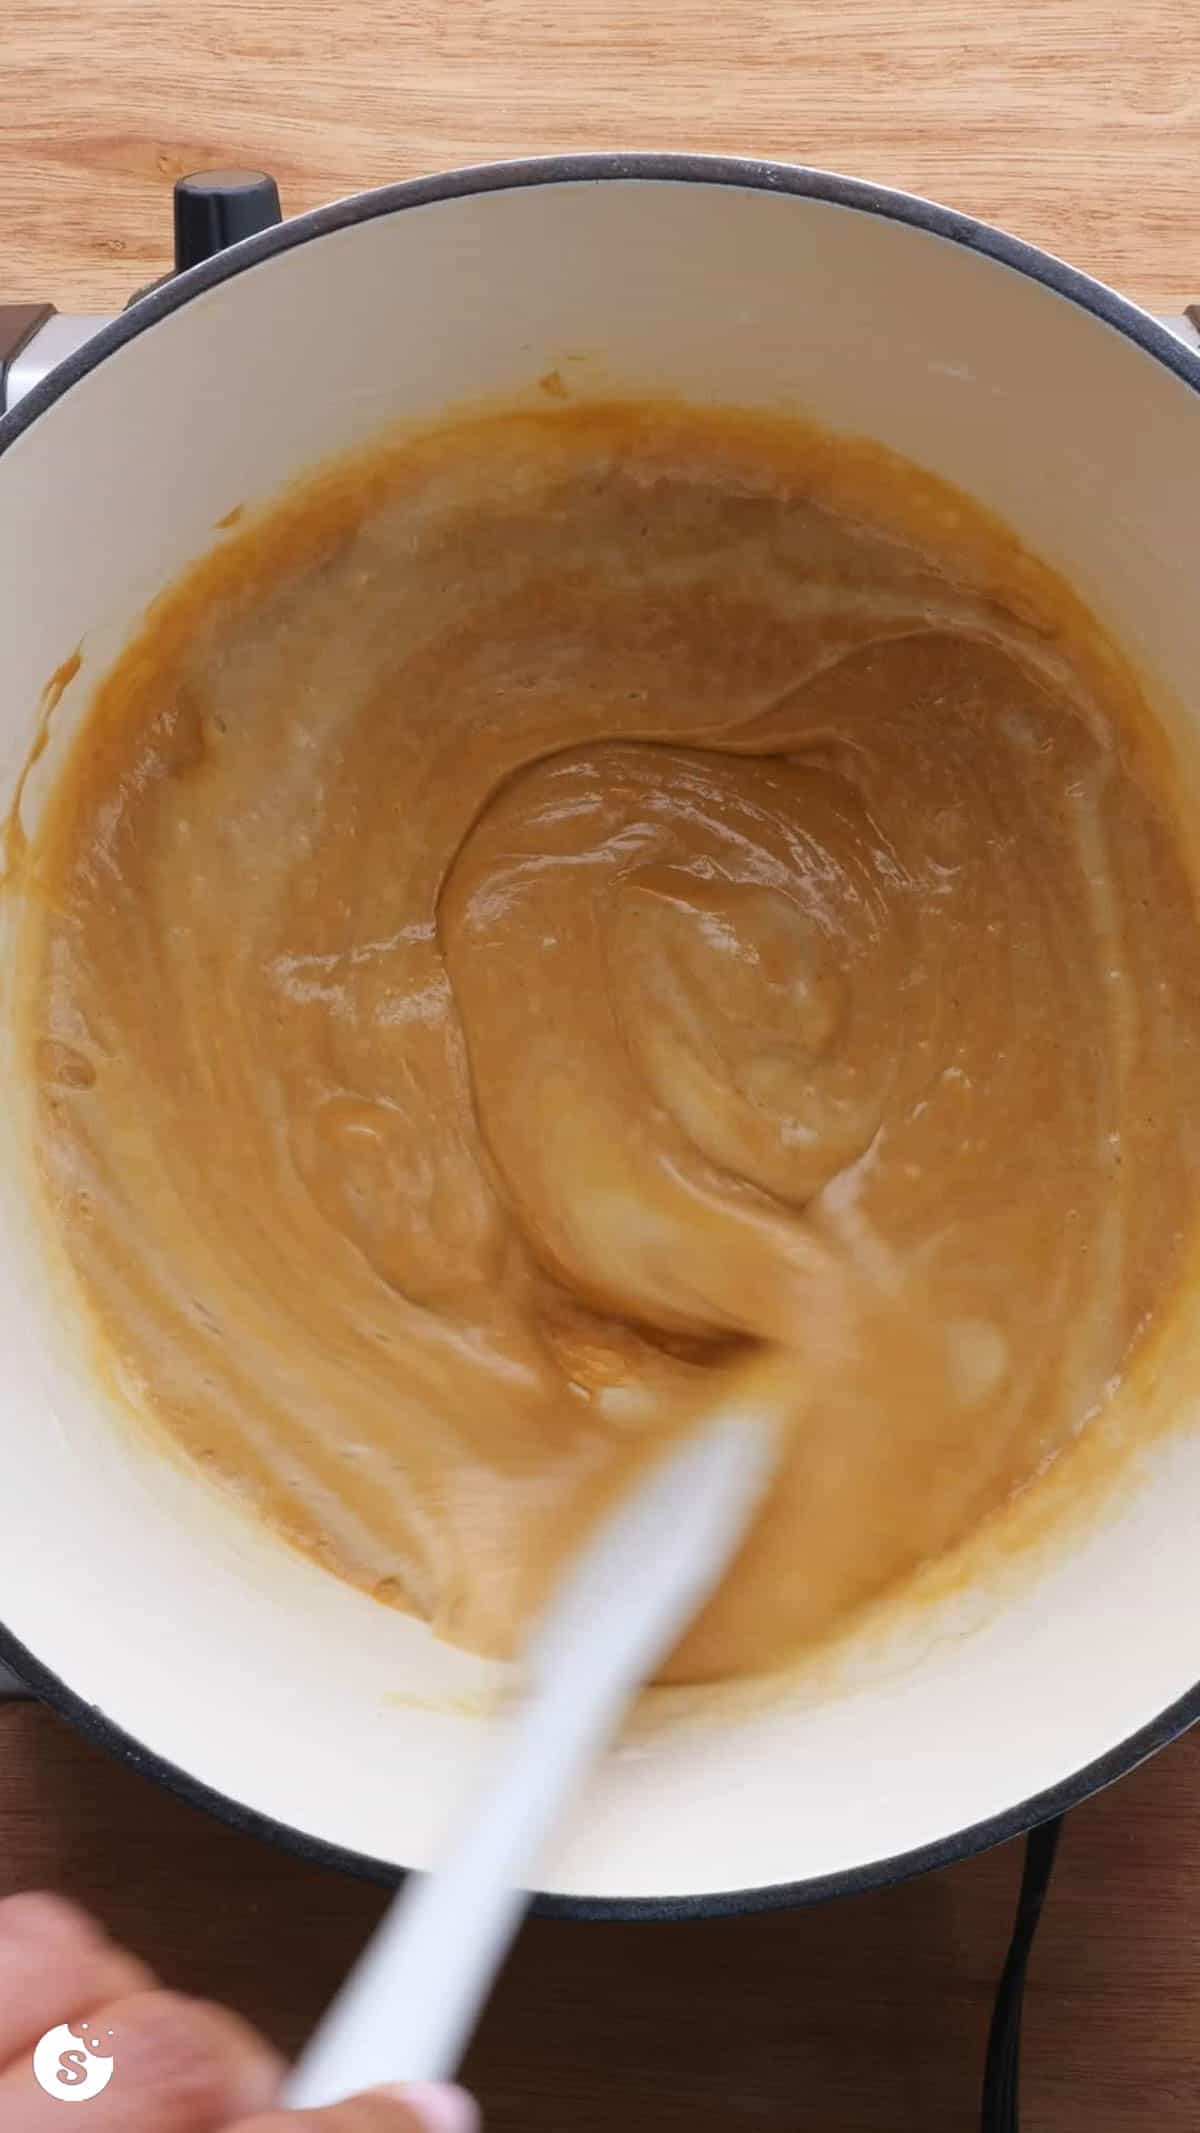
Step 2: Turn off heat, add peanut butter and stir to combine. If the peanut butter you’re using doesn’t have added salt, you can add a pinch of salt at this point and stir to combine.
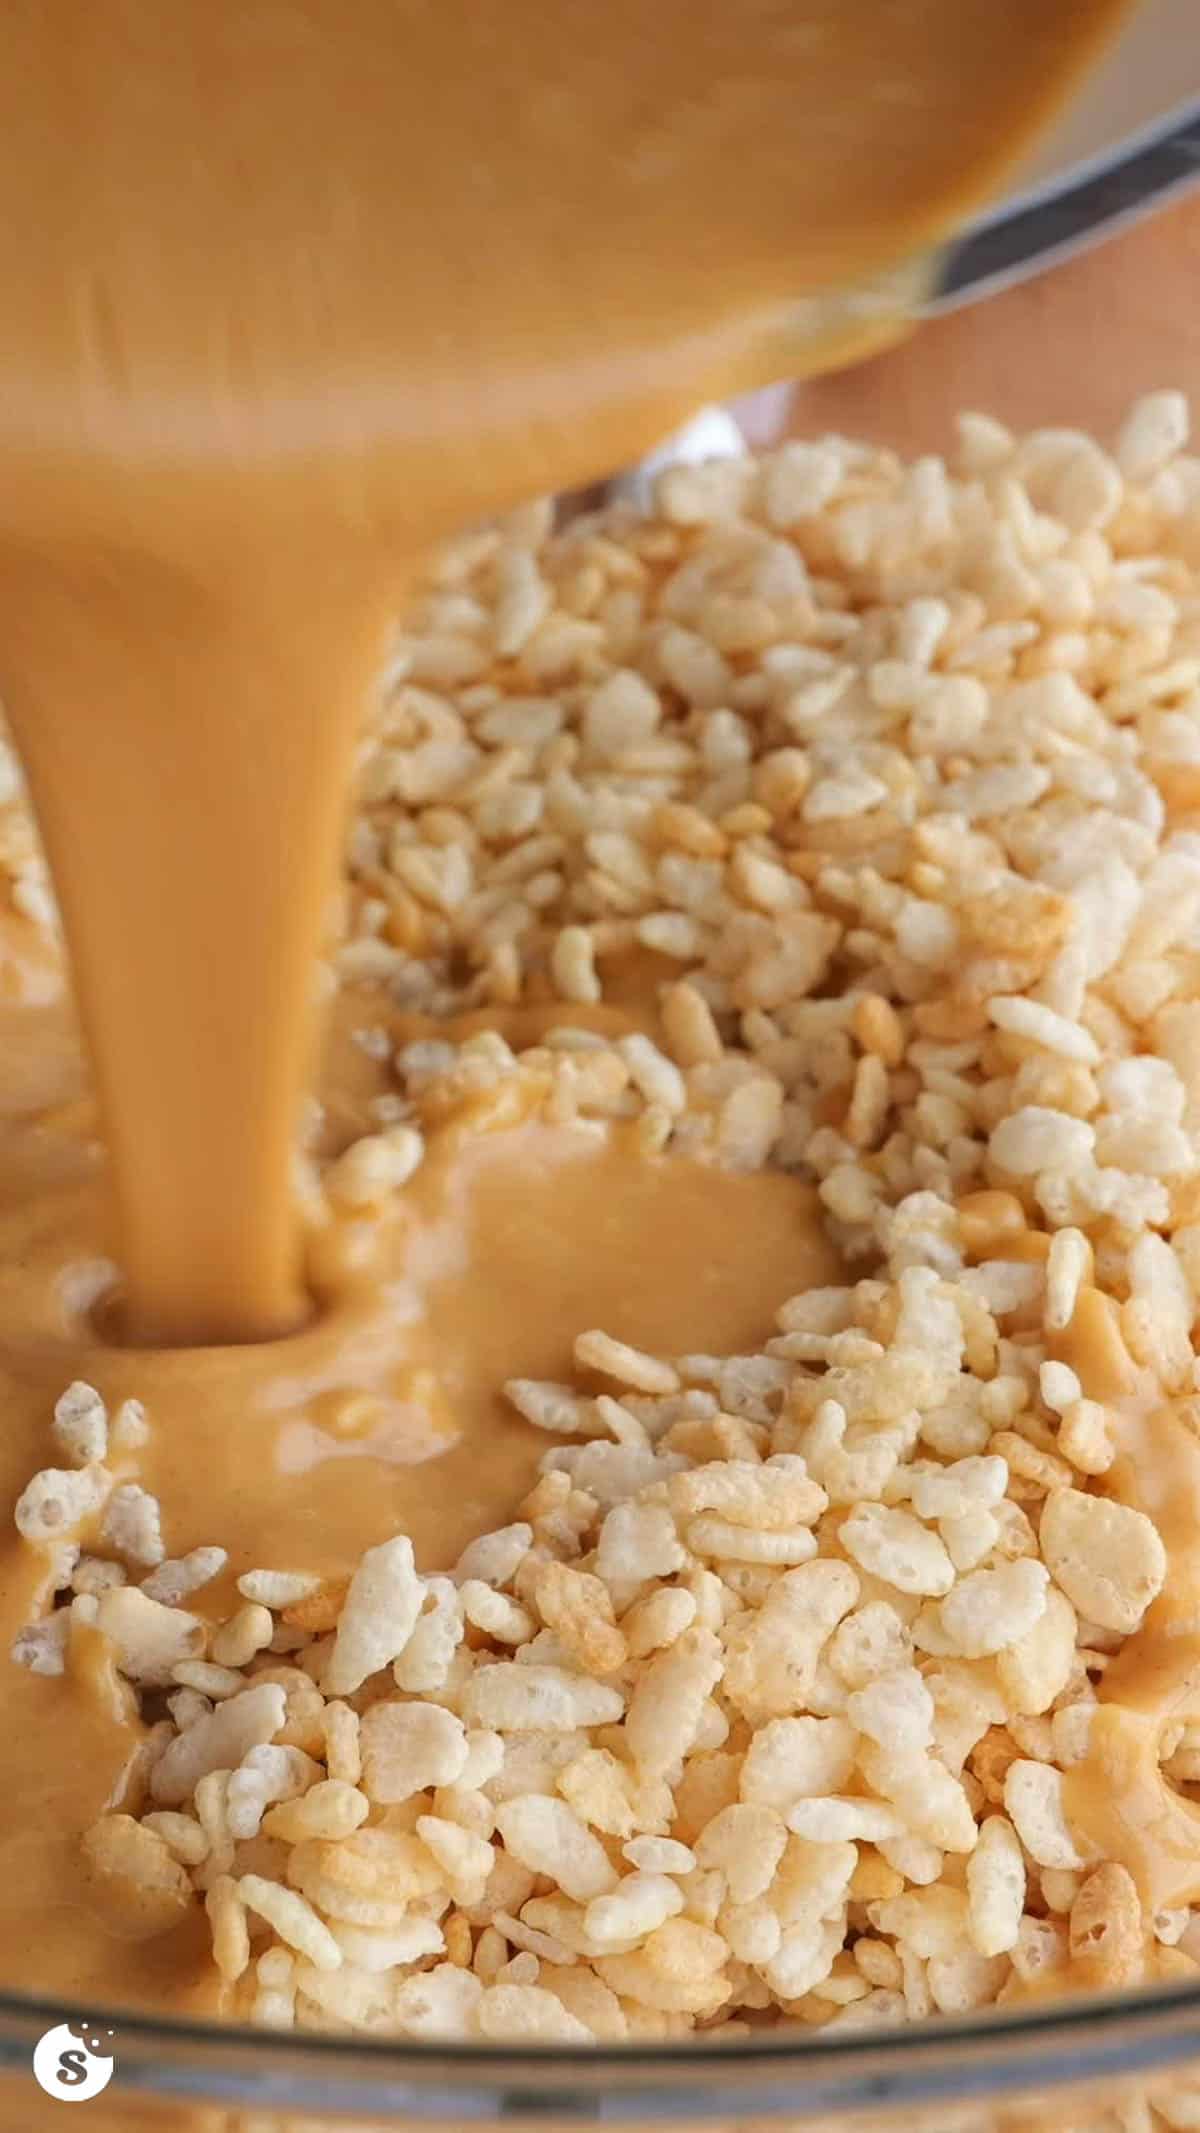
Step 3: Immediately pour peanut butter mixture into the bowl of Rice Krispies, add Fluff and remaining 2 cups mini marshmallows and stir to coat and combine.
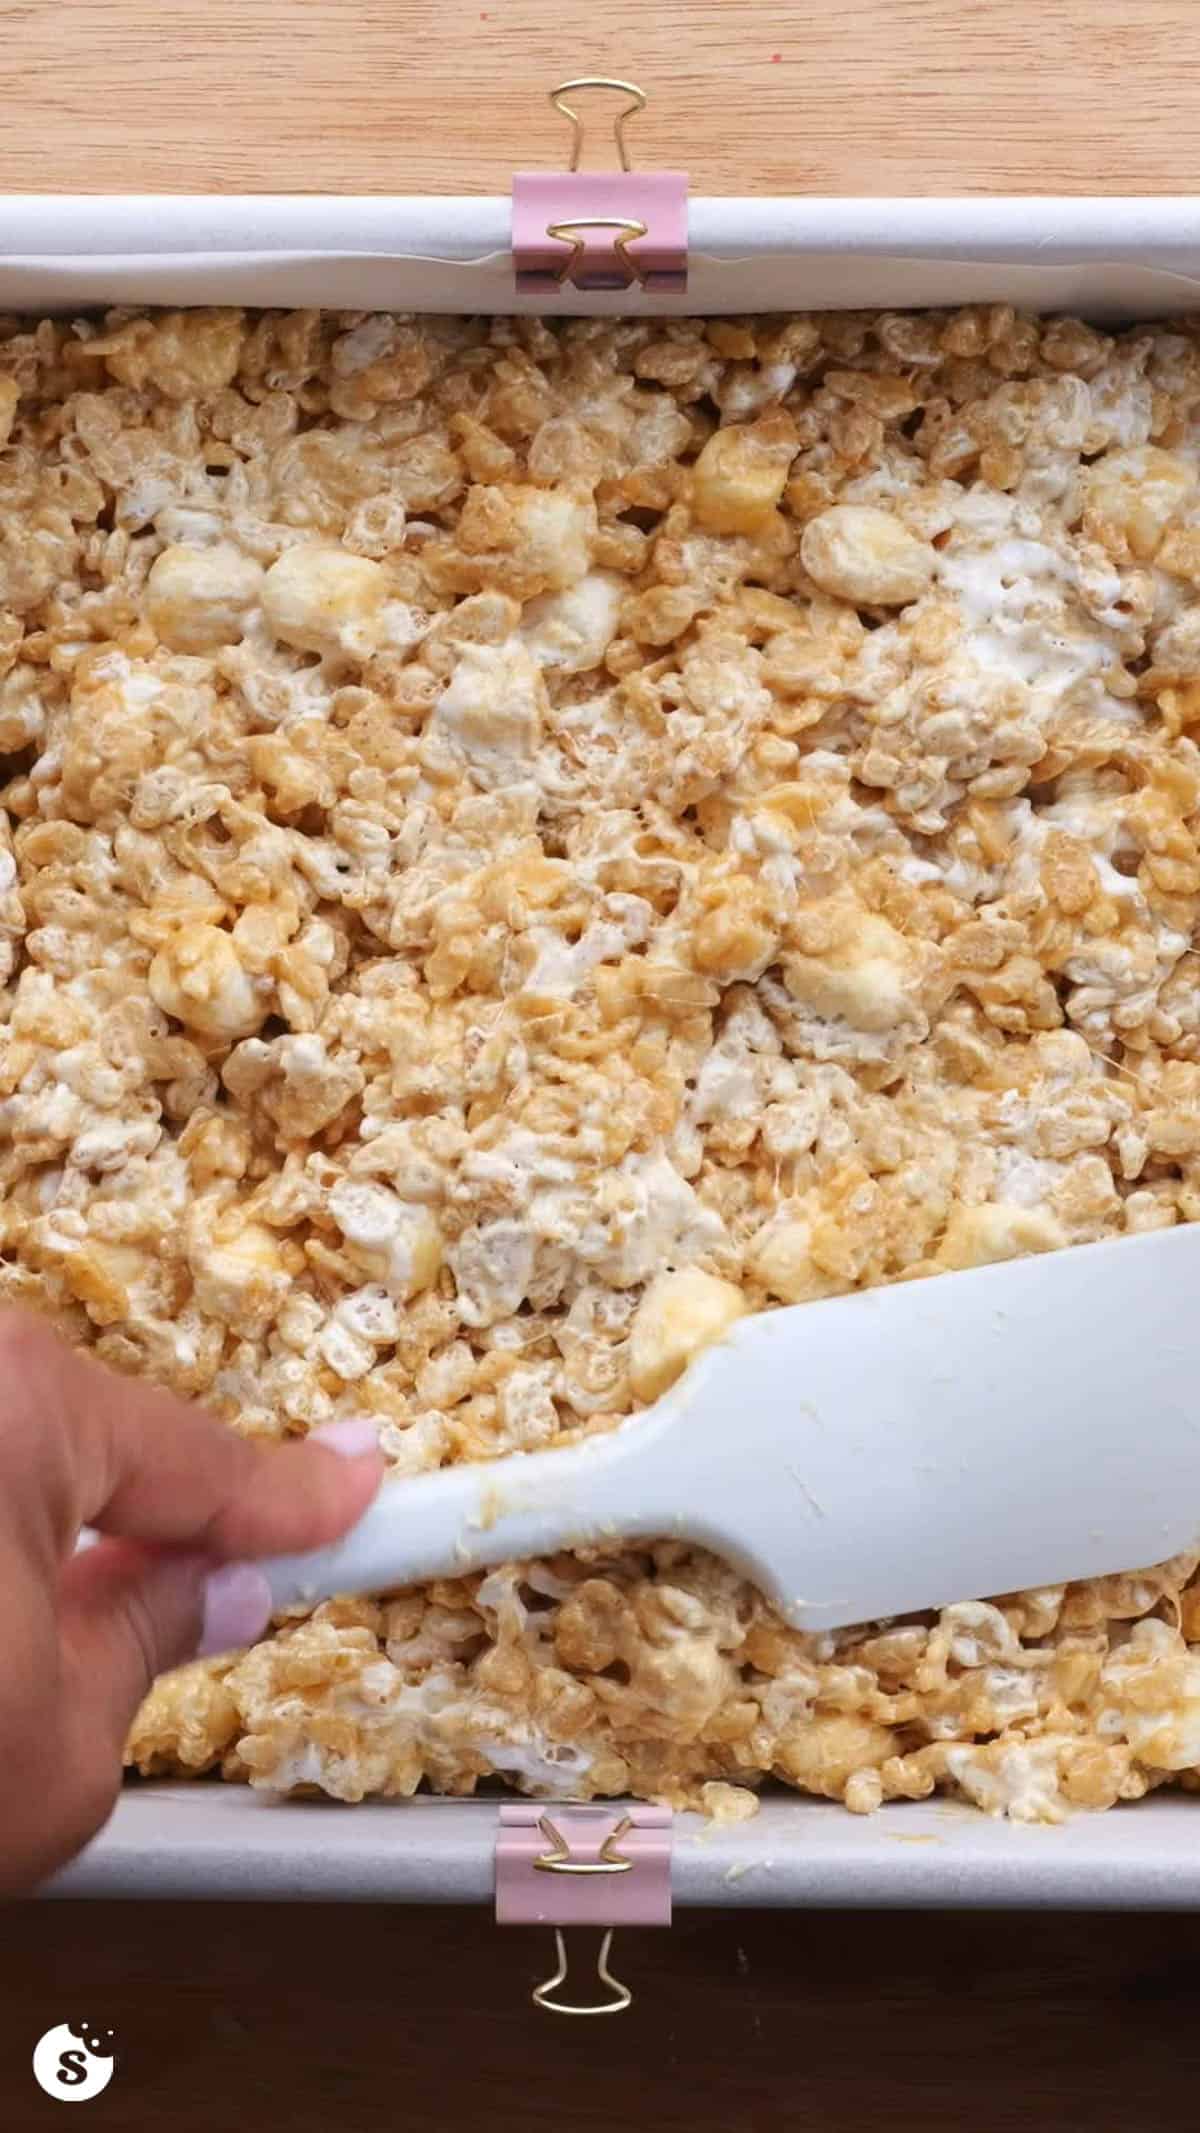
Step 4: Turn out into a prepared baking dish and press down into an even layer.
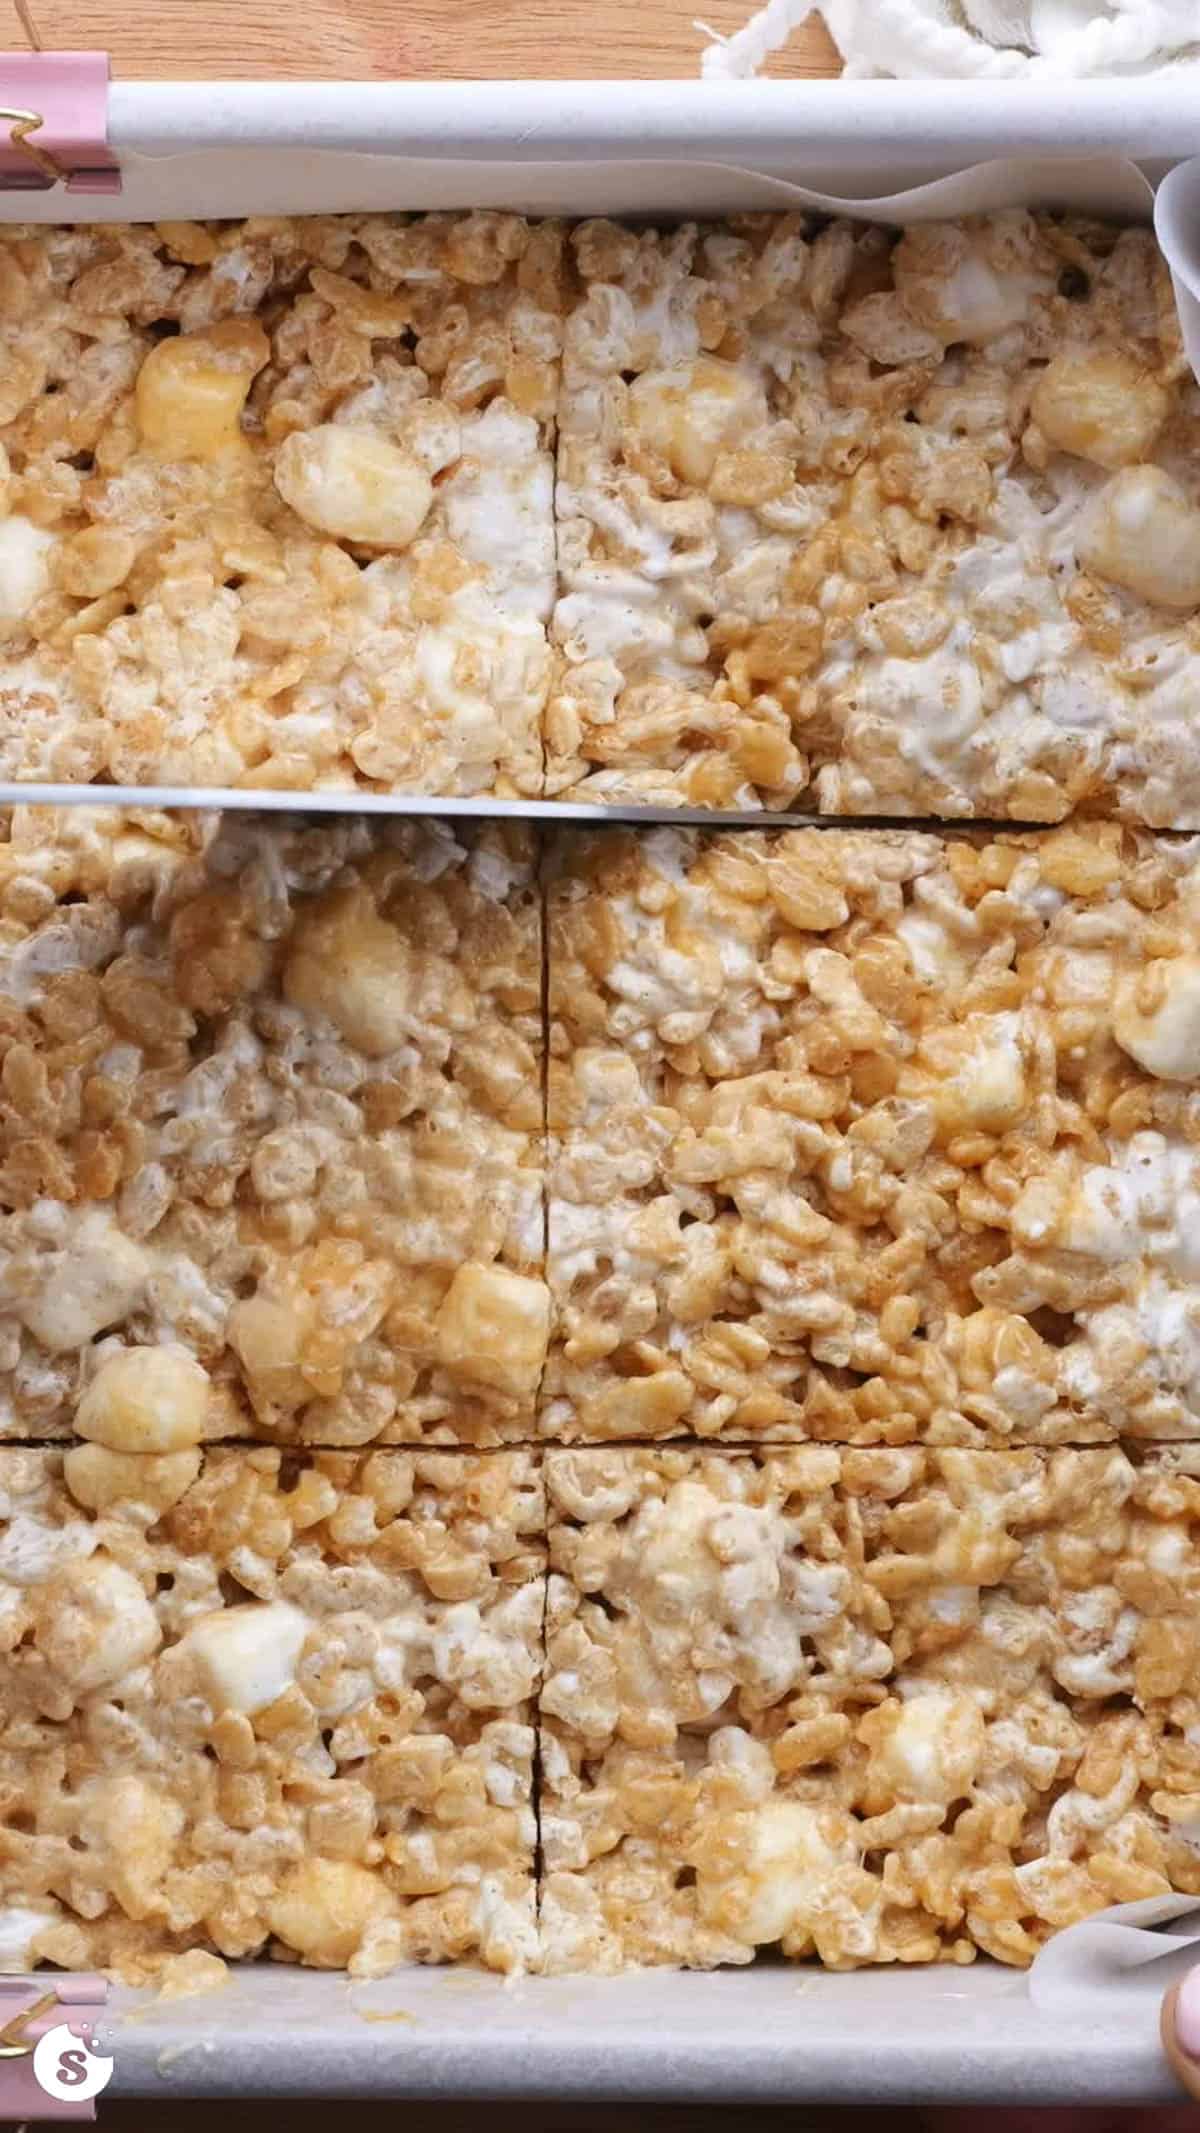
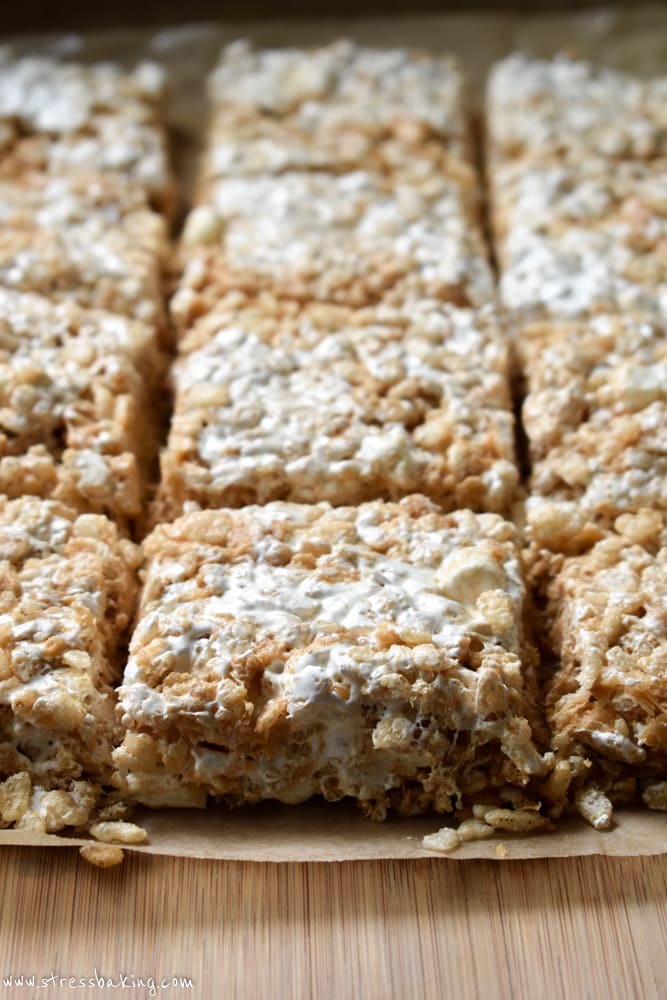
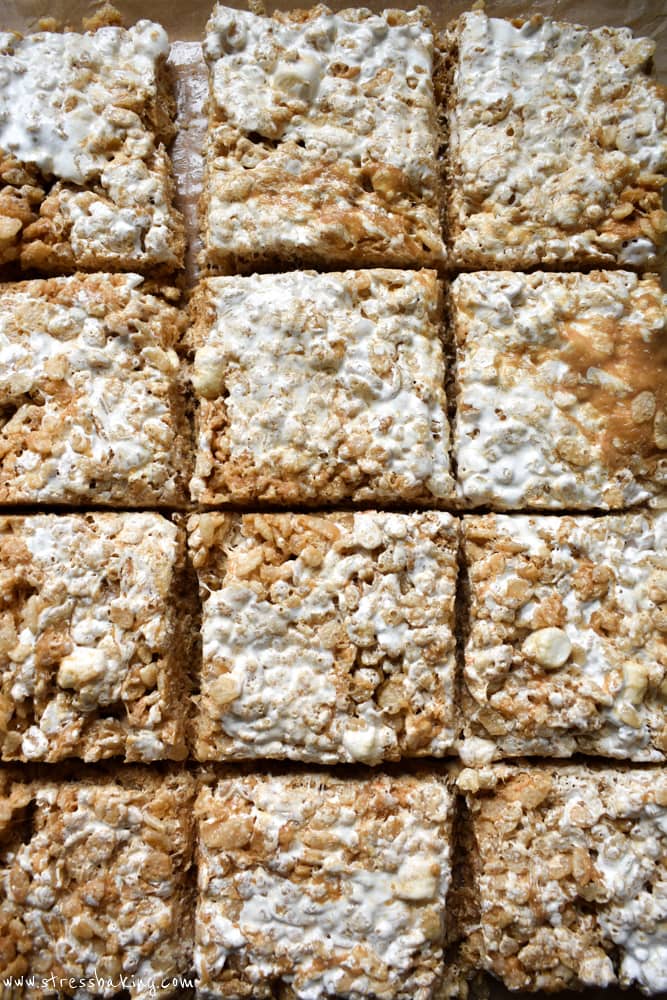
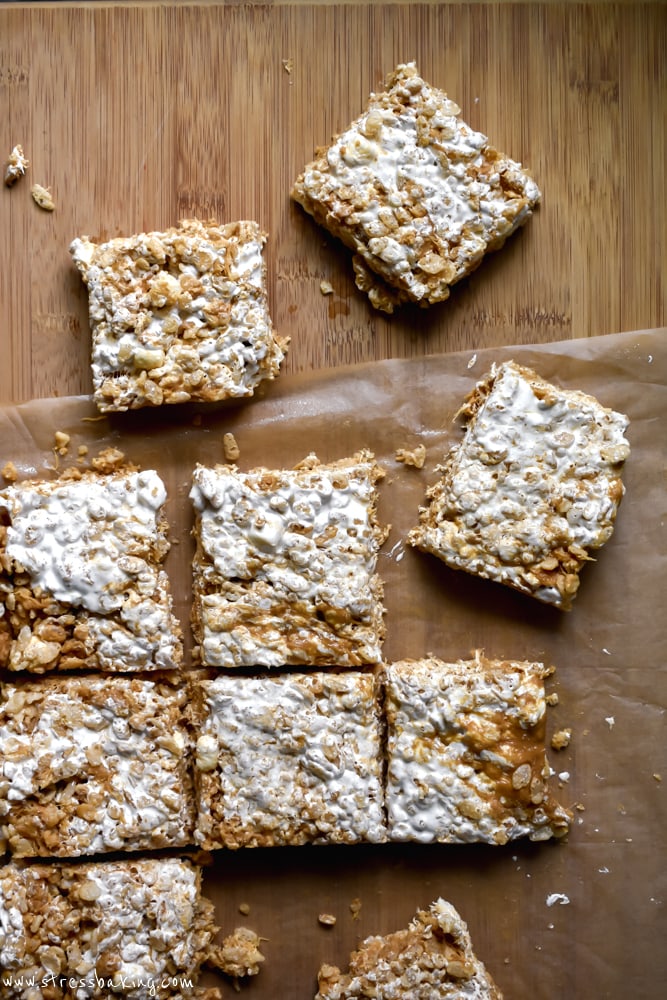
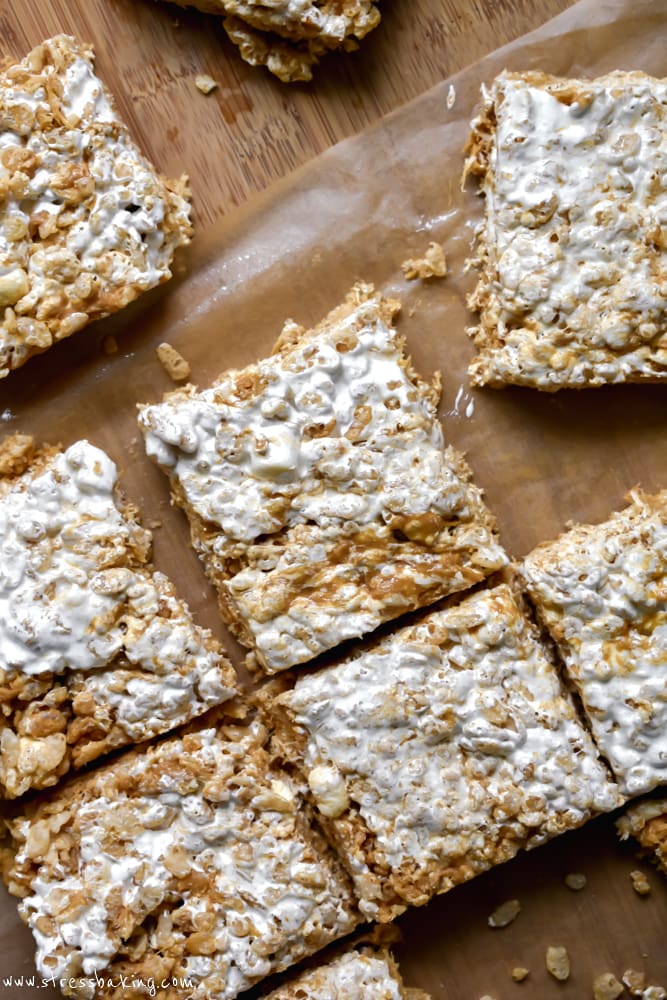
Step 5: Let set for at least 15 minutes, and then slice into 12 large bars.
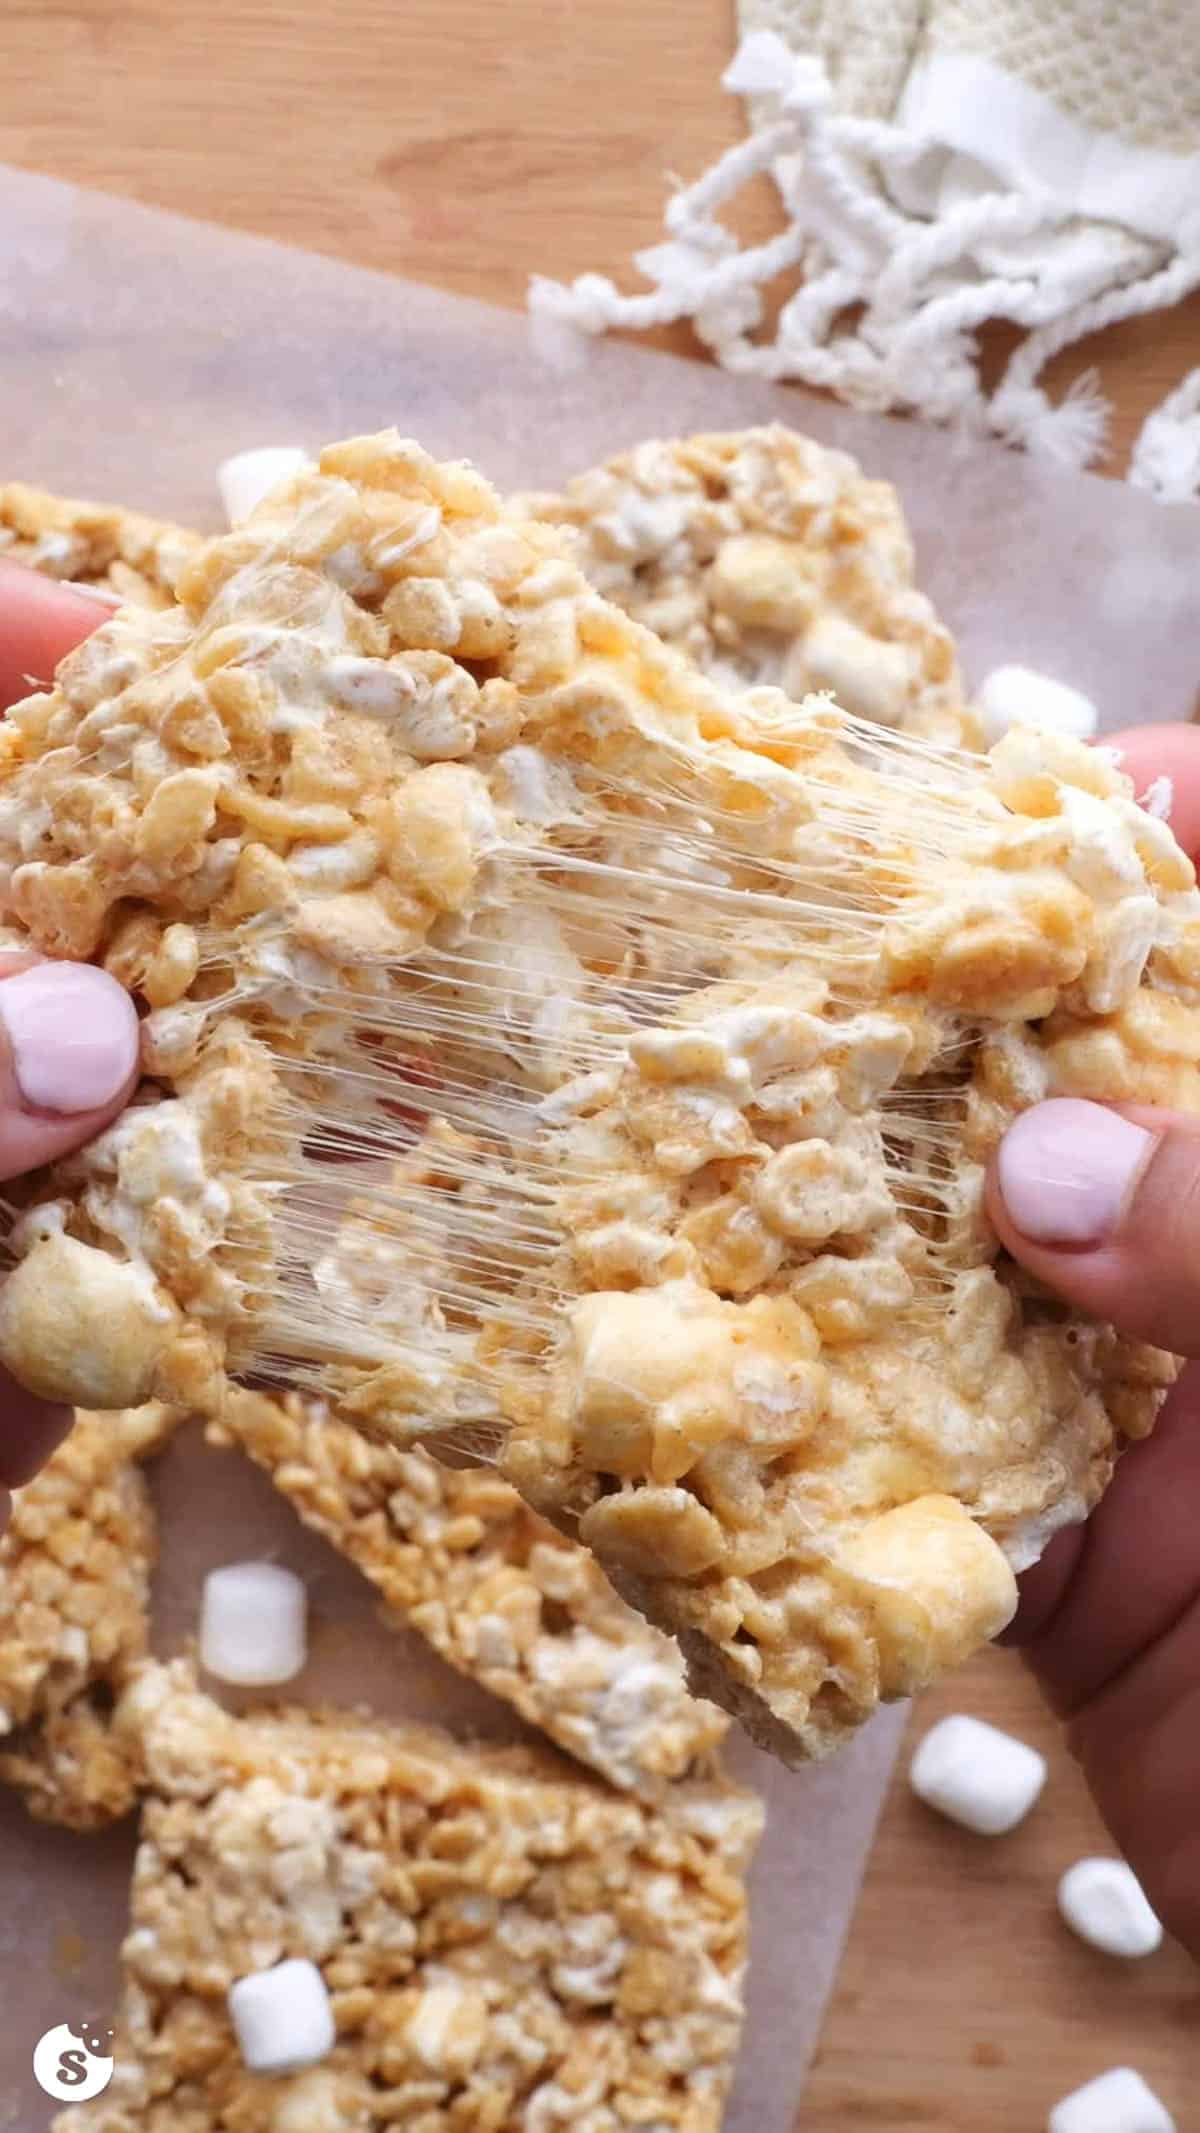
Just look at that marshmallow pull – enjoy!
How to make the best rice krispie treats
- Place parchment paper in the baking pan and spray with nonstick spray. This ensures they won't stick! Make sure there's a bit of overhang over the sides to make it easy to lift the bars out of the pan, too.
- Use fresh marshmallows! I can't emphasize this enough. If you try to use a bag of mini marshmallows that have been hanging out in the back of your pantry since last Christmas and have the texture of little doorstops, they're not going to melt and it just plain won't work. New, squishy, and soft marshmallows are essential!
- And use fresh cereal, for that matter. Don't use stale cereal either, because you will notice.
- Don't press them into the pan too tightly. You want to gently spread them out to evenly distribute them in the pan, but you're not trying to pack them down. The tighter the pack, the denser they'll be, which means less light and chewy. And we want light and chewy! You can spray your hands with a little nonstick spray and use your palms to gently press it down, or place another piece of parchment paper on top before using your hands to press it down.
- Set aside some mini marshmallows to add at the end. Adding those extra marshmallows that haven't melted yet add a little extra fluff and chewiness to the final product. The intact mini marshmallows are a nice little surprise when you encounter them. That's why I save a cup or two of marshmallows to add right at the end.
Tips for slicing rice krispie treat bars
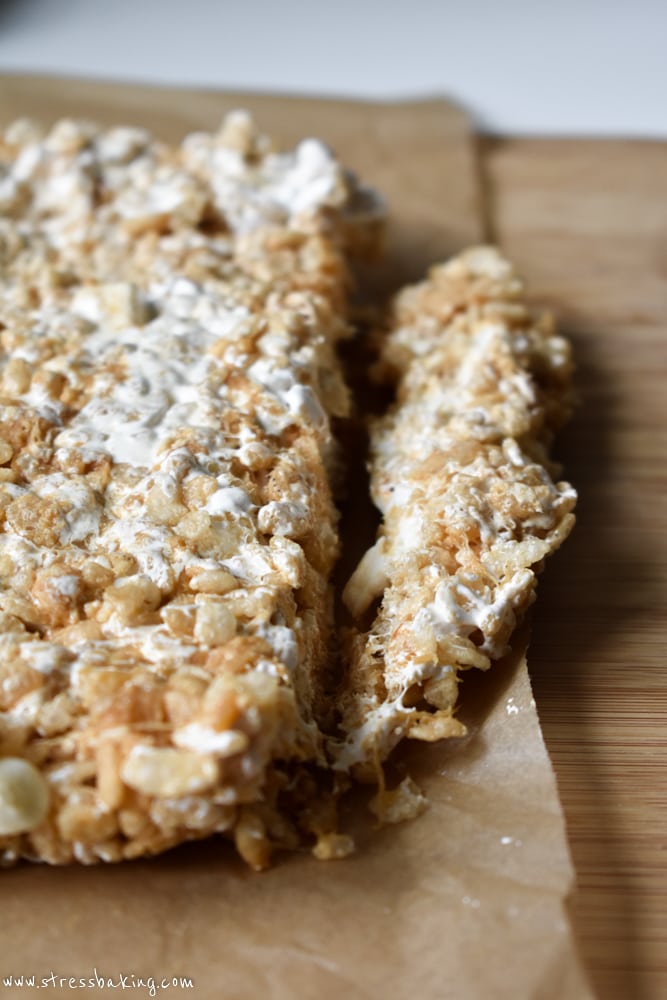
I'm going to share a little secret with you: when I pull these out of the pan, I slice off the edges to get the corners squared so no one gets a weird, sloped, lopsided piece.
And then I eat those cut-off pieces. I consider it payment for my time. Plus, you know, taste testing.
Not a secret, but a helpful tip: slicing bars like these are infinitely easier when I use a rocking pizza cutter (affiliate link) versus a large knife. It's big enough to span the width and the length of the bars, so you get one long, even cut.
Plus, it's easier on your cutting boards because you just rock the blade from side to side, instead of digging in and dragging a knife. Win-win.
Can I make these in an 8×8″ pan?
You sure can! Just halve the recipe – they'll have a different thickness than they would in a 9×13″ pan, but it won't affect the flavor.
How to clean saucepan after making rice krispie treats
If you're using a non nonstick pan (definitely should have phrased that differently), you may have to put in a little extra effort to clean it.
Scrape out as much excess sticky rice krispie leftovers as you can with your spatula, then fill it with hot water and place it back on the stovetop. Bring it to a boil and let it sit for a bit. The residue will melt off the sides and bottom and float to the top!
Then you can skim that out of the water and throw it in the trash, then clean the pan with dish soap and water per usual.
Are they really sticky and messy?
Surprisingly, they're not overly sticky and impossible to eat! That was a sacrifice I was going to be willing to make for the flavor I wanted.
You will, however, still want to store any leftovers in an airtight container between layers of parchment paper just to keep them from sticking together.
But you know, for the purposes of food photography, stacking them without parchment paper is a-okay.
Do as I say, not as I do.
How to store rice krispie treats
You can store them at room temperature between layers of parchment paper in an airtight container for 2 days.
You can also store them in the freezer for up to 1 month – again, in an airtight, freezer-safe container between layers of parchment paper.
To defrost, just let them sit on the counter at room temperature for about 30 minutes before serving. Due to the marshmallow fluff, it tends to take a little bit longer than your typical Rice Krispie Treats.
FAQs
You can store them at room temperature between layers of parchment paper in an airtight container for 2 days.
You sure can! Just halve the recipe – they'll have a different thickness than they would in a 9×13″ pan, but it won't affect the flavor.
If you're using a non nonstick pan, you may have to put in a little extra effort to clean it. Scrape out as much excess sticky rice krispie leftovers as you can with your spatula, then fill it with hot water and place it back on the stovetop. Bring it to a boil and let it sit for a bit. The residue will melt off the sides and bottom and float to the top! Then you can skim that out of the water and throw it in the trash, then clean the pan with dish soap and water per usual.
Rating this recipe is a great (and free) way to support Stress Baking. After you've enjoyed this recipe, click on the stars below to share your experience – thank you!
Fluffernutter Rice Krispie Treats
Ingredients
- 6 cups Rice Krispies cereal
- 6 tablespoons unsalted butter
- 6 cups mini marshmallows, divided
- 1 cup creamy peanut butter
- Pinch salt, if your peanut butter doesn't have any
- 7.5 ounce container of Marshmallow Fluff
Instructions
- Prep a 9×13 baking pan with parchment paper so that the edges hang over the sides of the pan, and then spray with nonstick spray. Set aside.
- Pour Rice Krispies into a large bowl and set aside.6 cups (168 g) Rice Krispies cereal
- In a medium saucepan, melt butter over low heat. Add 4 cups mini marshmallows and heat, stirring frequently, until melted and mostly combined – it's okay that it's not fully incorporated, it's better that way!6 tablespoons unsalted butter6 cups (300 g) mini marshmallows
- Turn off heat, add peanut butter and stir to combine. If the peanut butter you're using doesn't have added salt, you can add a pinch of salt at this point and stir to combine.1 cup (258 g) creamy peanut butterPinch salt
- Immediately pour peanut butter mixture into the bowl of Rice Krispies, add Fluff and remaining 2 cups mini marshmallows and stir to coat and combine.7.5 ounce (212 ⅝ g) container of Marshmallow Fluff
- Turn out into prepared baking dish and press down into an even layer.Tip: If you have another 9×13 pan, you can use the bottom of that pan to press into the top of your dish for an easy way to get it evenly distributed! You can also spray your hands with a little nonstick spray and use your palms to press it down, or place another piece of parchment paper on top before using your hands to press it down.
- Let set for at least 15 minutes, and then slice into 12 large bars. Serve and enjoy!
Video
Notes
Nutrition Facts
Nutrition Disclaimer
The provided nutrition information is generated by an automatic API and does not take variations across specific brands into account. This information is provided as a general guideline and should not be treated as official calculations. Learn more here.
Delish!
I did a terribly delicious thing. These tastes wonderful (especially to someone who finds rice krispie treats rather bland) but I wanted more peanut butter flavor. Originally I was just going to add the Reese’s peanut butter baking chips but the store was out so I bought the baking mix of Reese’s pieces and mini peanut butter cups.
Oh. My. Goodness.
Could I replace the rice with quinoa and chia seeds? If so how much could I replace it with?
why is it when I click on one of these recipes the metric choice never works? I’m British and cup’s mean nothing to me
Not sure because it’s working for me – if you could share a bit more about what happened, what browser you were using, of you’re on mobile or desktop, I can submit a ticket to the creator of the application and see if they have any advice!
I’m a little confused. The recipe states to use a 9×13 pan which is not a square pan. Then elsewhere in the FAQ you answer the question: “Can I make these in a 9″x13″ pan?
You sure can! Just double the recipe – they’ll have a different thickness than they would in a square pan, but it won’t affect the flavor.”
So should I double the ingredients for this to fit a 9×13 pan? If I want to just make this in an 8×8 or 9×9 will the original recipe work or was there some sort of typo and the recipe as written using 6 cups of cereal is the proper amount for a 9×13? I mean, should I use 12 cups of cereal for a 9×13 pan?? I’m confused by this. I hope you understand my confusion. Looks good though!
Thank you so much for catching that! I had updated this recipe a bit ago to make it in a larger pan and completely forgot to take that part out of the body – so the instructions are written for a 9×13 pan. Going to edit that right now!
I will sum up my review with my husband’s words: “These are the best rice krispie treats I’ve ever had!” Loved them. I thought they might be too over the top, but they weren’t. Next time I might add some extra krispies, but they were really good as is. My best prep tip is to pour the cereal in a big oven proof bowl and put it in the oven on warm (160 degrees or so) until you are ready to mix everything together. The warm bowl and cereal makes it very easy to mix before everything cools off! Also, I used an 8×12 pan to make sure they were nice and thick. YUM! I will definitely make these again!
So glad you liked them!
If you like peanut butter, you must make these. OMG. Only difference I did was brown the butter before adding anything.
You’re a smart person, Heather! :) That sounds faaaaaaantastic.
This was absolutely perfect! I will never make regular rice krispies again.. They are gooey but arent oberly sticky to the point they stick to your hands.. I had a bag of jet puffed marshmallows but i was a handful short so i used store brand marshmallows.. For some reason the store brand ones dont melt like the jet puffed do.. I ended up having a couple marshmallows that never melted which tasted really great anyways… This will be a favorite in my house forever.
So glad that you liked them!
Does it make a difference if you use natural vs not natural peanut butter? All I have is natural!
It may make the mixture more moist if you use natural peanut butter because of the oil so I don’t recommend it in general, but if you make sure you give it a real good stir to combine the oil before adding it I think it’s worth a shot!
Can you only use Fluff? How would that change the outcome (texture, firmness, etc)? If you can, how much would you use to replace the marshmallows? Thx!
I’m not sure what you’re planning to swap the Fluff with, but I’ve only ever made/tested this recipe with Fluff so I can’t speak to the results using anything else – sorry!
Sorry! I was unclear. In the pot when you’ve melted the butter you say to use marshmallows. I wonder if you could use marshmallow fluff instead. Or would that change the outcome of the recipe. Then use the fluff again like the recipe calls for.
Ohhhhh, I see what you mean! Honestly, I don’t know – but my gut tells me it likely wouldn’t work as well.
The divided 6 cups of marshmallows is divided into 4 cups and 1 cup. One of these numbers is incorrect. Can anyone tell me which one?
My apologies! That was supposed be divided into 4 cups in the initial mix, and 2 cups for the end. Just updated the recipe card with the correction :) But for what it’s worth, 5 cups and 1 cup would work well, too!
Instruction #4 doesn’t form a complete sentence – seems cut off after ” If the peanut butter you’re using doesn’t…” – doesn’t what?
Thanks for letting me know there was an issue with the recipe card rendering in full – yikes! Just got that fixed – that step is to add salt if the peanut butter you’re using doesn’t have added salt and you’d like to add some yourself.
Delicious. I separated the batch into half and added mini chocolate chips after it cooled a little but before I spread it. Now I’m wondering how it would be if I made the plain version, flattened half it on the cookie sheet, spread jam on top them put the rest on top.
Ooo, that sounds good! Thanks for coming back to leave a comment and rating, Gail!
I looooove all the marshmallow goodness in these!!