Easy 30-Minute Strawberry Shortcake Recipe
An easy strawberry shortcake recipe that can be made from scratch in 30 minutes! Sweet biscuits are layered with juicy strawberries and fresh whipped cream for an easy-to-make, classic summer dessert. Try my strawberry lemon mascarpone mousse next for more strawberry fun.
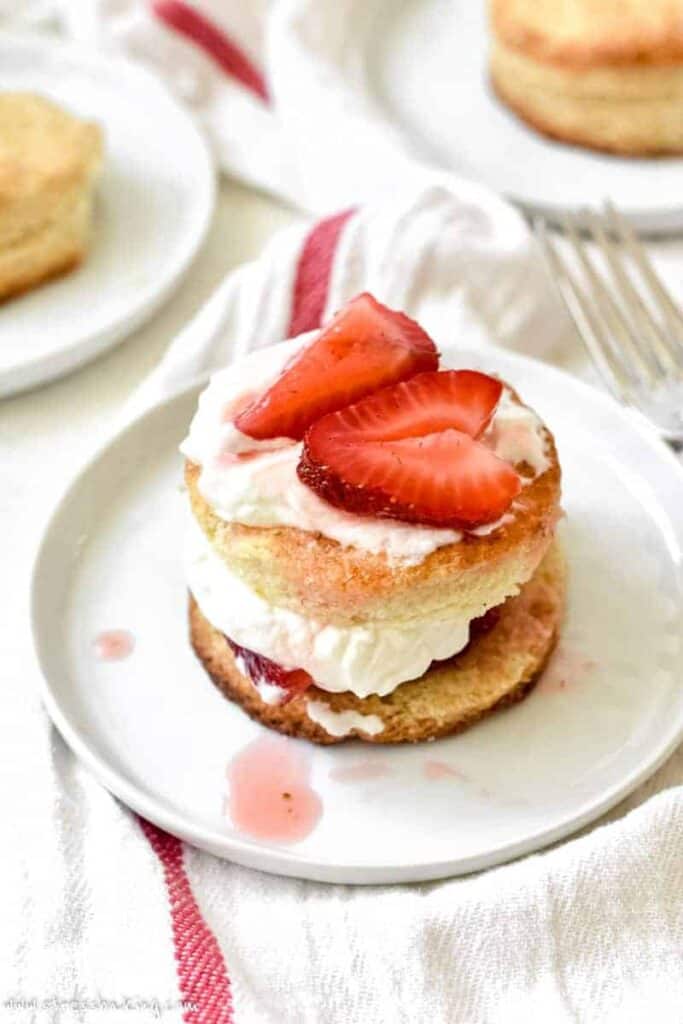
When it comes to strawberry shortcake, there are lots of variations to be found in different people's recipe boxes.
Some people like to use angel food cake, others use drop biscuits, and then some people default to that yellow spongecake that you find at the grocery store in the bakery section.
Shudder. Apologies if you enjoy those, but just thinking about their artificial yellow color and kitchen sponge texture makes my stomach flip.
Homemade strawberry shortcakes in 30 minutes
My personal preference is freshly baked sweet biscuits – but don't think that means you have to plan this days in advance! You can decide you want strawberry shortcake for dessert and have it ready in 30 minutes.
Plus we're even macerating the strawberries to produce just enough sweet strawberry syrup, and making our own whipped cream. In 30 minutes.
Seriously? Seriously.
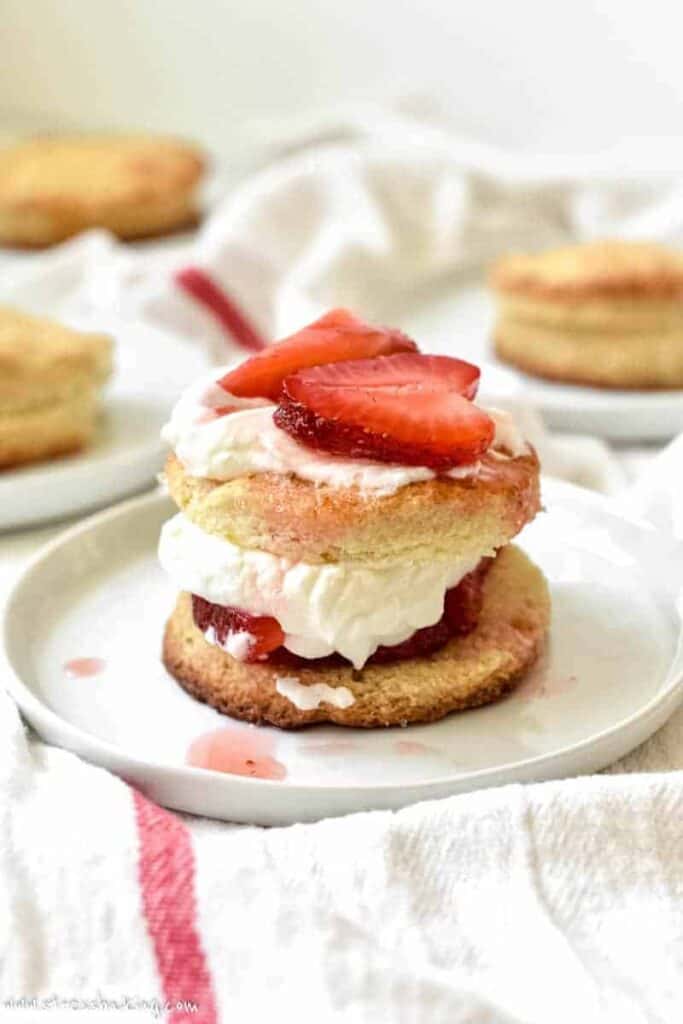
Let's start with the strawberries
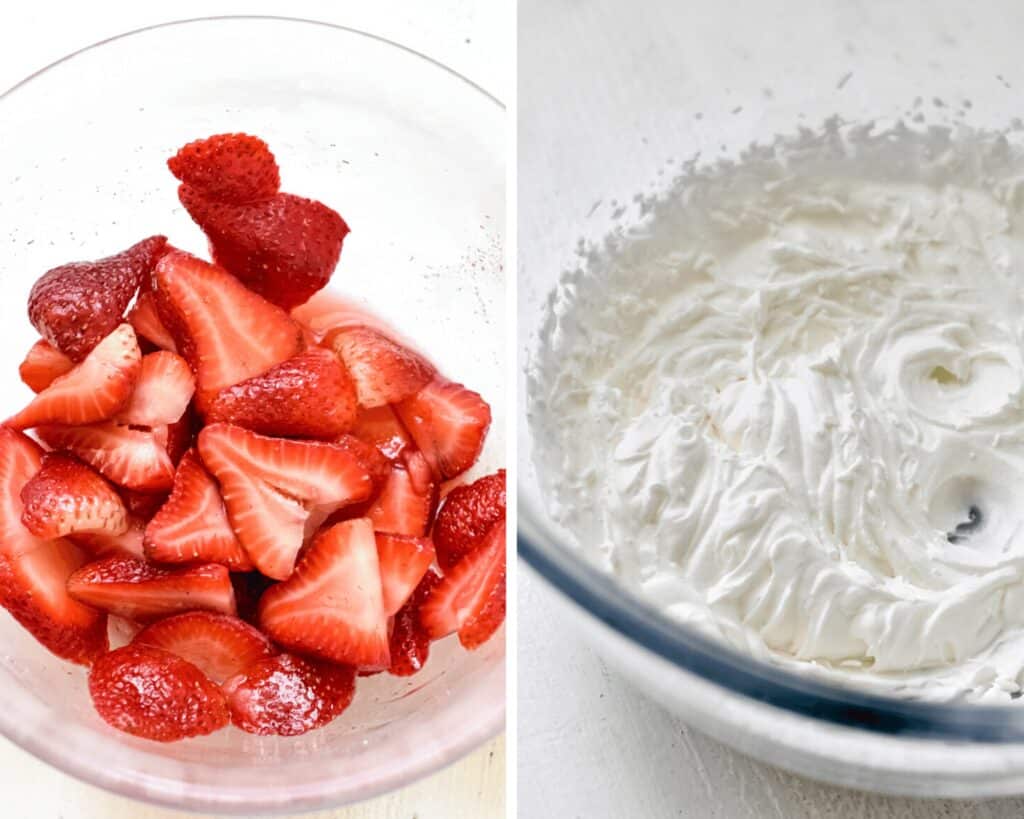
As I said before, the strawberries are the star of the show. Your first step will be to macerate the strawberries and let them do their thing while you work to make the biscuits and whipped cream.
What does it mean to macerate strawberries?
Sounds pretty violent or terrible, doesn't it? I've always found “macerate” to be an off-putting word. But it's basically the opposite of that and requires almost no effort at all.
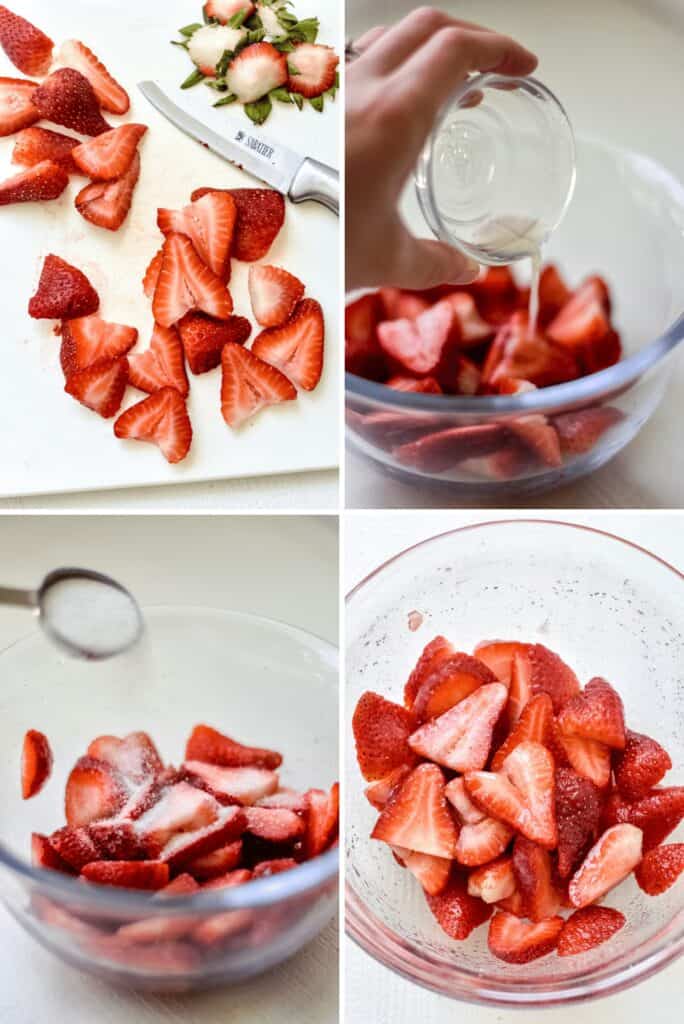
Macerating strawberries just means that you're soaking the fruit to soften it and release its juices. In the case of this recipe, we're going to toss them with a little lemon juice and granulated sugar.
This process not only draws out that liquid, but also sweetens the strawberries. And it's a no-fuss way of making a syrup to go with your shortcake, rather than a stovetop method where you have to have to heat it to reduce it down to a certain consistency, strain it, etc. etc.
I'm all about this two-in-one method.
Can I macerate the strawberries in advance?
You sure can! You can cover the bowl and keep them refrigerated for up to 24 hours before you're going to serve them. The bonus to making them in advance is that their flavors will become more intense and they will produce even more juices.
When you go to assemble your shortcakes, you may want to use a slotted spoon to drain the liquid out of the strawberries as you're plating.
I like to transfer the leftover syrup to a little tiny pitcher I have and let people add the amount of syrup they desire – some people like it more than others and want to control the amount of moisture and sweetness they're adding.
Just make sure before you've done any of this, you've hulled and sliced your strawberries!
How do you hull a strawberry?
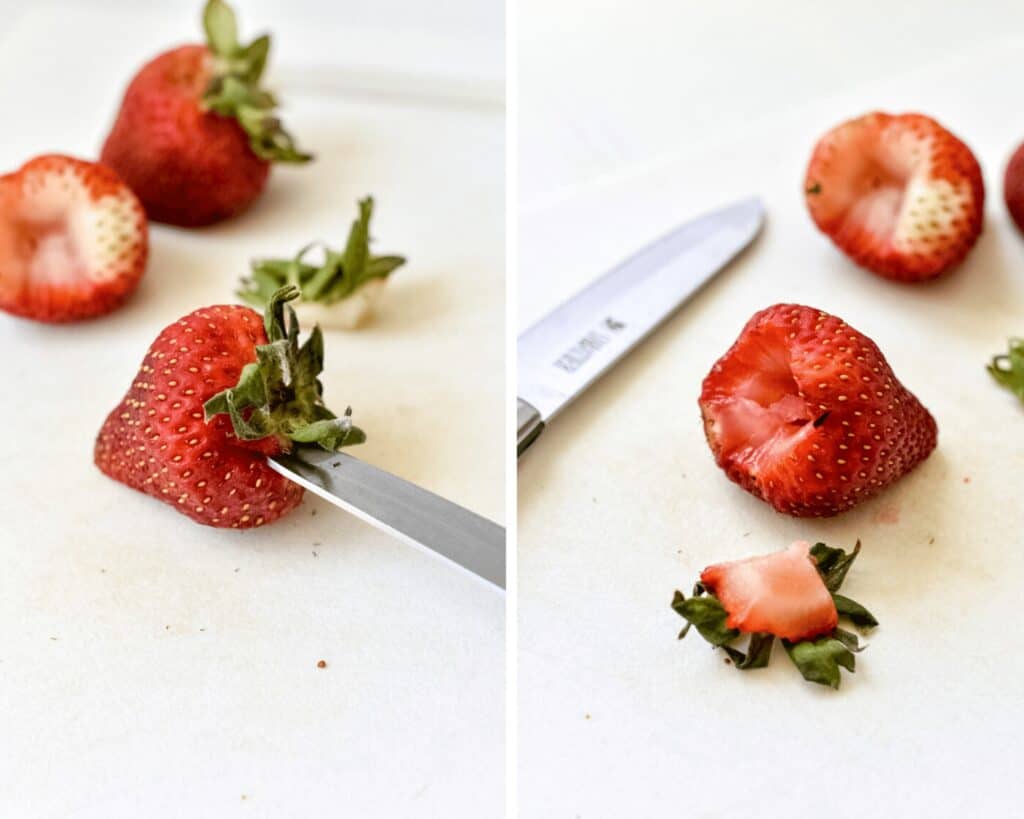
All you need is a pairing knife to hull a strawberry. Hold the strawberry in one hand and the knife in the other with the tip of the knife inserted into the top of the strawberry, slightly off-center from the stem. Angle the knife toward the center of the strawberry.
Turn the strawberry as you guide the knife around the stem (keeping it angled) and once you've made a full turn of the strawberry the stem cap should come right out! You'll have a little green stem with a cone-shaped center attached to it.
If you feel like that's too much trouble, you can also just slice off the top of each strawberry. You lose a little more of the strawberry this way, but if you're not concerned about that – go for it.
How to make homemade sweet biscuits
Okay, now let's talk about the biscuits. They're not sweet in the sense that it's like eating cake – they're just sweet enough to perfectly complement the juicy strawberries and slightly sweetened whipped cream.
The key is to let the strawberries be the star of the show – the rest of the ingredients are the backup dancers. Well prepared, but humble.
For my method, you'll need 8 ingredients and a food processor. I want to walk you through the steps to explain the importance and reasoning behind all of it so that you fully understand why we're doing what we're doing.
Note: If you don't have a food processor, you can whisk together the dry ingredients by hand and cut in the butter with a pastry cutter – but the food processor is what makes this such a quick recipe.
Biscuit dough prep
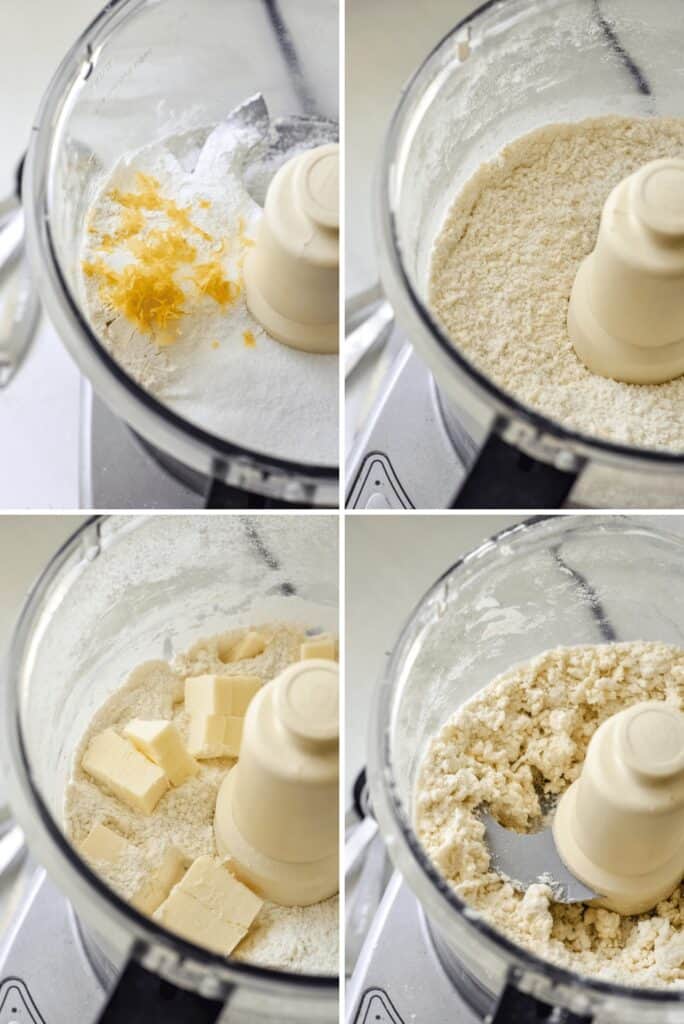
While your oven is preheating to 425°F, combine the flour, sugar, baking powder, lemon zest, and salt in the food processor and pulse a few times to combine everything.
Then you'll add the cold butter and pulse again until you have a coarse crumb. You don't need to worry about dicing the butter into super small cubes – just slicing it into tablespoon-sized squares will do just fine.
Then you'll add heavy cream and pulse to create a dough. It's going to be a bit crumbly, and that's what we want!
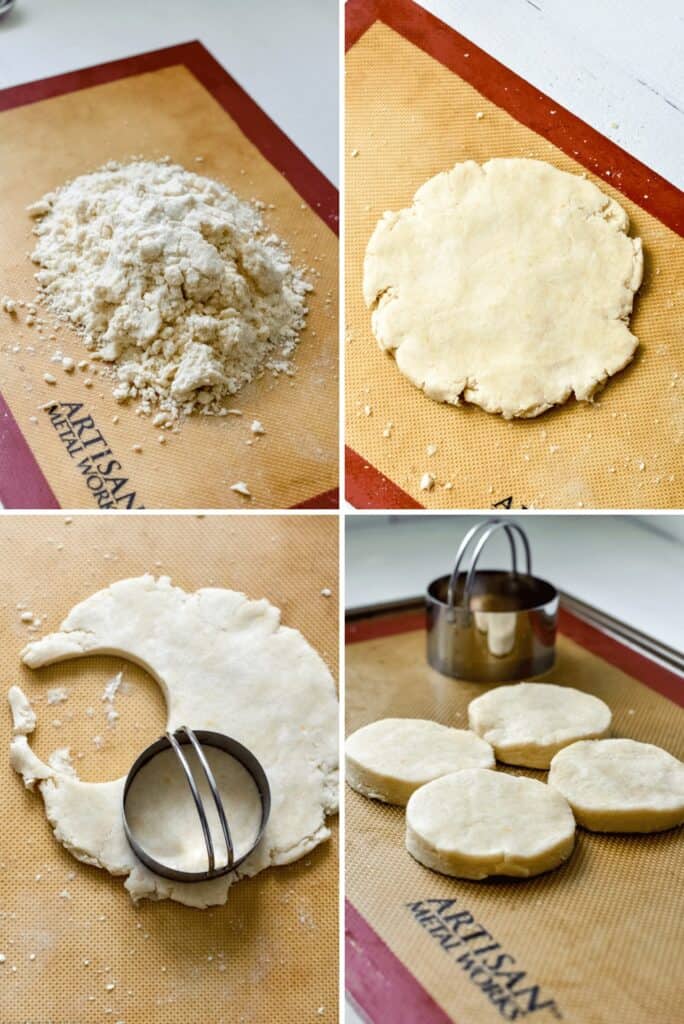
You'll turn it out onto a large silicon mat or other clean surface and shape into a ball. If you find it's not quite coming together after kneading, add a teeny bit more heavy cream and knead to combine.
Now flatten into a ~1/2″ high disc. It doesn't need to be exact – you just don't want it to be too thin, because then your biscuits will look more like coasters.
Cut the biscuits
Use a ~3″ biscuit cutter or the top of a drinking glass to cut out 4 circles (re-rolling the dough as needed). You may end up with enough dough to make 5 or 6 depending on the cutter you're using.
Press straight up and down with the cutter – don't twist! Twisting will seal the edges of the biscuits and preventing them from getting the best rise in the oven.
Place the biscuits on a baking sheet lined with a nonstick silicone mat, making sure the insides of biscuit are touching. The same way that when you make cinnamon rolls, you press the inside edges against each other.
Why do the biscuit edges need to be touching?
When you set the biscuits on a baking sheet together, you place them with the inside edges touching one another because that causes them to cling to each other and rise taller.
They're each other's little support system! Isn't that just the cutest thing?
Coat with cream, sprinkle with sugar
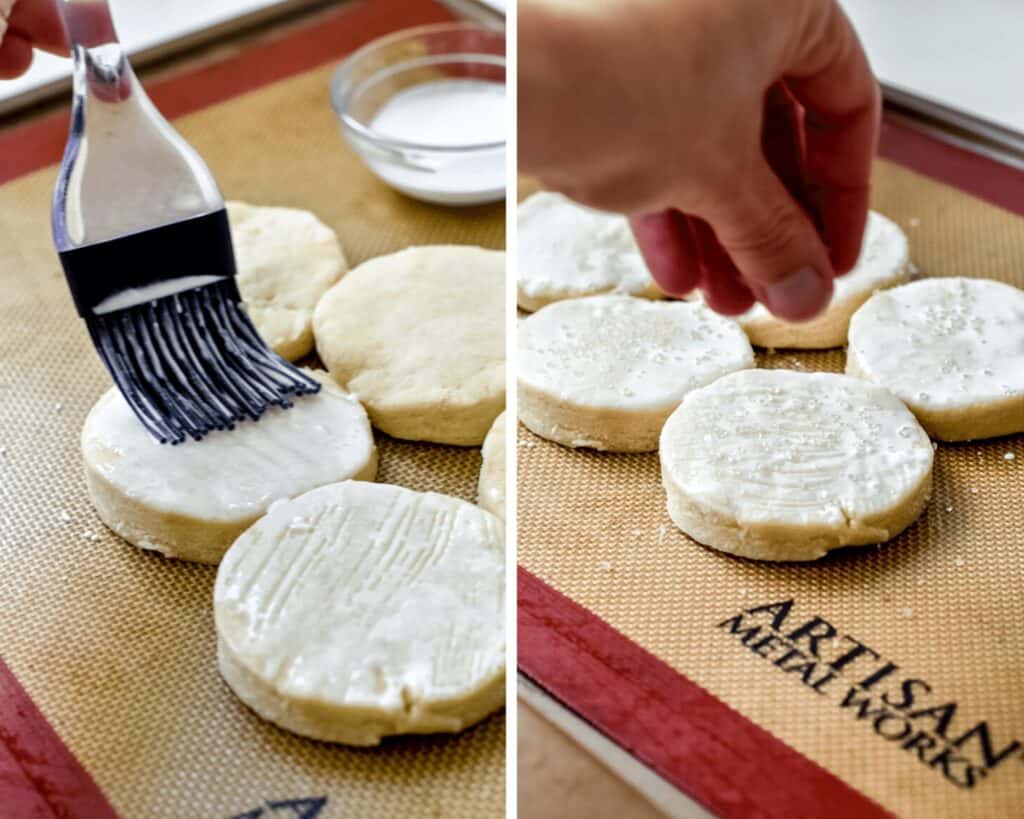
Use a pastry brush to coat the tops of each biscuit with a little heavy cream. Then sprinkle with coarse sugar – not a requirement, but good gravy do I recommend it. It provides a nice crunch to each bite.
Now you'll bake them for 15 minutes or until the biscuits are golden brown. Let them cool on the baking sheet while you make the whipped cream.
Last, but not least – the whipped cream
Homemade whipped cream is easier than you might think.
In a medium bowl using an electric mixer, you'll just beat heavy cream, granulated sugar, and vanilla together on medium speed to combine, then increase to high and beat until soft peaks form.
That's it! You can also make the whipped cream ahead of time and just give it a quick re-whip before serving.
Assembling strawberry shortcakes
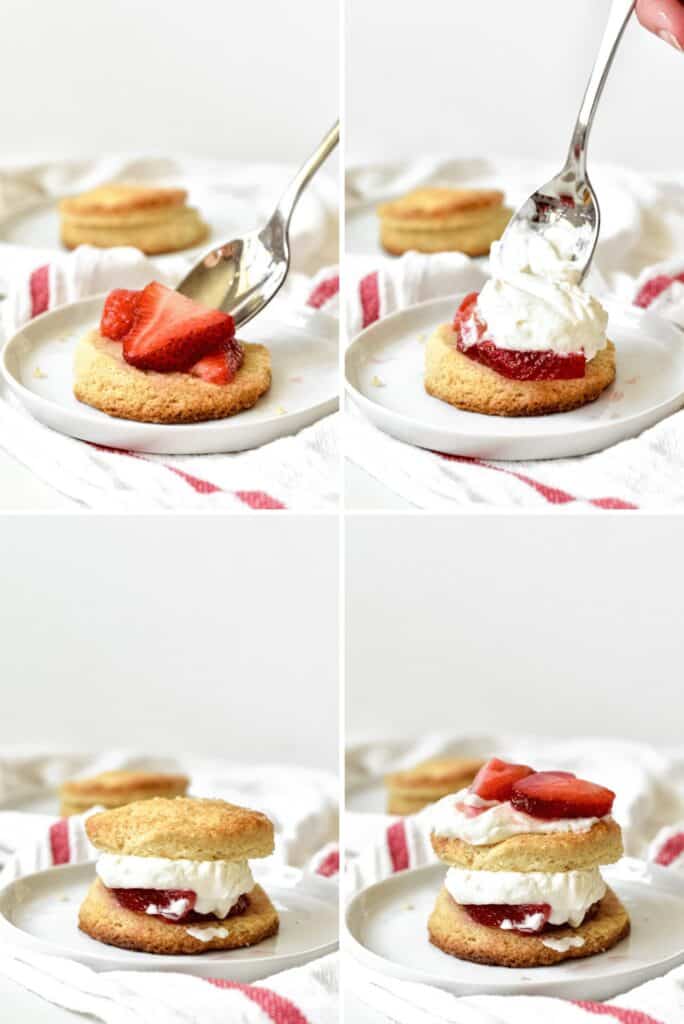
Now for the fun part! Get your serving plates ready to go, and slice each of your freshly-baked sweet biscuits in half.
- Place the bottom half of the biscuit on each plate.
- Add a layer of strawberries.
- Add a layer of whipped cream.
- Top with other half of the biscuit.
- Add another layer of whipped cream and strawberries.
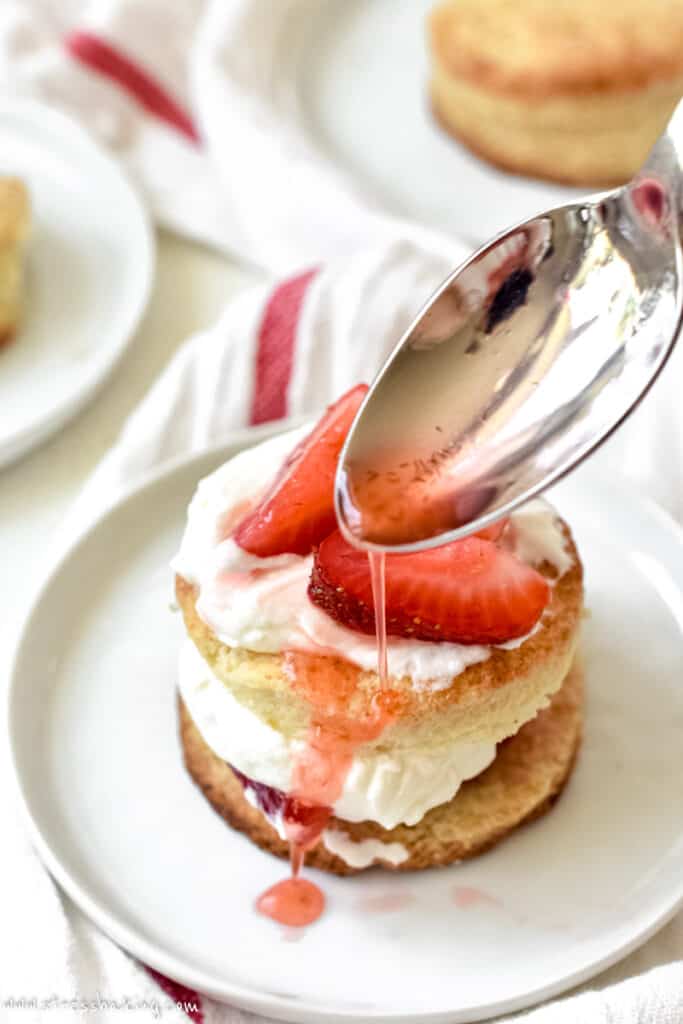
All you need to do now is add a hearty drizzle of your strawberry syrup, and dig in!
Strawberry shortcakes need to be served immediately so they don't get mushy and wet – but I don't think you're going to have any problem finding people to put these bad boys away.
Serving a crowd
This recipe is purposely written as a small batch recipe. But if you have a larger family, are having friends over, or are just having a day (treat yourself!) and need more than 4-6, you can simply double the recipe. No other adjustments are needed.
Try making a DIY strawberry shortcake bar to let people control their proportions! Add a pitcher of blood orange sangria, peach rosé sangria, or raspberry rosé sangria to the table for a colorful pairing! Strawberry basil margaritas go together with this dessert beautifully, too.
Leaving a comment and star rating is a great (and free) way to support Stress Baking. After you've enjoyed this recipe, click on the stars below and leave a comment to share your experience – thank you!
Small Batch Strawberry Shortcakes
Ingredients
Macerated Strawberries
- 2 cups fresh strawberries, hulled and sliced (about 10 strawberries)
- 1 teaspoon lemon juice, about half a lemon
- 2 Tablespoons granulated sugar
Sweet Biscuits
- 1 cup all-purpose flour
- 2 Tablespoons granulated sugar
- 2 teaspoons baking powder
- 1 teaspoon lemon zest
- ¼ teaspoon kosher salt
- ¼ cup unsalted butter, cold and cubed
- ⅓ cup + 2 teaspoons heavy cream, divided
- coarse sugar, for sprinkling
Whipped Cream
- ⅓ cup heavy cream
- 1 Tablespoon granulated sugar
- ¼ teaspoon pure vanilla extract
Instructions
Strawberries
- In a medium bowl, toss strawberries with lemon juice. Sprinkle the tops with the granulated sugar and toss again to combine.2 cups (288 g) fresh strawberries1 teaspoon lemon juice2 Tablespoons granulated sugar
- Cover and place in the fridge to let the juices release while you make the rest of the shortcake ingredients.
Sweet Biscuits
- Preheat oven to 425°F. In a food processor, combine flour, sugar, baking powder, lemon zest and salt and pulse to combine.1 cup (125 g) all-purpose flour2 Tablespoons granulated sugar2 teaspoons baking powder1 teaspoon lemon zest1/4 teaspoon (¼ teaspoon) kosher salt
- If you're not using a food processor, whisk to combine in a large bowl.
- Add the butter to the food processor and quickly pulse a few times until a coarse crumb forms. Pour 1/3 cup heavy cream into food processor and pulse only until just combined – you don't want to overwork the dough.1/4 cup (56 ¾ g) unsalted butter1/3 cup (79 ⅓ g) + 2 teaspoons heavy cream
- If you're not using a food processor, use a pastry cutter or fork to cut the butter into the dry ingredients. Then pour heavy cream into bowl and stir until combined.
- The dough is going to be crumbly and that's how it should be! Turn the dough out onto a large silicon mat or other clean surface and shape into a ball. If you find it's not quite coming together after kneading, add a teeny bit more heavy cream and knead to combine. Flatten into a 1/2″ high disc.
- Use a 3″ biscuit cutter or the top of a drinking glass to cut out 4 circles (re-rolling the dough as needed). Press straight up and down with the cutter – don't twist.
- Place the biscuits on a baking sheet lined with a nonstick silicone mat, making sure the insides of biscuit are touching.
- Use a pastry brush to coat the tops of each biscuit with the remaining 2 teaspoons heavy cream. Sprinkle with coarse sugar, if using.1/3 cup (79 ⅓ g) + 2 teaspoons heavy creamcoarse sugar
- Bake for 15 minutes or until the biscuits are golden brown. Let cool on the baking sheet while you make the whipped cream.
Whipped Cream
- In a medium bowl using a hand mixer, beat the heavy cream, sugar and vanilla together on medium speed to combine, then increase to high and beat until soft peaks form.1/3 cup (79 ⅓ g) heavy cream1 Tablespoon granulated sugar1/4 teaspoon (¼ teaspoon) pure vanilla extract
Assemble your strawberry shortcakes
- Pull apart or slice each biscuit in half, horizontally.
- On the bottom half of the biscuit, add a layer of strawberries and whipped cream, then top with the other half of the biscuit.
- Add another dollop of whipped cream and more strawberries if desired. Drizzle with the strawberry syrup leftover from the strawberries. Serve immediately and enjoy!
Video
Nutrition Facts
Nutrition Disclaimer
The provided nutrition information is generated by an automatic API and does not take variations across specific brands into account. This information is provided as a general guideline and should not be treated as official calculations. Learn more here.


This was so easy and quick to make and was absolutely delicious! I look forwards to making it for guests!
Scrumptious!
Just the right size recipe.
I followed the recipe almost perfectly the first time, but changed it up after that.
I have made this three times in less than one week!
I substituted half-and-half since I didn’t have heavy cream. I melted the butter then stirred it into cold half-and-half which makes the butter solidify into tiny bits. Then I added that mixture to the dry ingredients.
I’m so glad you enjoyed them! :)
All these years I didn’t know that the term for the strawberry deliciousness was “macerating”, I feel smarter already.
Love the easy to follow recipe and the step by step instructions. The pictures alone made me excited to try this!
Absolutely amazing! I’m new to baking and I appreciated all of the really good tips and easy to follow instructions on this post. I don’t usually feel this confident about attempting something new so big thanks for that! And the final product was so dang delicious! Like something my grandmother would make
I’m so glad that the post helped you feel more confident in your baking abilities, AND that you enjoyed the recipe, Erin!
Love love LOVE this recipe! So tasty, and perfect on a warm, summer day. Glad you shared this one!
I’m so glad you like it – thanks so much for the comment and rating, Tegan!
Absolutely stellar, simple and delicious. Thank you so much for this recipe, Leslie!!
Ah, you’re so welcome! Thanks for leaving a comment and rating, Jim!
Suggestion: give us an alternate recipe like I fondly remember my grandmother made for just me as a kid. Imagine her in our bare-bones 1950s kitchen without food processor, heavy cream, lemons, unsalted butter, etc. All I remember is how she held the dough in her hands and sprinkled a generous amount of sugar on it and squeezed it to mix. The result was a natural formed shortcake, not perfectly round. The strawberries were already prepared in a bowl with sugar and lots of juice. It seems like this was all done while I was eating lunch.
The strawberries were already prepared in a bowl with sugar and lots of juice. It seems like this was all done while I was eating lunch and she knew what to do without looking up a recipe.
I was amazed and it was the best strawberry shortcake I’ve ever had!
Thanks!
Hi Kent,
I’m glad you enjoyed the strawberry shortcakes your grandmother made, but I couldn’t provide an alternate recipe that would match your own family’s since I didn’t experience it personally :) This is the recipe I make and love with the intention to make it quick and easy – and respectfully, I don’t think it’s fair to give my own personal homemade recipe a low rating just because it’s not the same as the one you grew up with.
Regardless, I hope you’re able to find your own family recipe that you loved so much so you can make that one and enjoy the nostalgia!