Star Wars Fan Candy

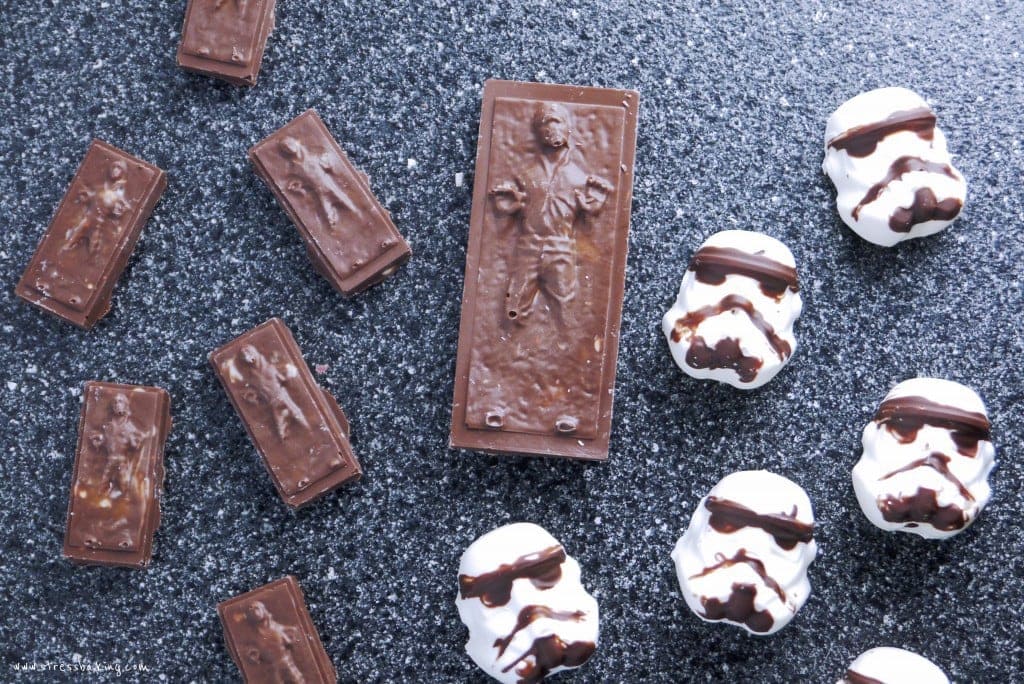
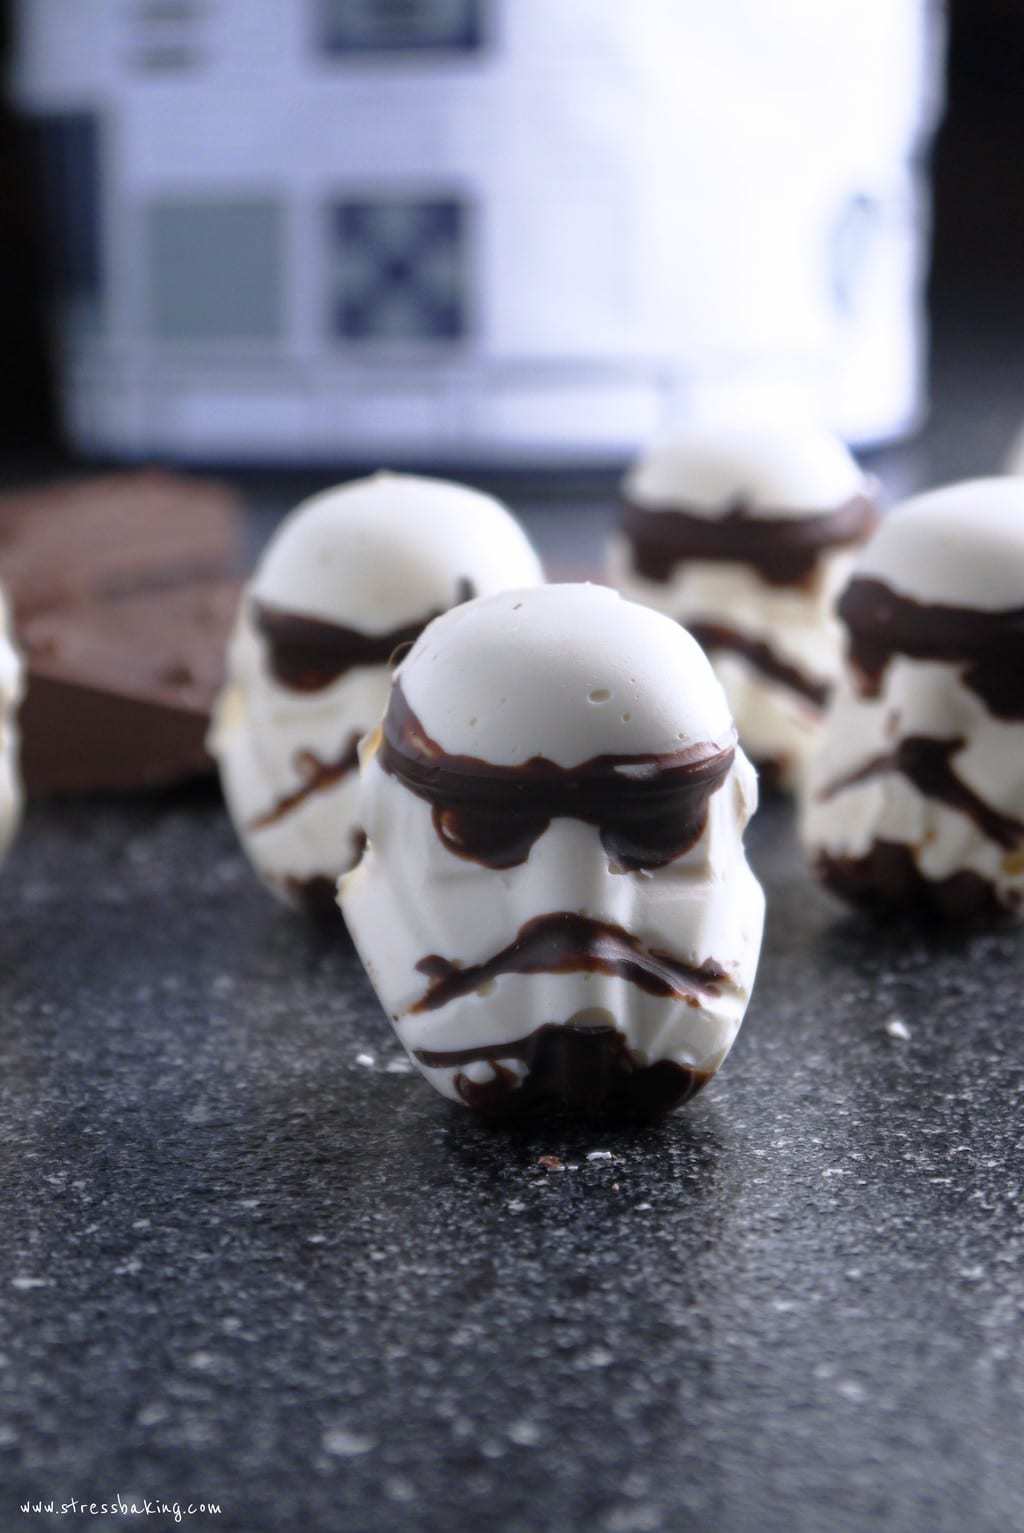
Celebrate Star Wars with White Chocolate Storm Troopers and Caramel-filled Dark Chocolate Han Solos (in Carbonite, no less)!
The day that all Star Wars fans have been waiting for is here! If the force is not strong with you and you're unaware, December 18th is the release date for Star Wars Episode VII: The Force Awakens. Nerds everywhere rejoice! I'm allowed to say that, because I'm one of them.
To commemorate the day I decided to make a batch of Star Wars candy – specifically, White Chocolate Storm Troopers and Caramel-filled Dark Chocolate Han Solos in Carbonite.

I like to call them “perfectly imperfect”. It was late, I'd had a few glasses of wine, and I was running dangerously low on supplies.
Plus, I was jittery with excitement about the movie release. Isn't making Star Wars candy at 2AM what everyone does on a Thursday night?
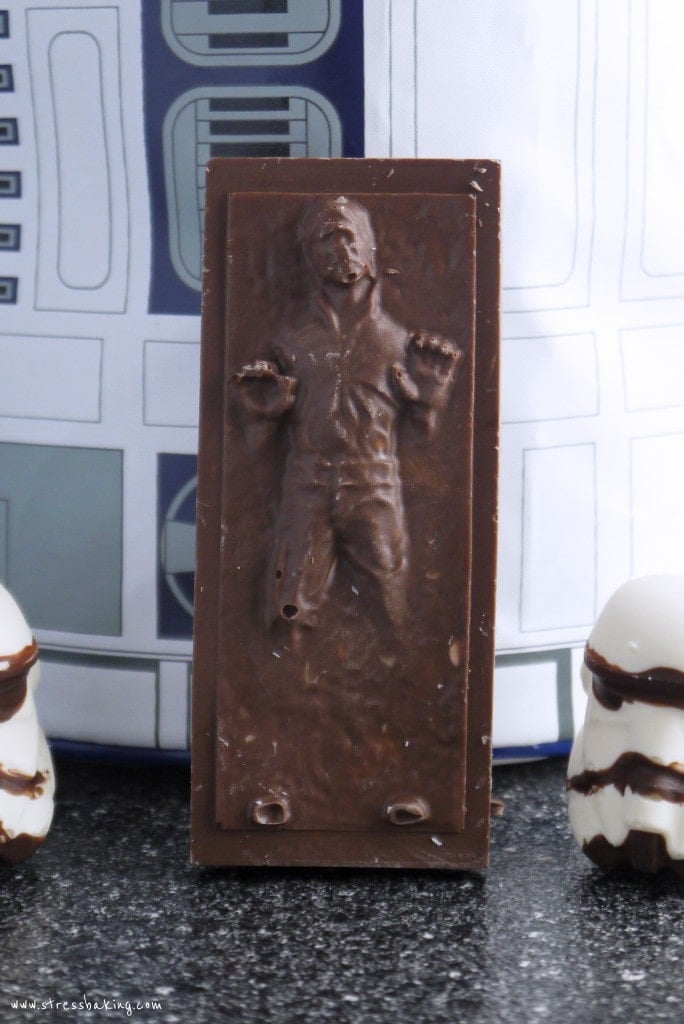
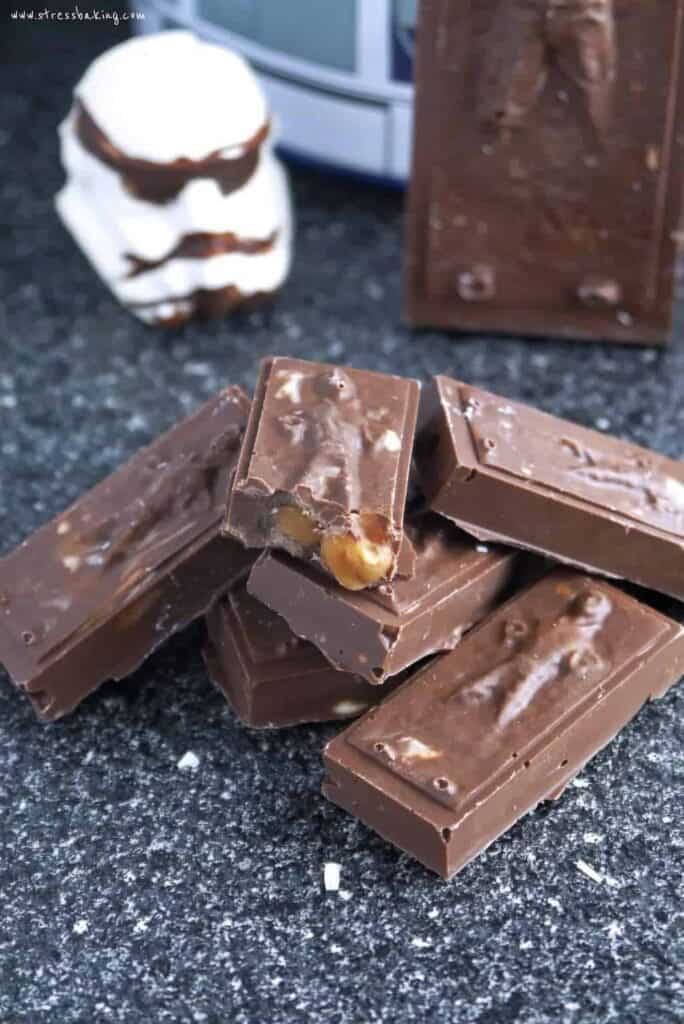
Did you know that Han Solo doesn't bleed, he actually oozes caramel? Well, now you do.
Second only to ice cream, he's the most delicious “frozen” treat in my house.
Side note: If you're looking for these molds, I found these silicone Star Wars molds on Amazon.

This recipe is highly customizable
You can choose from all the different kinds of silicone Star Wars mold, different kinds of chocolate melting wafers (I'm a dark chocolate fan myself), and whether or not you want to include caramel in the middle (but seriously, just do it).
You could add sprinkles, you could dip them into another layer of chocolate if you wanted to (you'd lose some of the detail from the molds though – be warned)… you can frankly do whatever you want.
That means the nutrition information is all over the place and your results and mileage may vary – but that's also what makes it fun!
Want more Star Wars?
Scroll near the bottom of my no chill sugar cookie post for a surprise ;)
Leaving a star rating is a great (and free) way to support Stress Baking! ❤️ After you've made this recipe, please consider clicking on the stars below to share your experience!

Description
Equipment
Ingredients
- Melting chocolate wafers, any kind/colors you'd like – I recommend white chocolate for the Storm Troopers!
- Caramel sauce, if homemade, make sure it's cooled to room temperature
- Sprinkles or any other desired decorations
Instructions
- Melt chocolate wafers according to the instructions and pour into molds. If you want to decorate faces and other details, just use a toothpick or a small (clean and food safe) paintbrush to color in what you'd like on the inside of each mold with your desired chocolate/sprinkles/etc. first before pouring in the rest of the chocolate.
- Place in fridge to let them set completely, at least 2 hours.
- Pop them out and enjoy!