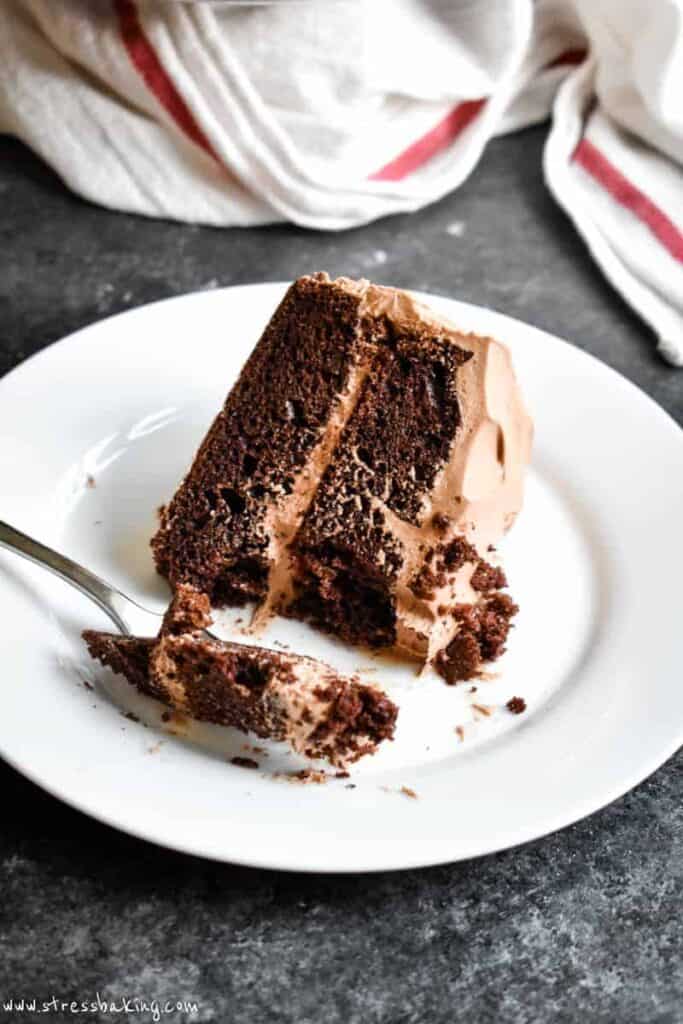
Double Chocolate Layer Cake (Chocolate Mayonnaise Cake)
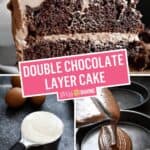


This is my favorite chocolate cake recipe because it's easy to make, ready in under an hour, and reminds me of the famous Portillo's chocolate cake from Chicago! You might know this as “chocolate mayonnaise cake” – a moist chocolate cake, rich and chocolatey, covered in a thick layer of chocolate buttercream frosting, and layered for a decadent dessert. The perfect base for my homemade Portillo's Chocolate Cake Shake.

Don't run away just because of the name! Mayonnaise is an ingredient that's doing triple duty, and you would never know that it's included if I didn't tell you.
Which I have to… so you can make it… yeah.

But really… mayonnaise?
I rarely use mayonnaise unless I'm making a big batch of my copycat Ruby Tuesday pasta salad, and the other exception is this cake.
Mayonnaise is generally just a mix egg yolks, oil, vinegar and salt. And if you think about most cake recipes, they call for eggs, oil, salt and sometimes also vinegar – so the mayo is covering the jobs of all those ingredients at once!
So don't let the idea of adding mayo to this chocolate cake gross you out, because I promise there's no aspect of the completed cake that will deter you from falling in love with it.

Portillo's Chocolate Cake Copycat recipe
I call this my Portillo's Chocolate Cake copycat recipe. If you don't already know, I'm originally from Illinois and one of the things I miss the most about it (aside from the deep dish pizza because ooooooohmygod) is Portillo's.
Portillo's makes some of my favorites foods, and it's the first place I stop when I go to visit. I order the same thing every time:
- Italian Beef sandwich, dry with gravy on the side
- Cheese fries (crinkle fries, to be precise)
- Chocolate cake shake
- And depending on how long I'm sticking around town, maybe also a chocolate cake, to go
While I don't get to go home to Chicago often to indulge myself, the good news is that making my own decadent double chocolate layer cake at home couldn't be easier – you know, aside from asking someone else to make it.
Yep, we're using boxed chocolate cake mix
I normally wouldn't call for using a box mix, but it's honestly the easiest way to get the closest taste I want – so that's exactly what we're going to use!
Specifically, a box of Betty Crocker Super Moist Milk Chocolate cake mix. You could use a different brand, but to me this one is the best flavor.
How do you keep chocolate cake layers moist?
There are a lot of different things that go into ensuring a moist chocolate cake that isn't too heavy and doesn't crumble, which is why I love using some shortcuts in this recipe to help ensure success!
- Not over-measuring the flour. Since we're using boxed cake mix, all the measuring of dry ingredients (flour, cocoa powder, sugar, etc.) has been done for you! If you're unsure of the proper way to measure dry ingredients, check out this post for future reference.
- Avoiding overmixing the cake batter. This is also somewhat helped by using the dry mix, but still! Make sure that you're mixing together the ingredients until well combined, but you don't need to do it extra long for good measure or anything.
- Baking at the correct, consistent temperature. If you need help checking the calibration of your oven, I have a post about how to do that! Aside from that, just make sure that you're not opening and closing the oven while it's baking because that can drastically drop the baking temperature and those fluctuations can cause uneven results.
- Don't overbake! I want to call this the most important tip, but really, they're all important. You'll want to bake the cake for 25-30 minutes or until a toothpick inserted into the center comes out with moist crumbs. I know some recipes call for the toothpick to come out clean, but I find if it goes that long that it's overdone and potentially dry.
- Add plenty of frosting. You might not realize it, but adding the layer of frosting in between the two cake rounds, as well as frosting the top and sides of the cake helps provide and retain moisture!

How to level a cake
Use a cake leveling tool. I like to use a cake leveler like this – you just adjust the height on each side and hold on to the top while you glide it through the cake from one side to the other.
Use a serrated knife. Place your knife at the edge of the cake dome and hold the blade parallel to the counter while you slice into the cake a few inches. Now remove the blade, turn the cake a quarter turn and do the same thing again. Work your way the rest of the way around the cake, and then take one final parallel slice all the way through to remove the top.
Use a ruler, toothpicks and unflavored dental floss. You may have seen this viral hack in a video at some point. You use a ruler to measure up from the bottom of the cake and insert a toothpick where you want the layer that's going to be removed.
Turn the cake an eight turn and do the same thing, all the way around. Now wrap the dental gloss (again – unflavored, my friends) around the cake, resting on top of each toothpick. Cross the ends of the floss and pull straight across – this will pull the floss through and slice the cake.
For what it's worth, this will be the least clean of the three methods, but hey – a hack is a hack, right?
How to frost a layer cake
There's no need to be intimidated by decorating a layer cake! Especially this one – we're not doing any crazy fondant, or intricate piping.
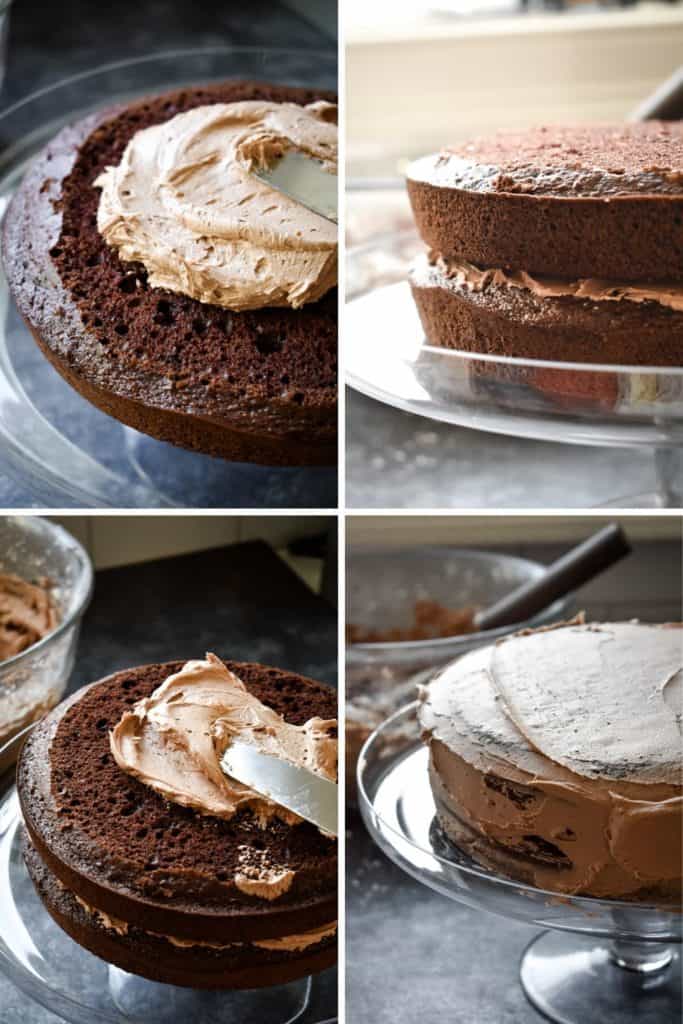
- Use an icing spatula to spread about 1/3 of your frosting on top of the first layer of cake, within about 1/4″ around the edge.
- Place the second layer on top, making sure you have it centered and lined up with the bottom layer.
- Coat the sides of cake with a thin layer of frosting – this is called the “crumb layer” or “crumb coat”. It seals in any crumbs that might manifest as you're frosting.
- Now you'll frost the outside of the cake with the rest of your frosting, in whatever way you'd like!

Decorating a chocolate layer cake
To be completely honest, I like to use the cake tops that are leftover from when we leveled the tops of the cake rounds as a decoration, because it's simple and avoids waste.
Just crumble them and place them on top – boom, decorated!
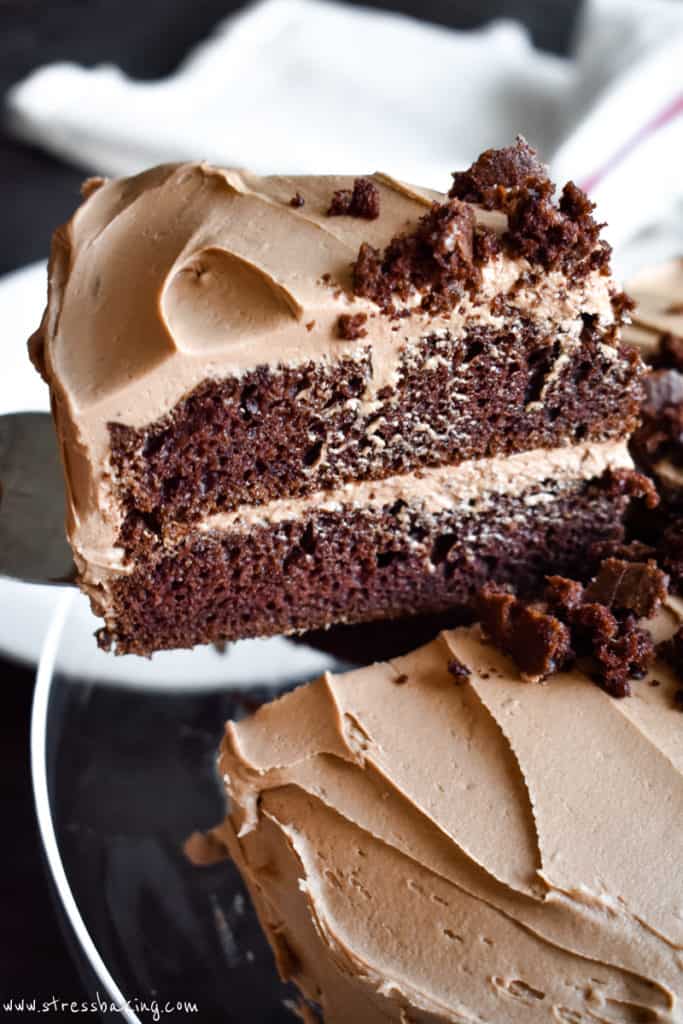
The result is a moist, rich, double chocolatey layer cake with a beautifully thick layer of chocolate buttercream frosting.
How many slices does this recipe make?
This is the kind of cake that you probably want to slice into 16 thinner slices, instead of 8 large ones. It's indulgent and sweet enough that a larger slice is probably too much to handle.
… that's not to say I haven't eaten a big slice with reckless abandon. I just knew as soon as I was done that I probably should have had a little self control because the sugar rush isn't for the faint of heart!
How to store a chocolate layer cake
This isn't quite as simple as just sticking the frosted cake it on a covered cake stand and calling it a day – unless of course, you're hosting guests and it's gonna be gone quickly!
- If you're storing the assembled, frosted cake you'll want to cover the leftover cake tightly and store in the refrigerator for 5-6 days. I emphasize the “tightly” because you don't want cold air from the fridge to suck moisture out of it.
- If you're storing the baked and cooled cake layers before frosting, wrap each cake layer individually in plastic wrap and foil (and in a freezer-safe container) and freeze for up to 3 months. Bring them to room temperature before assembling and frosting.
- As for the frosting, you can make this up to 3 days ahead of time and store in an airtight container in the fridge. You may just need to get it a quick re-whip before using.
Use a slice for a chocolate cake shake!
Once you've served everyone at the table, consider throwing a slice of cake into a blender with chocolate ice cream to make my favorite chocolate cake shake.
I can't put into words how much I love it, so you'll just need to make it to experience it yourself.

Leaving a star rating is a great (and free) way to support Stress Baking! ❤️ After you've made this recipe, please consider clicking on the stars below to share your experience!
Double Chocolate Layer Cake (Chocolate Mayonnaise Cake)
Ingredients
Chocolate Cake
- 1 box 15.25 ounces Betty Crocker Super Moist Milk Chocolate cake mix
- 3 large eggs, room temperature
- 1 cup water
- 1 cup mayonnaise
Chocolate Frosting
- 10 ounces chocolate chips, semisweet, milk, or dark chocolate chips
- 1 ½ cups unsalted butter, room temperature
- 3 cups confectioners’ sugar (powdered sugar)
- 1 Tablespoon pure vanilla extract
Instructions
Chocolate Cake
- Preheat oven to 350°F. Spray two round cake pans with non-stick spray and set aside.
- In a large bowl, combine cake mix, eggs, water and mayonnaise and beat with a hand or stand mixer on medium speed until well combined.1 box (1) 15.25 ounces Betty Crocker Super Moist Milk Chocolate cake mix3 large (3) eggs1 cup (236 ⅗ g) water1 cup (224 g) mayonnaise
- Pour half of the batter into each of the prepared pans, and bake for 25-30 minutes or until a toothpick inserted into the center comes out with moist crumbs.
- Let cool in pans for 5 minutes, then carefully remove from pans and transfer to wire racks to cool completely.
- Once cooled, level off the top of one of the cakes (this will be your bottom layer). You can also level off both if you'd like the top to be flat as well. Set aside the pieces you've shaved off the tops and set aside.
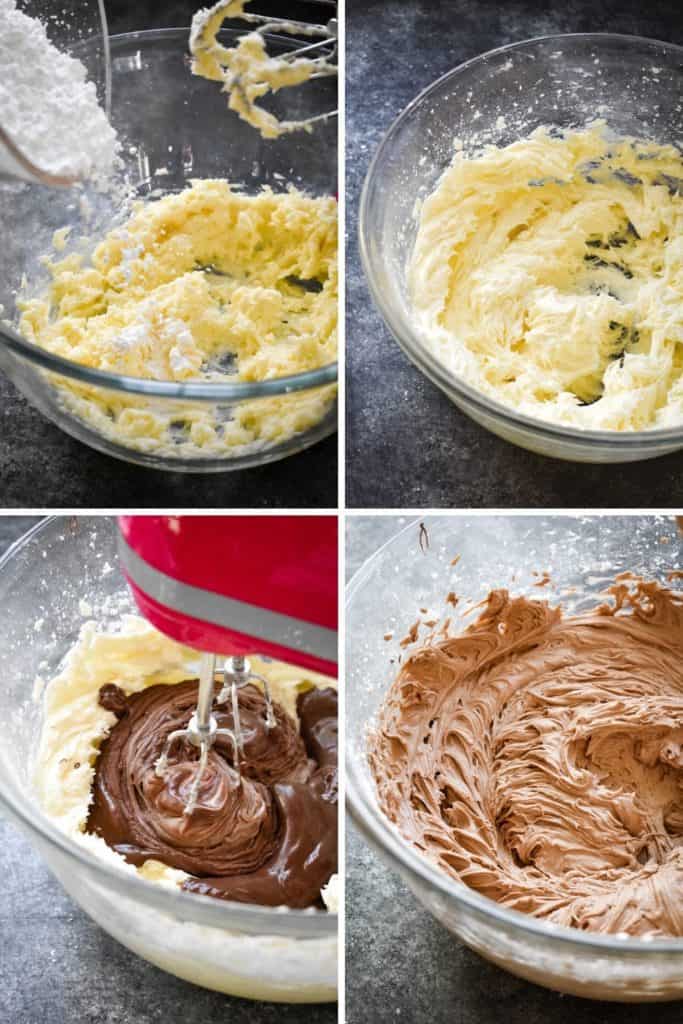
Chocolate Frosting
- In a double broiler or in the microwave, melt chocolate until smooth and set aside to cool.10 ounces (283 ½ g) chocolate chips
- In a large bowl, beat butter with a stand mixer or hand mixer until smooth.1 1/2 cups (340 ½ g) unsalted butter
- Add powdered sugar and beat until well combined, starting on low speed and increasing as the powdered sugar incorporates.3 cups (360 g) confectioners’ sugar (powdered sugar)
- Add vanilla extract and melted chocolate, and beat until well combined and smooth.1 Tablespoon pure vanilla extract
- Place the leveled off cake layer on a platter and frost the top with 1/3 of the prepared frosting. Top with second cake layer and frost the top and sides of both layers with remaining frosting.
Notes
- If you're storing the assembled, frosted cake you'll want to cover the leftover cake tightly and store in the refrigerator for 5-6 days. I emphasize the “tightly” because you don't want cold air from the fridge to suck moisture out of it.
- If you're storing the baked and cooled cake layers before frosting, wrap each cake layer individually in plastic wrap and foil (and in a freezer-safe container) and freeze for up to 3 months. Bring them to room temperature before assembling and frosting.
- As for the frosting, you can make this up to 3 days ahead of time and store in an airtight container in the fridge. You may just need to get it a quick re-whip before using.
Nutrition Facts
Nutrition Disclaimer
The provided nutrition information is generated by an automatic API and does not take variations across specific brands into account. This information is provided as a general guideline and should not be treated as official calculations. Learn more here.
This recipe is delicious!!! Being egg free I always get worried making changes but have found box mixes work best to adapt— and the mayo definitely helped bind it and not have it come out too “puddingy”… that’s a real word, I swear.
Used 9 tbsp of Just Egg to replace the 3 eggs and vegan mayo, but came out so good! Holds together well and using this as my wedding cake in a few weeks!
I love to hear this! I’m so glad the egg substitutes work for you and I hope it makes for a wonderful wedding cake – congrats!
Fantastic!
I’m so glad you like it – thanks so much for the comment and rating, Shawna!
Hi
Thank you for sharing your recipe but I’m in South Africa so can I use any cake mix or can you advise how much cake flour and cocoa to use instead of cake mix for this yummy chocolate mayonnaise cake please.
Hi Nazreen, thanks for reaching out – I love hearing from readers outside the US! You can use any chocolate cake mix you’d like, I just personally prefer the type listed in the recipe card as my favorite and most consistent results.
I love chocolate cakes, it gives me that yummy satisfaction. I have never had it double-layered with mayonnaise.
Thanks for sharing this recipe, am going to bake mine this weekend. My family is gonna love it.
I hope you all love it!
I absolutely did. My family loved it too. The feedback was amazing. Thanks for putting smile on our faces.