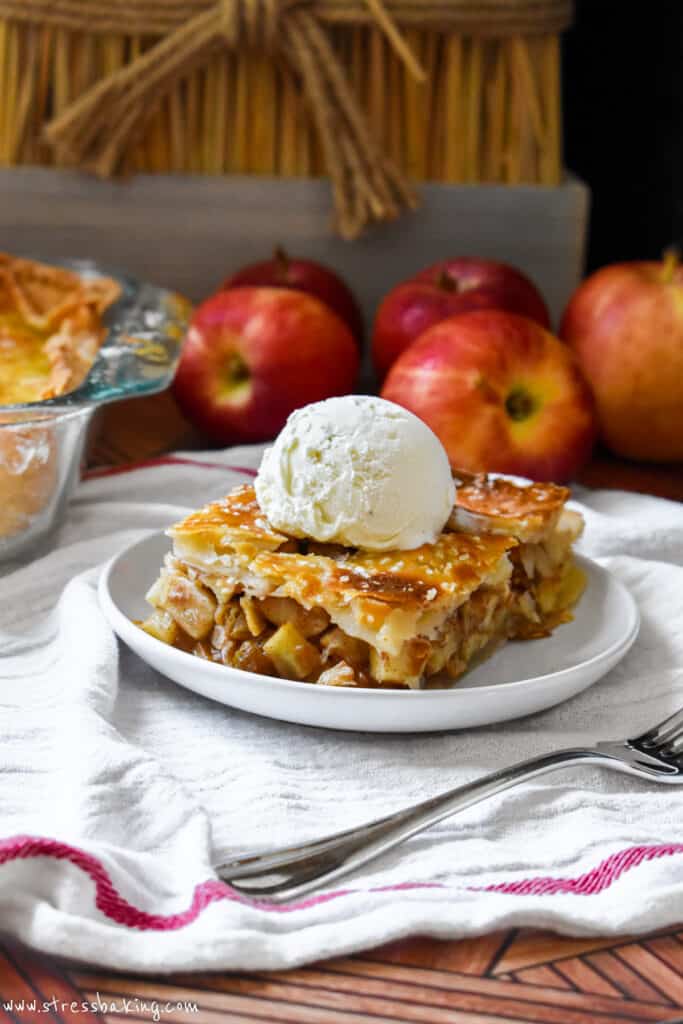
Deep Dish Apple Pie Recipe
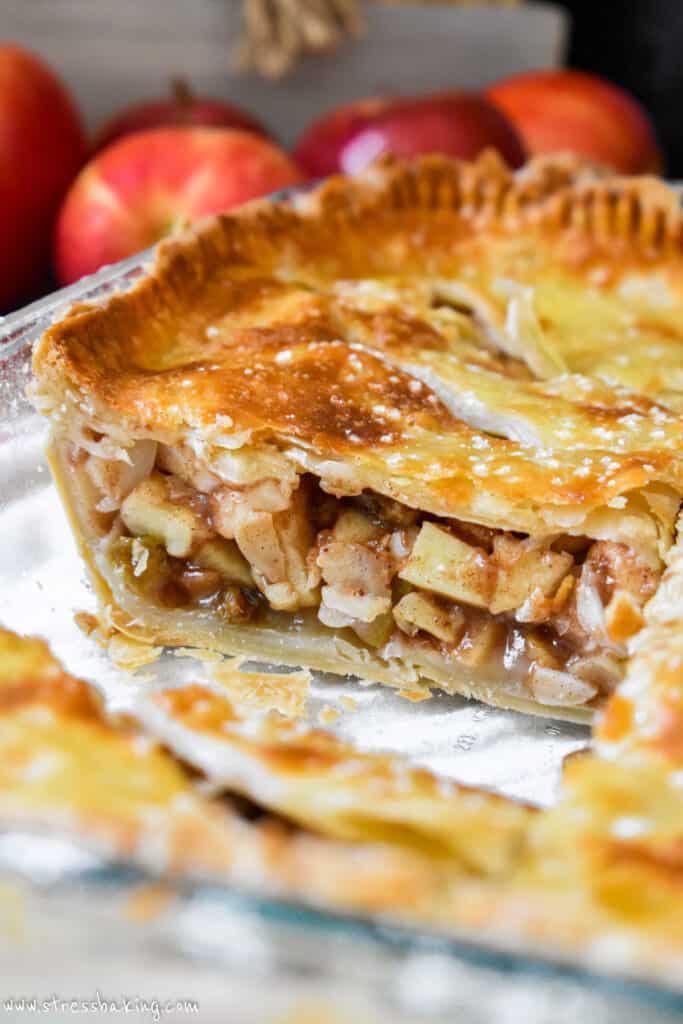
This deep dish apple pie has a flaky golden pie crust that is filled with 2″ of sweetly spiced, crisp apples and optional sliced almonds and golden raisins. Great for a crowd! For smaller portions, try my apple turnovers.
When it comes to apple desserts, I strongly believe in going big or going home. Though I guess in this case I'm going big at home, so… that expression doesn't really work.
That's why I couldn't just post a regular apple pie. Much like my favorite kind of pizza from my hometown, we're going deep dish.
What is a deep dish apple pie?
A deep dish apple pie is basically exactly what it sounds like: an apple pie made in a deep dish. In this case, we're making it in an 9″x13″ casserole dish, with apple pie filling two inches high.
How does a Dutch apple pie differ from a regular apple pie?
A Dutch apple pie has a sweeter streusel topping, while a regular apple pie (like this one) has a pastry, pie crust topping.
How to make a streusel topping
If you want to swap the pie crust topping in this recipe for a streusel topping, here's what you'll need:
- 1 cup all-purpose flour
- 1/2 cup old-fashioned oats
- 1/3 cup light brown sugar, packed
- 1/3 cup granulated sugar
- 1 teaspoon baking powder
- 1/2 teaspoon ground cinnamon
- 1/8 teaspoon ground nutmeg
- Pinch of salt
- 1/2 cup unsalted butter, melted
- In a medium bowl, combine all ingredients except for the melted butter and whisk to combine.
- Add the melted butter and stir to combine.
- Sprinkle the topping over your prepared apple pie, and bake!
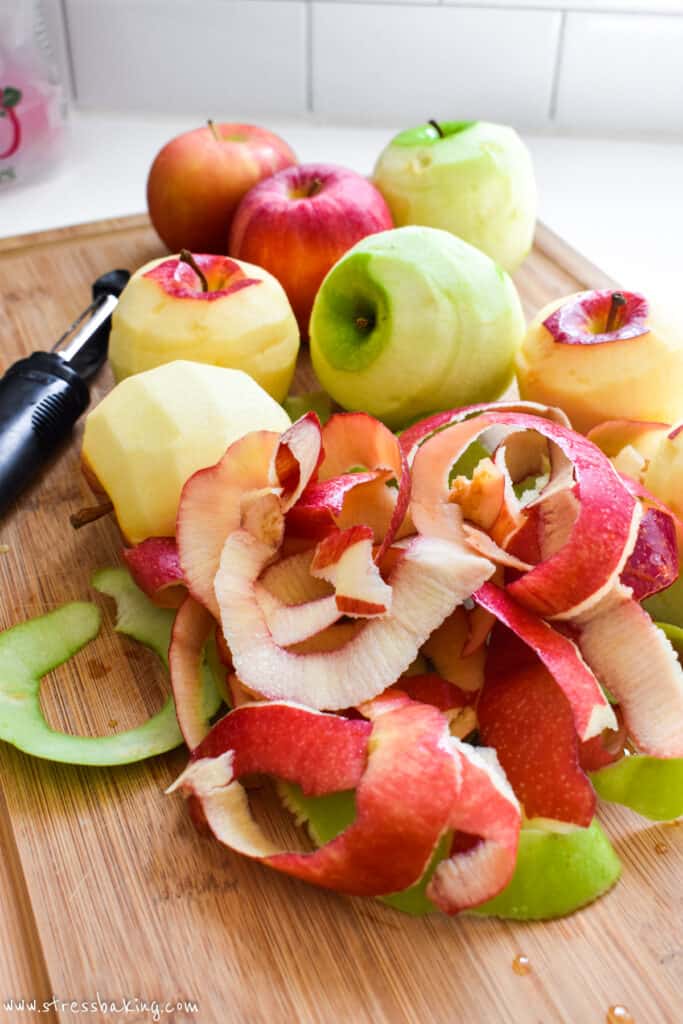
What kind of apples are best for apple pie?
The goal in picking your apples for your pie is to use an apple (or mix of apples) that can hold up to baking – because not all apples can!
- Granny Smith apples are tart and hold up well to baking.
- Honeycrisp apples are always in my fridge! They’re great for snacking because of their firm, crisp texture, but they’re also great for baking because they hold up well and have a sweet flavor.
- Pink Lady apples are also a great snacking apple, are crisp, and have a good combination of sweet and tart flavors.
- Braeburn apples are usually easy to find, they’re crisp, have a strong flavor and hold up well to baking without getting mushy.
- Gala and Golden Delicious apples are also usually pretty accessible, have more mild flavors and hold up well in the oven.
How to make deep dish apple pie
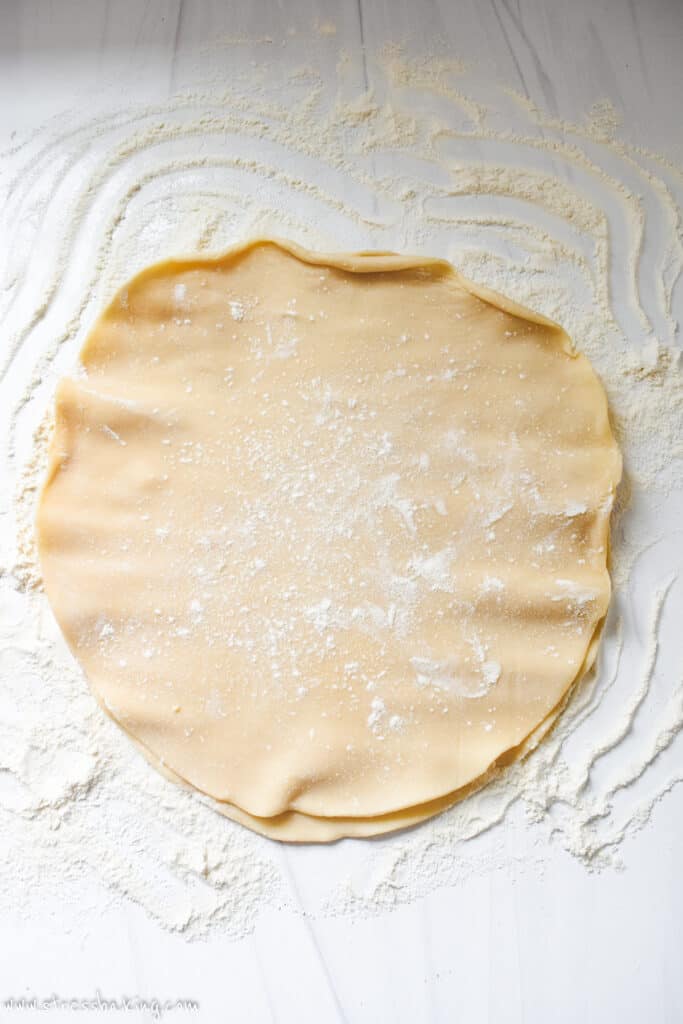
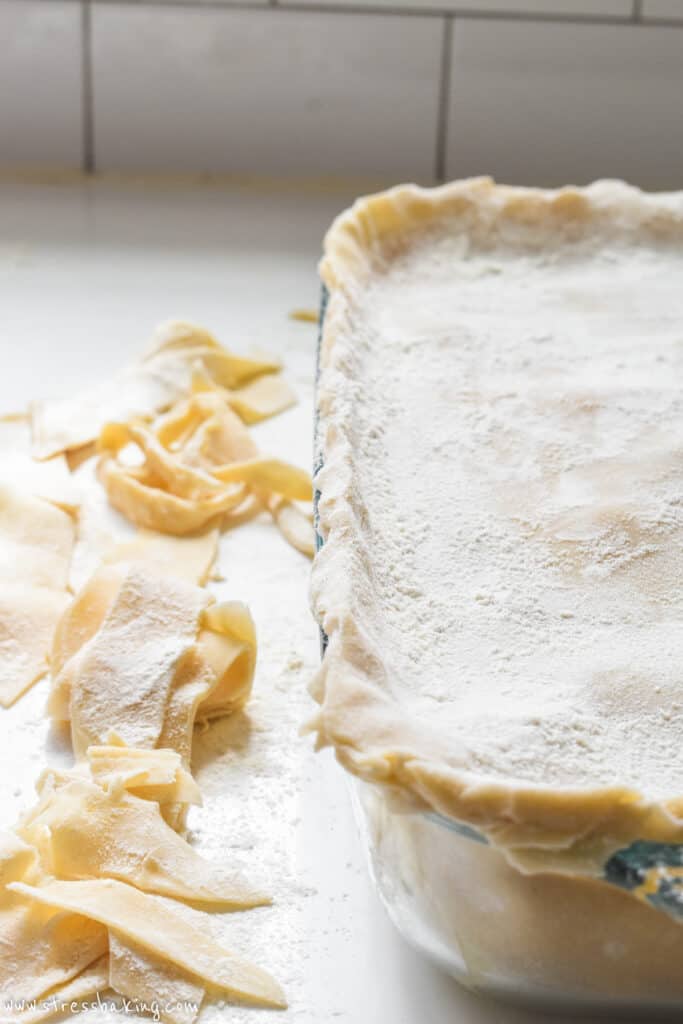
Step 1: Remove the crusts from one box (2 pie crusts in total). On a lightly floured surface, unroll and stack the two crusts on top of one another.
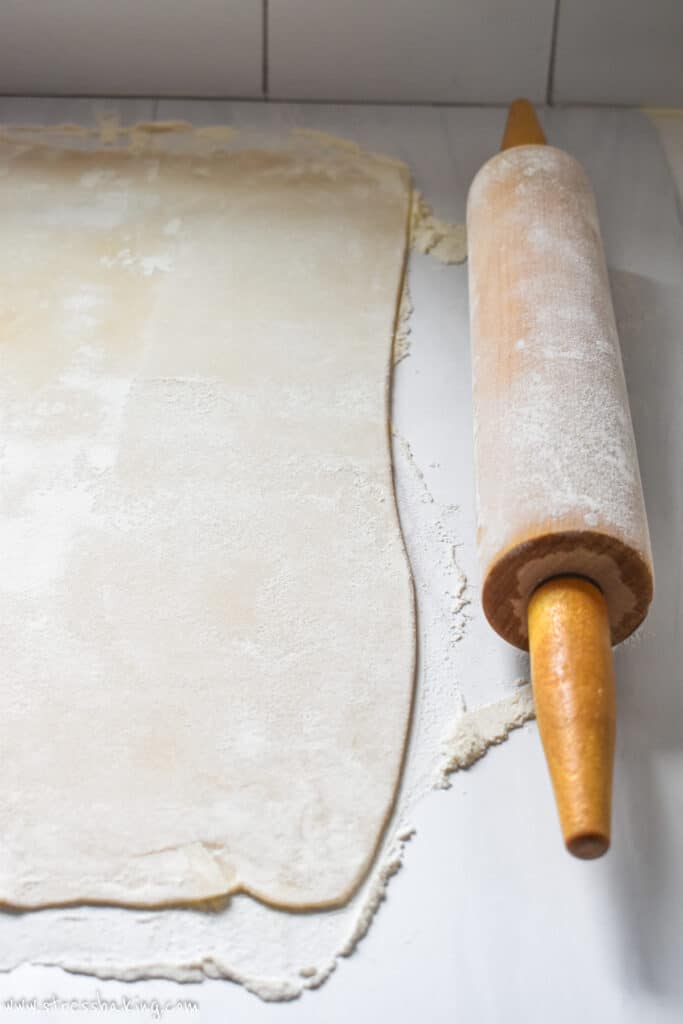
Step 2: Roll into a 12″x18″ rectangle.
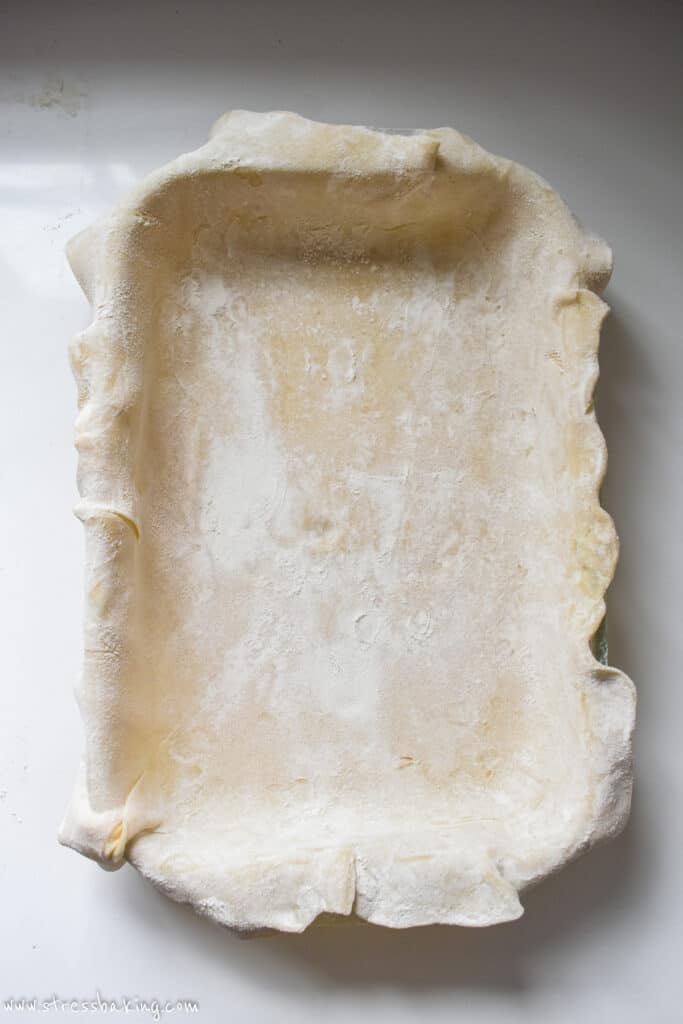
Step 3: Press into a 9″x13″ pan so that it's firmly pressed into the bottom and sides, with a slight overhang on the edges. Repeat this process for the remaining 2 crusts and set them aside.
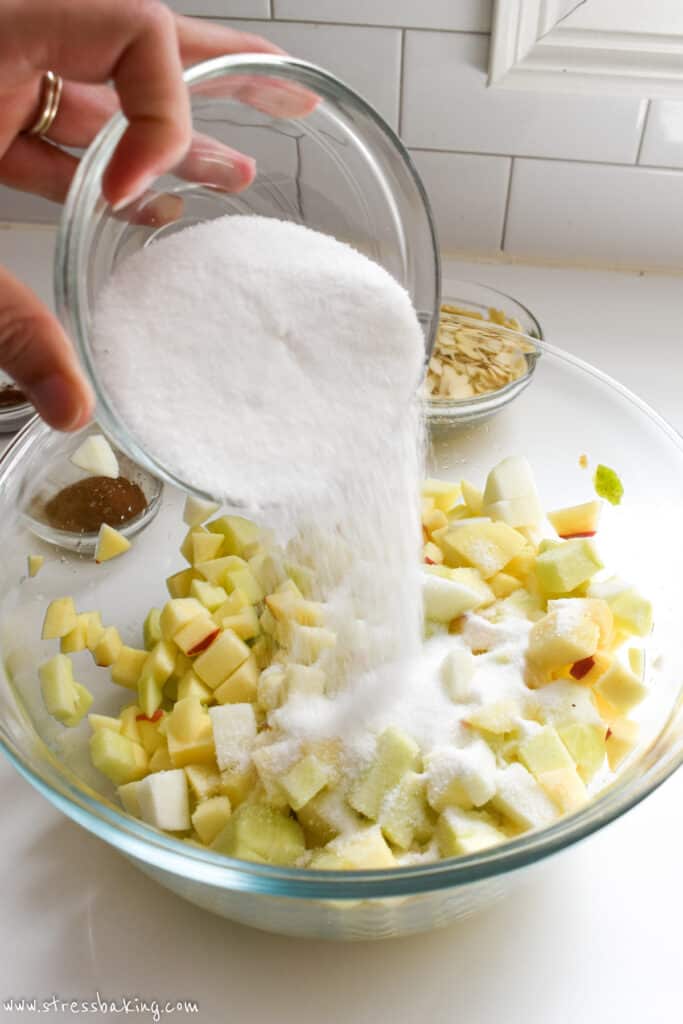
Step 4: In a large bowl, stir to combine apples, lemon juice, sugar, cinnamon, nutmeg, ginger, flour, raisins and almonds (if using).
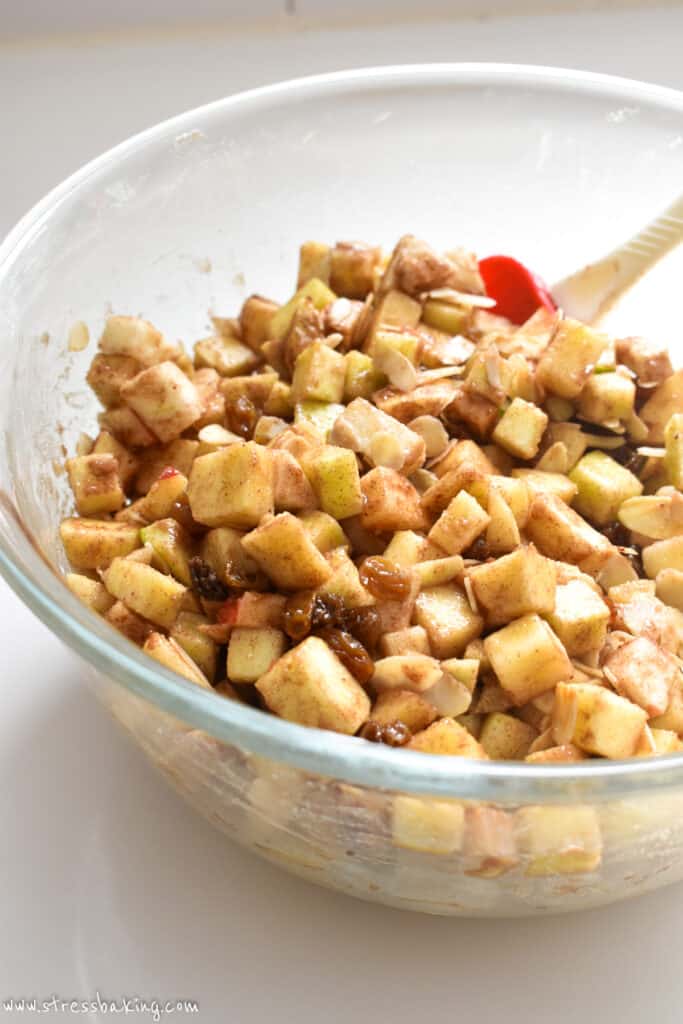
Step 5: Toss and stir to coat the apples.
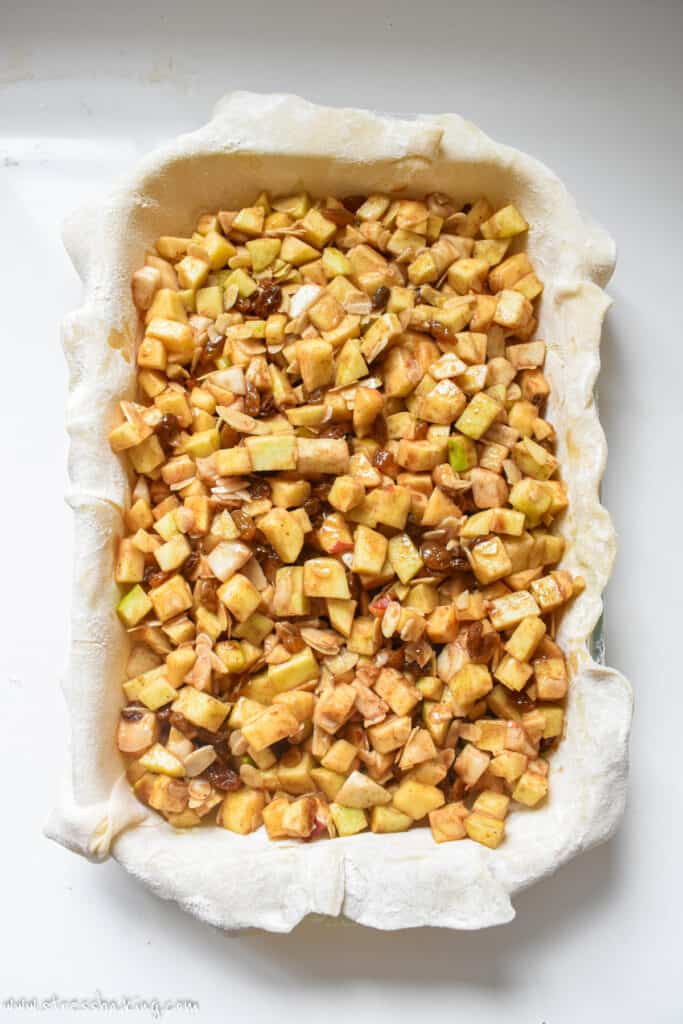
Step 6: Transfer this apple mixture into the prepared crust in an even layer.
Step 7: Place the other prepared crust on top of the filling and pinch the edges of the crusts together all the way around the pan to create a seal. If needed, use a pairing knife to trim the excess crust around the edges.
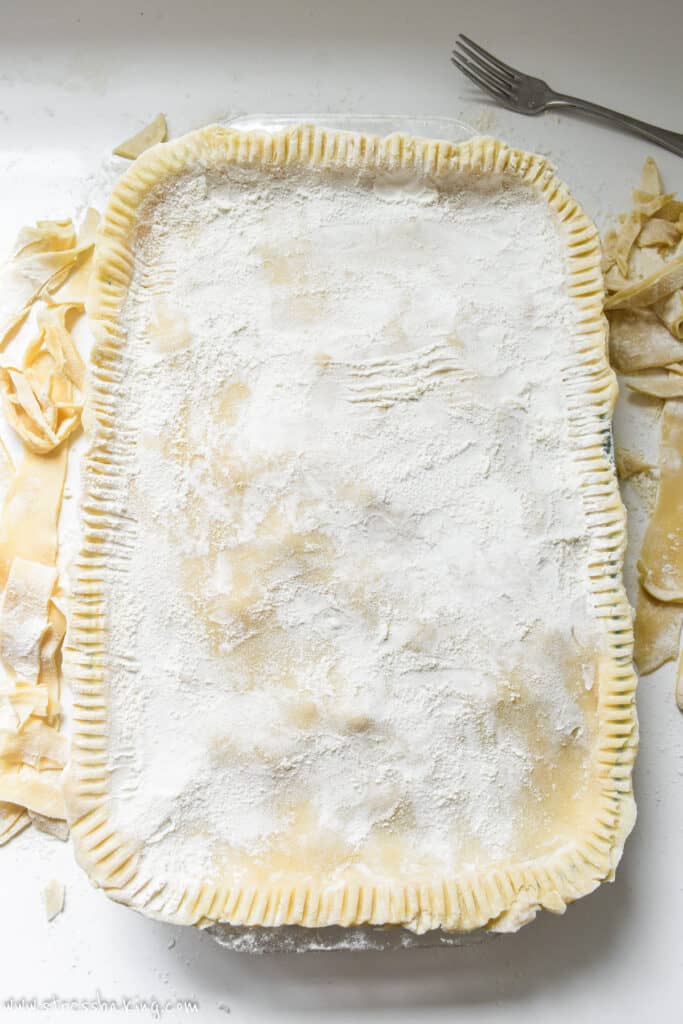
If you'd like to make pie crust decorations, save that excess dough and read the notes at the bottom of the recipe card for how to use them to decorate your pie before baking.
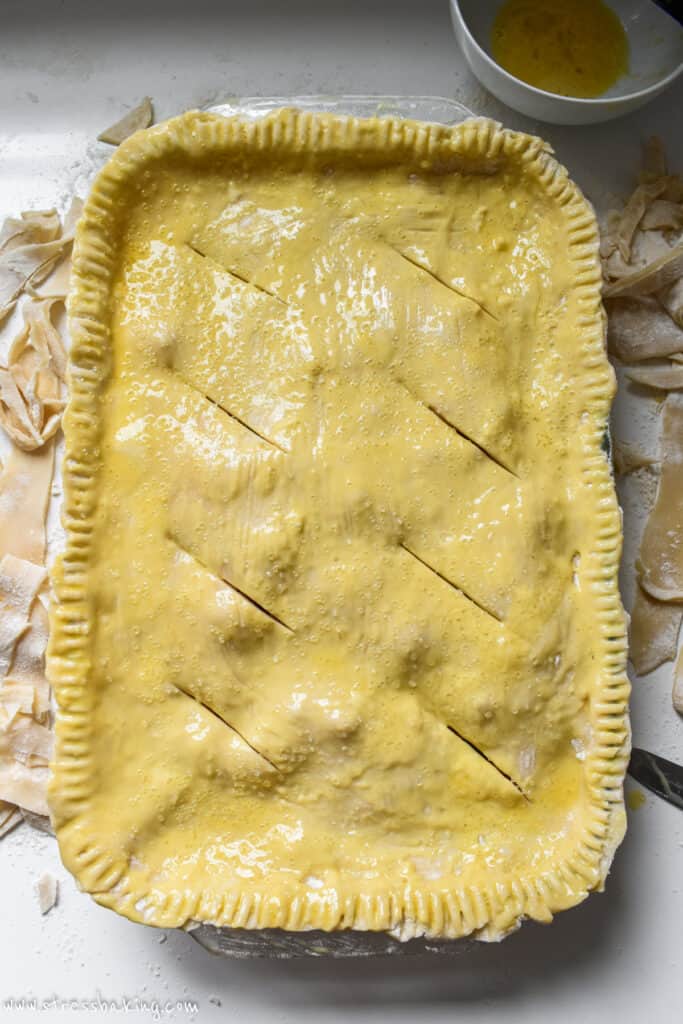
Step 8: Brush your egg wash over the top and edges of the crust, then use a paring knife to cut a few slits in the top of the crust to allow the filling to breathe. Add sparkling sugar across the top, if desired.

Step 9: Bake for 35 minutes or until the crust is golden brown. Check on it after 20 minutes – if it appears the top is browning more than you'd like, loosely cover the top with foil for the remaining baking time.
How to prepare apple pie ahead of time
To save yourself time the day you want to bake it, you can prepare your apple pie the night before!
Follow all the steps and stop before brushing with the egg wash, then cover with plastic wrap and refrigerate. After removing from the fridge, follow the rest of the steps in the recipe card and bake as normal.
Why is the egg wash important?
The egg wash is just an egg beaten with water, milk or cream. It helps to seal the edges of the pastry together, and also adds a golden luster to the finished product.
What happens if you don't add the egg wash?
The pastry will just look more pale and doughy and, to be honest, look sort of… unfinished.
If you’re allergic to eggs, vegan, or just straight up don’t have any around the house, you can melt 1-2 tablespoons of coconut oil or unsalted butter and lightly brush that on top instead.
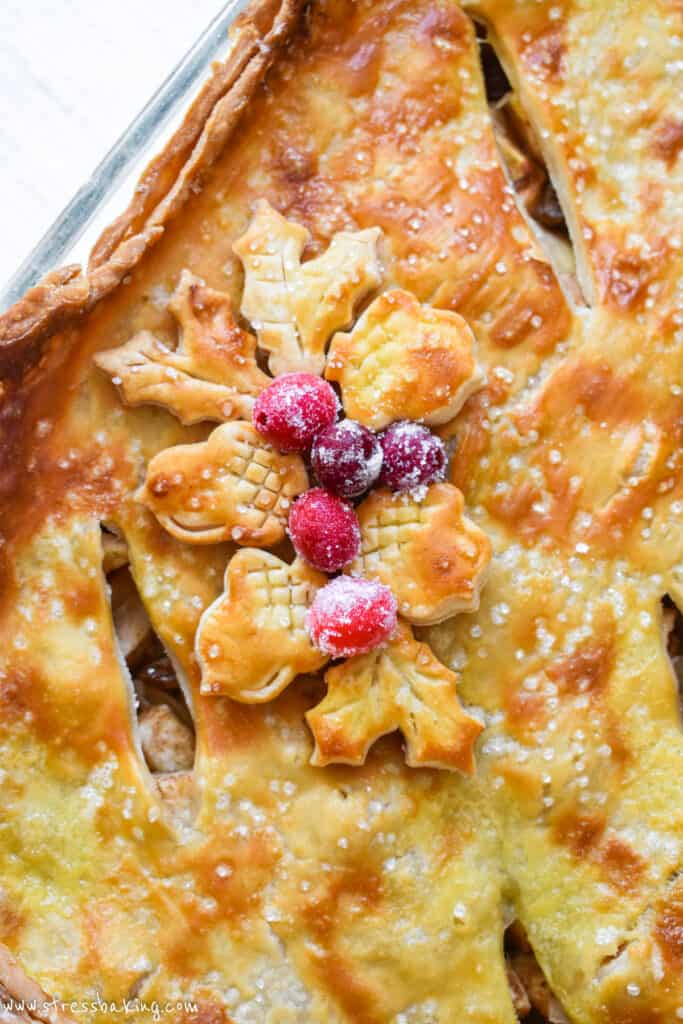
Want to add pie crust decorations?
They won't stick to the crust top you already have on your pie, but if you wanted to add some pie crust leaves with a little whipped cream and sugared cranberries to the tops of slices for a little somethin' somethin' when serving, this is a cute way to do it.
On a lightly floured surface, roll out the excess dough scraps to about 1/8″ thickness. Using pie crust/pastry stamps to cut into as many shapes as you'd like, then decorate the top of your pie as desired prior to baking.
Can I make this in a round pie dish?
If you'd prefer to make this in a 9″ pie dish, cut the recipe in half.
For other sized pans, check out my post about converting recipes for different pan sizes.
How to slice apple pie
This might sound like a silly thing to call out, but there actually is a better way to slice it than just taking the biggest knife you can find and dragging it through the pie.
Apple pie is easier to slice when cold because it's more set and the apple pie filling won't fall out and apart as easily. So you at least want it to be cooled completely to room temperature before slicing.
Use a serrated knife to score the top and edges of the crust (just press it into the top, don't drag it), then use a pairing knife to cut each slice all the way through.
How to store apple pie
After the pie has completely cooled, you can cover it with plastic wrap or foil and store in the fridge for up to 5 days. Keep in mind as time goes on, the crust will lose its crispness and crunch.
You can either slice it before storing it, or slice it each time you go in for a snack. I personally like to slice it before storage so that I can just lift it out of the pan, give it a quick reheat in the microwave and dig in :)
How to reheat apple pie
I'm going to be honest with you: I almost never reheat my pie slices the best way. I throw it on a plate, stick it in the microwave for 1 minute, and then pile whipped cream and ice cream on top and shove it in my face.
The right way to reheat apple pie is to place it on a baking sheet and bake at 350ºF for about 5 minutes.
FAQs
We add a thickener, namely flour, to the apple pie filling before baking to help prevent the pie filling from being too thin or liquidy. The rule of thumb is to use 1/2 teaspoon of flour for each cup of diced apples, but you can add if needed.
If you don't have or can't use flour in the apple pie filling, you can substitute the flour for cornstarch, tapioca starch or arrowroot powder instead.
A Dutch apple pie has a sweeter streusel topping, while a regular apple pie has a pastry, pie crust topping. If you wanted to swap the pie crust topping in this recipe for a streusel topping, check the body of the post for the recipe for an easy streusel topping!
For a deep dish apple pie, I find 7-9 large apples are needed for a thick filling.
You want to use a type of apple (or mix of apples) that can hold up to baking and have a crisp texture.
I love to use extra apple pie filling as a dip – cinnamon pita chips are the perfect accompaniment!
If you'd prefer to make this in a 9″ pie dish, cut the recipe in half. For other sized pans, check out my post about converting recipes for different pan sizes.
Rating this recipe is a great (and free) way to support Stress Baking. After you've enjoyed this recipe, click on the stars below to share your experience – thank you!
Deep Dish Apple Pie Recipe

Ingredients
- 2 14.1 ounce boxes premade refrigerated pie crusts
- 8 cups peeled and chopped apples, 7-9 apples, depending on size
- Juice of 1 lemon
- ¾ cup granulated sugar
- 1 tablespoon ground cinnamon
- ¼ teaspoon ground nutmeg
- ⅛ teaspoon ground ginger
- ¼ cup all-purpose flour
- 1 cup golden raisins, optional
- 1 cup sliced or slivered almonds, optional
- 1 egg, beaten
- Raw or sparkling sugar, optional garnish
Instructions
- Preheat oven to 425°F.
- Remove the crusts from one box (2 pie crusts in total). On a lightly floured surface, unroll and stack the 2 crusts on top of one another, and roll into a 12"x18" rectangle. Press into a 9"x13" pan so that it's firmly pressed into the bottom and sides, with a slight overhang on the edges.2 14.1 ounce boxes premade refrigerated pie crusts
- Repeat this process for the remaining 2 crusts and set aside.
- In a large bowl, stir to combine apples, lemon juice, sugar, cinnamon, nutmeg, ginger, flour, and raisins and almonds (if using). Transfer this apple mixture into the prepared crust in an even layer.8 cups (1 kg) peeled and chopped applesJuice of 1 lemon3/4 cup (150 g) granulated sugar1 tablespoon ground cinnamon1/4 teaspoon (¼ teaspoon) ground nutmeg1/8 teaspoon (⅛ teaspoon) ground ginger1/4 cup (31 ¼ g) all-purpose flour1 cup (145 g) golden raisins1 cup (108 g) sliced or slivered almonds
- Place the other prepared crust on top of the filling and pinch the edges of the crusts together all the way around the pan to create a seal. If needed, use a pairing knife to trim the excess crust around the edges. If you'd like to make pie crust decorations, save that excess dough and read the notes at the bottom of the recipe card for how to use them to decorate your pie before baking.
- Brush your egg wash over the top and edges of the crust, then use a paring knife to cut a few slits in the top of the crust to allow the filling to breathe. Add sparkling sugar across the top, if desired.1 eggRaw or sparkling sugar
- Bake for 35 minutes or until the crust is golden brown. Check on it after 20 minutes – if it appears the top is browning more than you'd like, loosely cover the top with foil for the remaining baking time.
- Transfer to a wire rack to cool in the pan completely (usually a few hours).
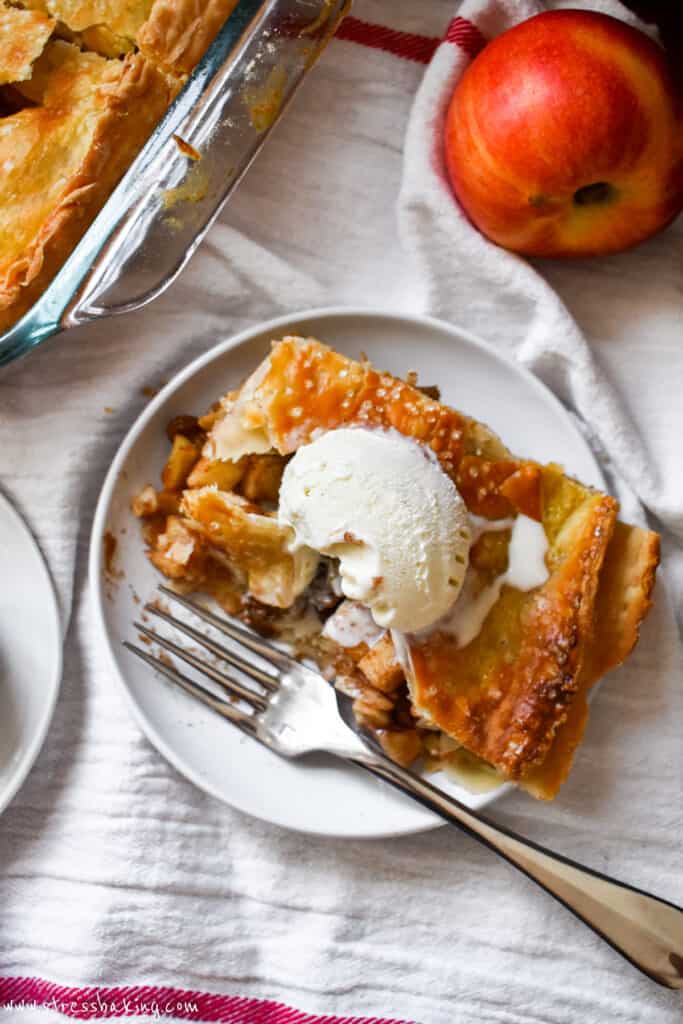
- Top with sugared cranberries and/or a maple drizzle, slice into 8 huge (pictured) or 12 regular sized pieces. Serve with whipped cream, Cool Whip and/or vanilla ice cream and enjoy!
Video
Notes
- 1 cup all-purpose flour
- 1/2 cup old fashioned oats
- 1/3 cup light brown sugar, packed
- 1/3 cup granulated sugar
- 1 teaspoon baking powder
- 1/2 teaspoon ground cinnamon
- 1/8 teaspoon ground nutmeg
- Pinch of salt
- 1/2 cup unsalted butter, melted
Nutrition Facts
Nutrition Disclaimer
The provided nutrition information is generated by an automatic API and does not take variations across specific brands into account. This information is provided as a general guideline and should not be treated as official calculations. Learn more here.
Awesome apple pie Thanks
5 star pie!! I made it with the streusel topping in a 9” round, with the maple drizzle from the Paleo Galette as suggested. Make sure you cut everything in half if you’re just making a 9” pie, I definitely messed that up and ended up with two pies. There are worse things!
This was total and the star of thanksgiving this year. Awesome recipe.
Haha, there are definitely worse problems to have! ;)